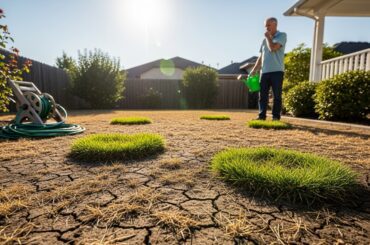
We’ve all been there – you spend hours planting and nurturing your beautiful flower beds, only to find invasive grass creeping through your carefully arranged flowers. I discovered that grass infiltration is one of the most frustrating challenges gardeners face, but after testing various removal methods and consulting extension service research, I’ve found reliable solutions that actually work.
The battle against grass in flower beds requires understanding why it invades in the first place and choosing the right removal strategy for your specific situation. Whether you’re dealing with aggressive Bermuda grass or simple lawn overgrowth, this comprehensive guide will walk you through every proven method to reclaim your flower beds.
After researching university extension recommendations and testing different approaches in my own garden beds, I’ve compiled the most effective techniques ranging from manual removal to selective herbicides that won’t harm your flowers. Let’s explore each method so you can choose the best approach for your garden.
Why Grass Invades Your Flower Beds?
Understanding how grass spreads into flower beds helps us prevent future invasions. Grass typically invades through three main mechanisms: underground rhizomes that spread horizontally beneath the soil, above-ground stolons that creep across the surface, and wind-blown seeds that germinate in bare soil.
Bermuda grass, one of the most aggressive invaders, reproduces through all three methods according to Oklahoma State University Extension research. Its rhizomes can extend 6 feet underground, making complete removal particularly challenging. This explains why simply pulling visible grass often results in regrowth within weeks.
The edges of flower beds are especially vulnerable to grass invasion. Without proper barriers, grass roots naturally extend from lawns into the nutrient-rich, well-watered soil of garden beds. Regular lawn mowing can also disperse grass clippings containing viable seeds directly into your flower beds.
Bare soil between plants creates perfect conditions for grass seed germination. When we leave gaps in mulch coverage or space plants too far apart initially, we’re essentially creating an open invitation for grass invasion. Competition for water, nutrients, and sunlight then begins between your desired plants and the invading grass.
Manual Grass Removal Methods
Manual removal remains the safest method for established flower beds with delicate plants. The key to success lies in timing and technique – soil moisture should be just right, neither too wet nor too dry, for effective root extraction.
Hand Pulling Technique
For small grass patches, hand pulling works best when soil is moist but not waterlogged. Water the area thoroughly the day before removal, allowing soil to absorb moisture overnight. Grasp grass clumps close to the soil surface and pull slowly to extract the entire root system.
I’ve found that using a dandelion weeder or similar long-handled tool helps reach deep grass roots without disturbing nearby flowers. Insert the tool 2-3 inches from the grass base at a 45-degree angle, then lever upward to loosen the entire root mass before pulling.
Young grass is significantly easier to remove than established patches. Weekly inspection and immediate removal of new grass shoots prevents extensive root development. This proactive approach saves hours of work compared to dealing with mature grass colonies.
Digging and Cultivation
For larger infestations, systematic digging becomes necessary. Use a sharp spade to cut 2-3 inch deep sections around grass patches, ensuring you capture the entire root zone. Bermuda grass and other aggressive species require digging at least 6 inches deep to remove all rhizomes.
A three-prong cultivator works effectively for breaking up grass root networks in open areas between plants. Work the tool through the soil in a crosshatch pattern, loosening grass roots for easier removal. Follow up by hand-sifting soil to remove root fragments that could regenerate.
After manual removal, monitor the area closely for regrowth over the next 2-3 weeks. Any grass shoots that appear indicate missed root fragments that need immediate attention. Consistent follow-up prevents re-establishment of grass colonies.
Chemical Control with Selective Herbicides
Selective grass herbicides offer an efficient solution for extensive grass problems while protecting your flowers. According to NC State University Extension research, four main grass-selective herbicides are safe for use around most ornamental plants: clethodim, sethoxydim, fluazifop-p, and fenoxaprop.
Understanding Grass-Selective Herbicides
These specialized herbicides target grass physiology without affecting broadleaf plants. They work systemically, moving through grass leaves to kill roots completely. Each product has a short soil residual of about two weeks, minimizing long-term environmental impact.
Clethodim-based products like Envoy Plus and Select Max control both annual and perennial grasses, including problematic annual bluegrass. Application rates typically range from 0.068 to 0.24 pounds of active ingredient per acre, depending on grass species and growth stage.
Sethoxydim products such as Segment II and Poast work effectively on most grass species but require addition of crop oil concentrate for optimal absorption. These herbicides show excellent safety profiles around flowers, though they may temporarily yellow certain sensitive plants.
Fluazifop-p herbicides like Ornamec and Fusilade II provide reliable control of perennial grasses including Bermuda grass. Multiple applications spaced 2-3 weeks apart often prove necessary for complete eradication of established grass colonies.
Application Best Practices
Timing herbicide applications for actively growing grass ensures maximum effectiveness. Spring and early summer applications coincide with peak grass growth periods, improving herbicide uptake and translocation to roots.
Always add the recommended surfactant or crop oil concentrate to improve herbicide adhesion and absorption. Mix solutions according to label directions, typically 1-2% concentration for spot treatments. Use a pump sprayer with adjustable nozzle for precise application.
Shield desirable plants with cardboard or plastic during spraying to prevent drift damage. Apply herbicides on calm days with temperatures between 60-85°F for optimal results. Avoid application before rain or irrigation for at least 24 hours.
Expect visible grass yellowing within 5-7 days, with complete death occurring over 2-3 weeks. Resistant grass species or mature plants may require repeat applications. Always follow label instructions for application intervals and maximum seasonal use rates.
Organic and Natural Removal Methods
Organic grass removal methods appeal to gardeners seeking chemical-free solutions. These techniques require more time and patience but offer environmental benefits and soil improvement opportunities.
Smothering with Mulch and Barriers
Sheet mulching effectively smothers existing grass while building soil organic matter. Layer 6-8 sheets of newspaper or single sheets of cardboard directly over grass, overlapping edges by 6 inches. Wet the paper thoroughly to prevent shifting.
Cover the paper barrier with 3-4 inches of organic mulch such as wood chips, shredded leaves, or compost. This combination blocks light completely while slowly decomposing to enrich soil. The process takes 6-8 weeks for complete grass death.
I’ve successfully used this method to convert lawn areas into new flower beds. The decomposing grass and paper materials create nutrient-rich soil perfect for planting. Plan ahead for seasonal timing, as this method works best when started in fall for spring planting.
Solarization Technique
Soil solarization harnesses solar energy to kill grass through heat accumulation. This method works best in summer when temperatures and sun intensity peak. Clear plastic sheeting proves more effective than black plastic for heat generation.
Prepare the area by mowing grass as short as possible and watering thoroughly. Cover with clear 2-4 mil plastic sheeting, securing edges with soil or boards to create an airtight seal. The greenhouse effect raises soil temperatures to 140°F or higher.
Maintain the plastic covering for 6-8 weeks during the hottest part of summer. This extended heat exposure kills grass, roots, and many weed seeds in the top 6 inches of soil. Remove plastic and plant immediately to prevent new weed establishment.
Corn Gluten Meal Prevention
Corn gluten meal acts as a natural pre-emergent herbicide, preventing grass seed germination. Apply 20 pounds per 1,000 square feet in early spring before grass seeds germinate. This organic byproduct won’t harm established plants but prevents new grass seedlings.
Reapplication every 6-8 weeks during the growing season maintains effectiveness. While not useful for existing grass, corn gluten meal helps prevent reinfestation after removal. The nitrogen content also provides mild fertilization for your flowers.
Creating Effective Barriers
Physical barriers provide long-term grass prevention when properly installed. Edge installation depth and material choice significantly impact effectiveness against different grass types.
Installing Deep Edge Barriers
Bermuda grass and other aggressive species require barriers extending at least 6-8 inches deep to block rhizome spread. Steel or aluminum edging provides superior durability compared to plastic alternatives. Install edging at a slight outward angle to deflect roots downward.
Create a narrow trench using a flat spade or edging tool, ensuring consistent depth along the entire border. Position edging with 1-2 inches above ground level to prevent stolon creepage. Backfill firmly to eliminate gaps where grass might penetrate.
Connect edging sections securely using manufacturer-provided stakes or connectors. Overlapping joints by 6 inches prevents grass infiltration at connection points. Regular inspection ensures barriers remain properly positioned despite soil movement or frost heaving.
Mulch Barriers and Maintenance
Maintaining a 3-4 inch mulch layer creates an inhospitable environment for grass germination. Organic mulches like shredded hardwood or pine bark also improve soil structure as they decompose. Refresh mulch annually to maintain proper depth and appearance.
Create a mulch-free zone immediately around plant stems to prevent moisture-related diseases. This crown clearance also makes it easier to spot and remove any grass attempting to establish near plants.
Consider using landscape fabric beneath mulch for added protection, though this prevents beneficial soil amendment from decomposing mulch. If using fabric, choose professional-grade materials and secure edges thoroughly to prevent grass from growing through seams.
Long-Term Prevention Strategies
Preventing grass reinvasion requires consistent maintenance and strategic planning. Combining multiple prevention methods creates a comprehensive defense system for your flower beds.
Proper Plant Spacing and Ground Covers
Dense plant coverage naturally suppresses grass invasion by eliminating bare soil and reducing available light. Space plants according to their mature size, using temporary annuals to fill gaps while perennials establish.
Ground cover plants like creeping phlox, ajuga, or sweet woodruff form living mulch that outcompetes grass. These spreading perennials fill spaces between larger plants while adding visual interest and seasonal color.
Strategic plant selection includes choosing vigorous growers for bed edges where grass pressure is highest. Plants like daylilies, hostas, and ornamental grasses create dense root systems that resist grass infiltration.
Regular Maintenance Schedule
Weekly bed inspection during growing season allows early detection and removal of grass seedlings. This five-minute investment prevents hours of future work removing established grass colonies.
Edge maintenance every 2-3 weeks keeps grass from creeping into beds. Use a string trimmer or edging tool to maintain clean borders, removing any grass runners attempting to cross boundaries.
Annual deep edging in early spring reestablishes barriers compromised by winter soil movement. This also provides opportunity to add fresh mulch and address any areas where grass gained foothold during dormant season.
Dealing with Specific Grass Types
Different grass species require tailored removal strategies based on their growth characteristics and reproductive methods. Understanding your specific grass invader improves removal success rates.
Bermuda Grass Control
Bermuda grass represents the ultimate challenge in grass control due to its aggressive spreading through rhizomes, stolons, and seeds. Complete eradication often requires combining multiple methods over an entire growing season.
Begin with systematic digging to remove all visible growth and rhizomes down to 8 inches depth. Follow with selective herbicide applications every 2-3 weeks as regrowth appears. Fluazifop-p herbicides show particular effectiveness against Bermuda grass.
Install deep barriers of at least 10 inches to prevent reinvasion from surrounding areas. Some gardeners report success using rolled steel barriers or poured concrete edges for permanent Bermuda grass exclusion.
Crabgrass and Annual Grasses
Annual grasses like crabgrass present different challenges, spreading primarily through prolific seed production. Pre-emergent strategies prove most effective since these grasses complete their lifecycle in one season.
Time corn gluten meal or synthetic pre-emergent applications for early spring before soil temperatures reach 55°F consistently. This prevents germination of overwintered seeds while allowing established flowers to thrive.
For existing crabgrass, hand pulling before seed head formation prevents next year’s infestation. The shallow root system makes manual removal relatively easy when soil is moist.
Safety Considerations and Best Practices
Whether using manual or chemical methods, following safety protocols protects both you and your garden ecosystem. Proper protective equipment and application techniques minimize risks while maximizing effectiveness.
Personal Protection Equipment
Always wear gloves when handling herbicides or performing manual removal to protect hands from chemicals and potential skin irritation from grass leaves. Long sleeves and pants prevent skin contact with herbicides during application.
Use safety glasses or goggles when applying liquid herbicides to prevent splash exposure. A respirator mask becomes necessary when using herbicides in enclosed areas or on windy days where drift might occur.
Keep children and pets away from treated areas according to product label restrictions, typically 24-48 hours. Post treatment notices if areas are accessible to others.
Environmental Considerations
Consider herbicide impacts on beneficial insects, particularly bees and butterflies. Apply treatments early morning or evening when pollinators are less active. Avoid treating flowering plants that might attract beneficial insects.
Prevent herbicide runoff by avoiding application before rain or irrigation. Buffer zones near water features, wells, or storm drains protect water quality. Many grass herbicides are toxic to aquatic life.
Dispose of herbicide containers according to local regulations, never reusing for other purposes. Triple rinse empty containers, using rinse water in your sprayer rather than discarding.
Frequently Asked Questions
What kills grass but not flowers in flower beds?
Grass-selective herbicides containing clethodim, sethoxydim, fluazifop-p, or fenoxaprop kill grass without harming broadleaf flowers. Products like Ortho Grass-B-Gon, Ornamec, and Select Max are specifically designed for this purpose. Always verify your specific flowers are listed as safe on the product label.
How do I permanently stop grass from growing in my flower beds?
Permanent grass prevention requires combining physical barriers, dense mulching, and regular maintenance. Install edging at least 6-8 inches deep, maintain 3-4 inches of mulch, and perform weekly inspections to remove new growth immediately. No single method provides permanent protection alone.
Will vinegar kill grass in flower beds?
Household vinegar (5% acidity) only kills grass leaves on contact without affecting roots, resulting in quick regrowth. Horticultural vinegar (20% acidity) provides better control but can damage nearby flowers and alter soil pH. Selective herbicides offer safer, more effective alternatives for flower bed use.
When is the best time to remove grass from flower beds?
Spring and early summer provide optimal conditions for grass removal when grass actively grows and soil moisture supports easy root extraction. Herbicide applications work best during active growth periods. Fall offers good timing for smothering methods and barrier installation before winter.
How deep do grass roots grow in flower beds?
Most lawn grasses have roots extending 6-12 inches deep, though some species reach deeper. Bermuda grass rhizomes commonly extend 6-8 inches deep but can reach 12 inches in ideal conditions. Kentucky bluegrass roots typically stay within the top 6 inches of soil.
Can I use Roundup in my flower beds?
Roundup and other glyphosate herbicides kill all plants they contact, including flowers. These non-selective herbicides should only be used for spot treatment with extreme care to avoid drift or contact with desirable plants. Grass-selective herbicides provide safer alternatives for established beds.
How long does it take to smother grass with cardboard?
Complete grass death through cardboard smothering typically requires 6-8 weeks during growing season. Bermuda grass and other persistent species may need 10-12 weeks for complete kill. Cool season or dormant periods require longer smothering duration for effectiveness.
Should I use landscape fabric to prevent grass?
Landscape fabric provides temporary grass prevention but creates long-term problems as it degrades, traps debris, and prevents beneficial soil amendment. Many gardeners find proper edging, mulching, and maintenance more effective than fabric. If using fabric, choose professional-grade materials and expect replacement every 5-7 years.
Conclusion
Successfully eliminating grass from your flower beds requires understanding the invasion patterns, choosing appropriate removal methods, and implementing prevention strategies. Whether you opt for manual removal, selective herbicides, or organic approaches, consistency and proper technique determine success.
I’ve found that combining methods works better than relying on any single approach. Start with thorough removal using your chosen method, install proper barriers, maintain adequate mulch coverage, and perform regular inspections to catch new growth early.
Remember that some grass species, particularly Bermuda grass, require persistent effort over multiple seasons for complete control. Don’t get discouraged by initial regrowth – consistent application of these techniques will eventually give you the grass-free flower beds you desire.
Take action today by assessing your current grass invasion level and selecting the most appropriate removal method for your situation. With patience and the right approach, you’ll enjoy beautiful, grass-free flower beds that showcase your flowers without unwanted competition.