If you’ve noticed your lawn looking tired despite regular watering and fertilization, or if water seems to run off rather than soak in, you might be dealing with a thatch problem. I discovered this the hard way when my previously lush Kentucky bluegrass started developing brown patches and became increasingly difficult to maintain. After learning how to properly dethatch, I transformed my struggling lawn back to its former glory.
Dethatching your lawn involves removing the layer of dead grass, roots, and organic debris that accumulates between the soil surface and living grass blades. While a thin layer of thatch (less than half an inch) actually benefits your lawn by insulating roots and retaining moisture, excessive thatch creates a barrier that prevents water, nutrients, and air from reaching the soil. According to research from the University of Minnesota Extension, thatch layers exceeding 0.5 inches require active management to maintain lawn health.
In this comprehensive guide, we’ll walk through everything you need to know about dethatching your lawn, from identifying when it’s necessary to choosing the right method for your specific grass type and climate. Whether you’re dealing with cool-season grasses like fescue and bluegrass or warm-season varieties like Bermuda and Zoysia, proper dethatching techniques can rejuvenate your lawn and prevent future problems.
Understanding Thatch: What It Is and Why It Matters
Thatch consists primarily of lignin-rich plant materials that decompose slowly, including grass stems, roots, and crowns. Unlike grass clippings, which break down quickly and rarely contribute to thatch buildup, these tougher materials accumulate faster than beneficial microorganisms can decompose them. The Oklahoma State University Extension explains that thatch formation occurs naturally but accelerates under certain conditions.
Several factors contribute to excessive thatch accumulation. Overfertilization, particularly with high-nitrogen fertilizers, promotes rapid grass growth that outpaces decomposition. Certain grass species, including Kentucky bluegrass, perennial ryegrass, and creeping bentgrass, naturally produce more thatch than others. Additionally, compacted soils, improper pH levels, and overuse of pesticides that harm beneficial decomposer organisms all accelerate thatch buildup.
Recognizing problematic thatch levels requires understanding the difference between healthy and excessive accumulation. A healthy thatch layer feels slightly spongy underfoot and allows water to penetrate easily. Excessive thatch creates a thick, water-repelling barrier that feels extremely bouncy when walked on. You might notice water pooling on the surface during irrigation, increased susceptibility to drought stress, and difficulty maintaining consistent green color despite proper care.
How to Check Your Thatch Layer?
Before deciding to dethatch, accurately measuring your thatch layer is essential. The University of Missouri Extension recommends a simple but effective method for assessment. Using a sharp knife or spade, cut several small wedges from different areas of your lawn, going about 3 inches deep into the soil. This sampling approach provides a cross-sectional view of your lawn’s structure.
Examine each wedge carefully, looking for the brown, fibrous layer between the green grass and soil. Measure this layer with a ruler. If the thatch layer measures less than 0.5 inches, dethatching isn’t necessary and might actually harm your lawn. A layer between 0.5 and 1 inch indicates it’s time to dethatch, while anything exceeding 1 inch requires immediate attention and possibly multiple dethatching sessions.
Take samples from various locations across your lawn, as thatch accumulation often varies. Areas receiving more foot traffic typically have less thatch due to natural compaction, while shaded or heavily fertilized sections might show greater accumulation. Document your measurements and create a simple map noting problem areas that might need extra attention during the dethatching process.
When to Dethatch Your Lawn: Timing Is Everything
Proper timing significantly impacts dethatching success and lawn recovery. The ideal window depends primarily on your grass type and regional climate. For cool-season grasses like Kentucky bluegrass, tall fescue, and perennial ryegrass, early fall (September to early October) provides optimal conditions. Penn State Extension research shows that fall dethatching allows these grasses to recover during their peak growing period while avoiding summer heat stress.
Warm-season grasses, including Bermuda, Zoysia, St. Augustine, and centipede grass, respond best to late spring or early summer dethatching (May to June). The University of California’s Integrated Pest Management program emphasizes dethatching these varieties just as they enter active growth, ensuring rapid recovery before peak summer temperatures arrive.
Weather conditions also influence timing decisions. Schedule dethatching when soil moisture is moderate – not waterlogged from recent rain or bone dry from drought. The grass should be actively growing but not stressed from extreme temperatures or moisture conditions. Avoid dethatching during drought, immediately before or after applying pre-emergent herbicides, or when the lawn shows signs of disease or pest damage.
Regional Timing Considerations
Northern regions with predominantly cool-season grasses should focus on early September dethatching, allowing 4-6 weeks of recovery before the first frost. This timing coincides with increased rainfall and moderate temperatures that promote rapid regrowth. Spring dethatching remains an option but requires careful timing to avoid interfering with pre-emergent crabgrass control applications.
Southern regions growing warm-season grasses benefit from late May or early June dethatching when soil temperatures consistently exceed 65°F. This ensures the grass has fully broken dormancy and entered vigorous growth. Avoid late summer dethatching in these regions, as it doesn’t provide sufficient recovery time before dormancy.
Transition zones, where both grass types grow, require more nuanced timing. Cool-season grasses in these areas still prefer fall dethatching, but the window extends slightly later (through mid-October) due to milder temperatures. Warm-season grasses in transition zones can be dethatched from late April through June, depending on spring weather patterns.
Dethatching Methods and Tools
Choosing the right dethatching method depends on lawn size, thatch thickness, budget, and physical capability. Each approach offers distinct advantages and suits different situations. Understanding these options helps you select the most effective method for your specific needs.
Manual Dethatching with a Rake
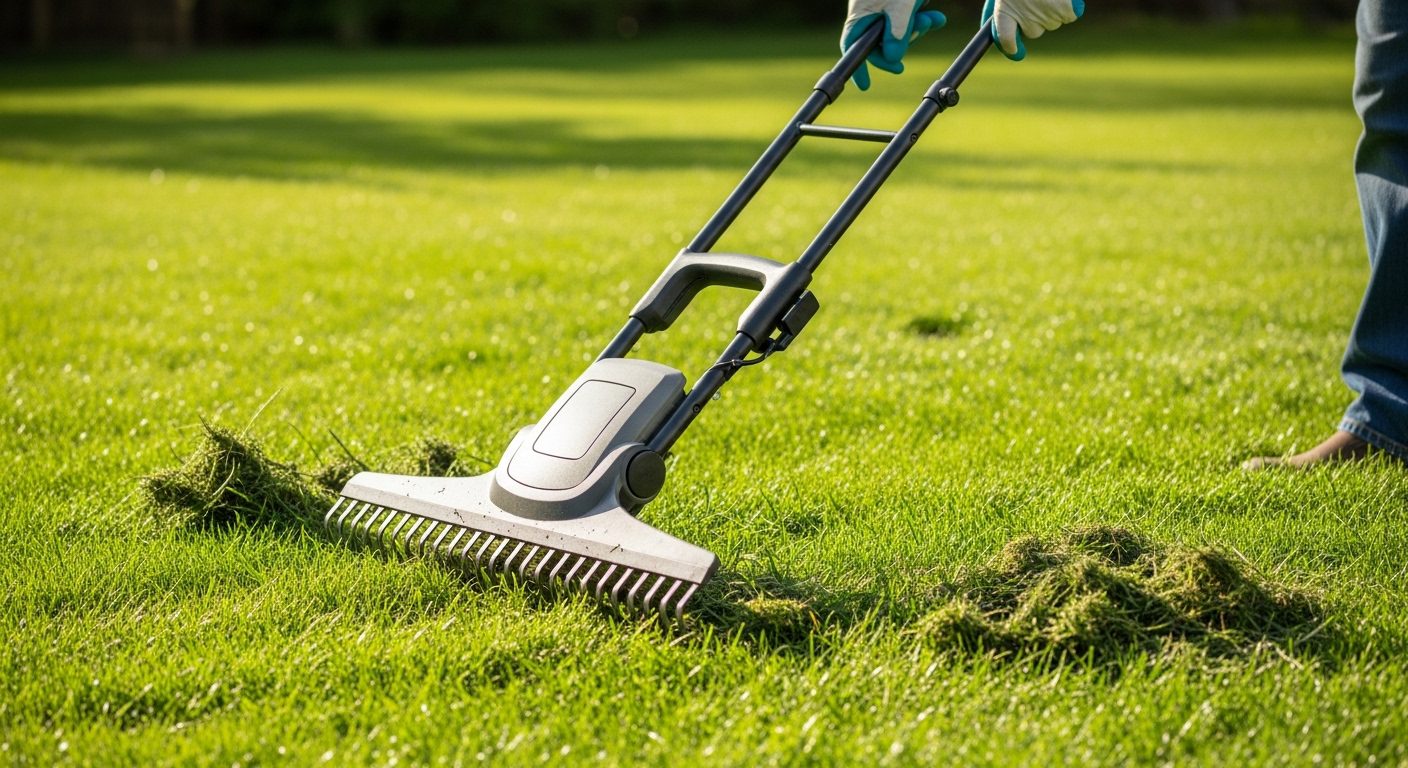
Manual dethatching using a specialized dethatching rake works well for small lawns (under 2,500 square feet) with moderate thatch problems. These rakes feature sharp, curved tines designed to slice through and pull up thatch without excessively damaging healthy grass. While labor-intensive, manual raking provides precise control and costs significantly less than powered options.
When using a dethatching rake, work in a consistent pattern across your lawn, applying moderate downward pressure while pulling the rake toward you. The motion should feel like combing through the grass rather than aggressive scraping. Expect to make multiple passes, working first in one direction and then perpendicular to ensure thorough coverage. Collect removed thatch regularly to prevent smothering healthy grass.
Power Raking and Vertical Mowing
Power rakes, also called vertical mowers or verticutters, use rotating flails or blades to slice through thatch and pull it to the surface. These machines, available at most equipment rental centers for $60-100 per day, efficiently handle medium to large lawns with moderate to severe thatch problems. The University of Illinois Extension notes that power raking removes thatch more thoroughly than manual methods while requiring less physical effort.
Operating a power rake requires careful attention to depth settings. Start with blades set high, making a test pass in an inconspicuous area. Adjust depth gradually until blades penetrate the thatch layer without gouging soil. Most lawns require blade spacing of 1-3 inches and penetration depth of 0.25-0.5 inches into the thatch layer. Make parallel passes across the lawn, overlapping slightly to ensure complete coverage.
Professional Dethatching Services
Professional lawn care services offer expertise and commercial-grade equipment for thorough dethatching. Costs typically range from $100-250 for average-sized residential lawns, though prices vary by region and lawn condition. Professionals assess thatch severity, select appropriate equipment, and often include cleanup and basic overseeding in their service.
Consider professional dethatching for large properties, severe thatch problems exceeding 1 inch, or when lacking time or physical ability for DIY approaches. Many services combine dethatching with aeration, overseeding, and fertilization for comprehensive lawn renovation. Request detailed quotes and verify that operators understand your specific grass type and regional considerations.
Step-by-Step Dethatching Process
Successful dethatching requires systematic preparation and execution. Following these detailed steps ensures thorough thatch removal while minimizing lawn stress and promoting rapid recovery.
Step 1: Preparation (2-3 Days Before)
Begin preparing your lawn several days before dethatching. Mow the grass slightly shorter than normal – about 1-1.5 inches for cool-season grasses or 0.5-1 inch for warm-season varieties. This height reduction improves equipment effectiveness and thatch visibility. Bag clippings to prevent adding organic matter during the dethatching process.
Water the lawn lightly 24-48 hours before dethatching if soil is dry. Aim for moist but not saturated conditions – soil should crumble in your hand rather than forming a mudball. Mark sprinkler heads, shallow pipes, or other obstacles with flags to avoid equipment damage. Clear the lawn of toys, hoses, and debris that might interfere with equipment operation.
Step 2: Equipment Setup and Testing
For power equipment, carefully review operating instructions and safety guidelines. Check that blades or tines are sharp and properly secured. Add fresh fuel and oil if needed, and test equipment operation before beginning. Set initial blade height conservatively – you can always lower it after testing effectiveness.
Perform a test run on a small, less visible area of lawn. The equipment should pull up brown, dead material without excessively damaging green grass or gouging soil. Adjust depth settings incrementally until achieving optimal thatch removal. Remember that multiple lighter passes cause less damage than one aggressive pass.
Step 3: Systematic Dethatching
Work methodically across your lawn in parallel passes, similar to mowing patterns. Maintain steady walking speed – rushing reduces effectiveness while moving too slowly can cause excessive damage. Overlap passes slightly (2-3 inches) to prevent missed strips. For severe thatch, make perpendicular passes after completing the initial direction.
Monitor equipment performance continuously, checking for clogged tines or reduced effectiveness. Stop periodically to remove accumulated thatch from equipment and assess removal depth. In areas with varying thatch thickness, adjust equipment depth accordingly rather than using one setting for the entire lawn.
Step 4: Thatch Collection and Disposal
Remove loosened thatch promptly to prevent smothering recovering grass. Use a lawn mower with bagging attachment for efficient collection on larger lawns, or rake manually on smaller areas. Expect to collect substantial material – a 5,000 square foot lawn might yield 10-20 bags of thatch.
Compost removed thatch if your pile reaches temperatures exceeding 140°F, which kills weed seeds and pathogens. Otherwise, dispose through municipal yard waste programs. Avoid using thatch as mulch around ornamental plants, as it decomposes slowly and might harbor lawn diseases.
Post-Dethatching Care and Recovery
Proper aftercare determines how quickly your lawn recovers from dethatching stress. The exposed soil and weakened grass require immediate attention to prevent weed invasion and promote healthy regrowth. Following a comprehensive recovery protocol ensures your lawn emerges stronger and more resilient.
Immediate Post-Dethatching Steps
Immediately after removing thatch debris, assess your lawn’s condition. Bare spots exceeding 2 inches in diameter need overseeding to prevent weed colonization. Choose grass seed matching your existing lawn type and spread at recommended rates – typically 4-6 pounds per 1,000 square feet for cool-season grasses or 1-2 pounds for warm-season varieties.
Apply a balanced starter fertilizer at half the recommended rate to support recovery without encouraging excessive growth. The University of Minnesota Extension suggests using a fertilizer with equal nitrogen and phosphorus ratios, such as 10-10-10, at 0.5 pounds of nitrogen per 1,000 square feet. This gentle feeding provides necessary nutrients without overwhelming stressed grass.
Begin a careful watering regimen immediately. Apply 0.25 inches of water daily for the first week, preferably in morning hours to reduce disease risk. This frequent, light watering keeps the soil surface moist for germinating seeds and recovering grass without causing runoff or pooling. Gradually transition to deeper, less frequent watering over the following weeks.
Two-Week Recovery Protocol
During the first two weeks post-dethatching, your lawn remains vulnerable to stress and invasion. Avoid heavy foot traffic, keeping children and pets off recovering areas whenever possible. If crossing the lawn is necessary, use stepping stones or boards to distribute weight and minimize damage.
Monitor soil moisture daily, adjusting watering based on weather conditions. After the first week, reduce watering frequency to every other day while increasing duration to promote deeper root growth. Watch for signs of fungal disease, which appears as circular patches or discolored areas, particularly during humid conditions.
Delay mowing until grass reaches normal cutting height plus 30% – approximately 4 inches for cool-season grasses maintained at 3 inches. Use sharp mower blades and bag clippings during the first few mowings to reduce stress and prevent disease spread. Resume regular mowing schedules once the lawn shows vigorous growth and consistent color.
Long-Term Recovery and Maintenance
Four to six weeks after dethatching, evaluate recovery progress. Healthy lawns should show uniform green color, minimal bare spots, and vigorous growth patterns. Areas recovering slowly might need additional overseeding or targeted fertilization. Consider soil testing if recovery remains sluggish, as pH imbalances or nutrient deficiencies might impede growth.
Resume normal fertilization schedules based on soil test recommendations and grass type requirements. Cool-season grasses typically need 2-4 pounds of nitrogen annually, while warm-season varieties require 1-3 pounds. Split applications into multiple smaller doses rather than single heavy applications to prevent rapid growth that contributes to future thatch problems.
Preventing Future Thatch Buildup
Prevention proves far easier than correction when managing thatch. Implementing proper cultural practices maintains the delicate balance between organic matter production and decomposition, keeping thatch at manageable levels. The Illinois Extension emphasizes that prevention-focused management reduces the need for aggressive dethatching.
Proper Mowing Practices
Maintain appropriate mowing height for your grass type – typically 2.5-3.5 inches for cool-season grasses and 1-2 inches for warm-season varieties. Following the one-third rule (never removing more than one-third of blade length) reduces stress and excessive organic matter production. Sharp mower blades create clean cuts that heal quickly, reducing disease susceptibility and organic debris.
Leave grass clippings on the lawn when they’re short and dry. Contrary to common belief, grass clippings don’t contribute significantly to thatch when properly managed. They decompose rapidly, returning nutrients to the soil and reducing fertilizer requirements by up to 25%. Only bag clippings when they’re excessive or clumping due to wet conditions.
Balanced Fertilization
Avoid excessive nitrogen fertilization, which promotes rapid shoot growth exceeding the root system’s decomposition capacity. Follow soil test recommendations rather than calendar-based applications. Most established lawns need 2-4 pounds of actual nitrogen per 1,000 square feet annually, split into 2-4 applications.
Use slow-release nitrogen sources that feed gradually over 6-8 weeks rather than quick-release formulations causing growth spurts. Organic fertilizers and compost applications support beneficial microbial populations that accelerate thatch decomposition. Consider leaving 25-30% of annual nitrogen needs to be met by recycled clippings.
Core Aeration Benefits
Annual core aeration significantly reduces thatch accumulation by improving soil conditions for decomposer organisms. The process removes soil plugs, creating channels for air, water, and nutrient penetration while depositing soil microbes on the thatch surface. These microorganisms accelerate decomposition when soil conditions support their activity.
Schedule aeration during the same optimal windows as dethatching – early fall for cool-season grasses and late spring for warm-season varieties. Unlike dethatching, aeration can be performed annually without damaging the lawn. Many lawn care professionals recommend alternating between dethatching and aeration yearly for lawns prone to thatch problems.
Soil Health Management
Maintaining proper soil pH (6.0-7.0 for most grasses) supports beneficial microbial activity essential for thatch decomposition. Test soil every 2-3 years and apply lime or sulfur as recommended to maintain optimal pH. Acidic or alkaline conditions reduce microbial efficiency, slowing natural decomposition processes.
Top-dressing with 0.25 inches of compost annually introduces beneficial microorganisms while improving soil structure. This thin layer doesn’t smother grass but provides organic matter and microbes that accelerate thatch breakdown. Quality compost also improves water retention and nutrient availability, reducing stress that contributes to thatch formation.
Troubleshooting Common Dethatching Problems
Even careful dethatching sometimes produces unexpected results. Understanding common problems and solutions helps address issues quickly, minimizing lawn damage and ensuring successful recovery.
Excessive Lawn Damage
If your lawn appears severely torn or brown after dethatching, you likely set equipment too deep or dethatched during stressful conditions. While alarming, most lawns recover with proper care. Immediately overseed bare areas, apply starter fertilizer, and maintain consistent moisture. Recovery typically takes 3-6 weeks during optimal growing conditions.
Prevent future damage by dethatching only during active growth periods when grass can recover quickly. Start with conservative equipment settings and gradually increase depth. Consider hiring professionals for severe thatch problems exceeding 1 inch, as they have experience minimizing damage while achieving thorough removal.
Slow Recovery and Persistent Brown Patches
Slow recovery often indicates underlying problems beyond thatch accumulation. Compacted soil, poor drainage, nutrient deficiencies, or disease might impede regrowth. Conduct a soil test to identify nutrient imbalances or pH problems. Core aeration might be necessary if soil compaction prevents root development.
Brown patches persisting beyond 3 weeks might indicate disease or pest problems exposed by dethatching. Fungal diseases thrive in stressed lawns, particularly during humid conditions. Apply appropriate fungicides if disease symptoms appear, following label directions carefully. Consider consulting with local extension services for disease identification and treatment recommendations.
Rapid Thatch Re-accumulation
If thatch returns quickly after dethatching, examine your maintenance practices. Excessive fertilization, improper mowing, or pesticide overuse might accelerate accumulation. Transition to organic or slow-release fertilizers, maintain proper mowing height, and minimize pesticide applications that harm beneficial organisms.
Some grass varieties naturally produce more thatch. Consider overseeding with lower thatch-producing cultivars when renovating your lawn. Modern perennial ryegrass and tall fescue varieties produce less thatch than older Kentucky bluegrass cultivars while maintaining attractive appearance and durability.
Cost Considerations: DIY vs. Professional Services
Understanding dethatching costs helps budget appropriately and decide between DIY and professional approaches. While DIY saves money, professional services offer expertise and efficiency that might justify the expense for some homeowners.
DIY Cost Breakdown
Manual dethatching requires minimal investment – a quality dethatching rake costs $30-60 and lasts many years. However, this method suits only small lawns due to labor intensity. Plan on spending 4-6 hours manually dethatching 1,000 square feet of moderately thatched lawn.
Power rake rental typically costs $60-100 per day, with some retailers offering 4-hour rates around $45. Factor in transportation costs and potential damage deposits. Additional expenses include disposal bags ($20-30), overseeding ($20-50), and starter fertilizer ($15-25). Total DIY costs for a 5,000 square foot lawn range from $150-250, plus significant time investment.
Professional Service Pricing
Professional dethatching services charge $10-25 per 1,000 square feet, with most companies requiring minimum service fees of $100-150. Average residential lawns (5,000-10,000 square feet) typically cost $150-300 for basic dethatching. Premium services including overseeding, fertilization, and aeration might reach $400-600.
Professional services provide value through expertise, commercial equipment, and efficiency. They complete large lawns in 1-2 hours versus full-day DIY efforts. Many companies guarantee results and include thatch disposal, eliminating hassle and ensuring proper technique. Spring and fall demand peaks might increase prices 15-25%, so booking during off-peak periods saves money.
Frequently Asked Questions
How do I know if my lawn needs dethatching?
Check your thatch layer by cutting small wedges from various lawn areas and measuring the brown, fibrous layer between soil and green grass. If this layer exceeds 0.5 inches, dethatching is beneficial. Other indicators include water running off rather than soaking in, spongy feeling when walking, and increased susceptibility to drought and disease despite proper care.
Can I dethatch my lawn in summer?
Summer dethatching isn’t recommended for most situations. High temperatures and potential drought stress significantly slow recovery, potentially causing permanent damage. Cool-season grasses suffer particularly in summer heat, while warm-season grasses tolerate early summer dethatching if adequate water is available. If summer dethatching becomes necessary due to severe problems, ensure consistent irrigation and consider professional services to minimize damage.
Should I aerate or dethatch first?
Dethatch first when both services are needed. Removing the thatch layer allows aeration equipment to penetrate soil effectively, creating better channels for air, water, and nutrients. Schedule dethatching and aeration 2-4 weeks apart to allow lawn recovery between procedures. For maintenance purposes, alternate between annual aeration and dethatching every 2-3 years rather than performing both simultaneously.
Is it better to dethatch in spring or fall?
Timing depends entirely on grass type. Cool-season grasses (Kentucky bluegrass, fescue, ryegrass) recover best from early fall dethatching when temperatures moderate and growth peaks. Warm-season grasses (Bermuda, Zoysia, St. Augustine) prefer late spring to early summer dethatching as they enter active growth. Spring dethatching of cool-season grasses remains possible but may interfere with pre-emergent herbicide applications.
How long does it take for a lawn to recover after dethatching?
Recovery typically takes 3-4 weeks under optimal conditions with proper aftercare. Cool-season grasses dethatched in early fall might show complete recovery within 2-3 weeks due to ideal growing conditions. Warm-season grasses generally need 3-5 weeks for full recovery. Severe dethatching or poor growing conditions can extend recovery to 6-8 weeks. Consistent watering, appropriate fertilization, and overseeding bare spots accelerate the recovery process.
Can I use a regular rake instead of a dethatching rake?
Regular leaf rakes aren’t effective for dethatching because they lack the sharp, sturdy tines needed to penetrate and remove thatch. Dethatching rakes feature knife-like blades that slice through tough organic matter without excessive lawn damage. While a regular rake might remove some surface debris, it won’t address the compressed thatch layer causing lawn problems. Invest in a proper dethatching rake or rent power equipment for effective results.
How often should I dethatch my lawn?
Most lawns need dethatching every 2-4 years, though frequency depends on grass type, maintenance practices, and growing conditions. High-maintenance lawns with aggressive fertilization might need annual attention, while well-managed lawns might go 5+ years between dethatching. Monitor thatch thickness annually and dethatch when the layer exceeds 0.5 inches rather than following a rigid schedule.
What should I do with the removed thatch?
Compost thatch if your pile maintains temperatures above 140°F to kill pathogens and weed seeds. Otherwise, dispose through municipal yard waste collection programs. Avoid using fresh thatch as mulch since it decomposes slowly and might harbor diseases. Some gardeners successfully compost thatch by mixing it with high-nitrogen materials like grass clippings and maintaining proper moisture levels. The decomposition process typically takes 6-12 months.
Will dethatching remove weeds from my lawn?
Dethatching removes some surface weeds but isn’t a primary weed control method. The process might actually spread weed seeds and create bare spots where new weeds establish. Combat this by overseeding immediately after dethatching and applying appropriate pre-emergent herbicides 6-8 weeks later. Focus on promoting thick, healthy turf through proper maintenance – the best long-term weed prevention strategy.
Should I water my lawn before dethatching?
Light watering 24-48 hours before dethatching creates ideal soil conditions – moist but not saturated. Dry soil makes equipment penetration difficult and increases lawn stress, while waterlogged conditions cause equipment to tear grass and create ruts. Soil should feel moist and crumbly, similar to wrung-out sponge consistency. Skip pre-watering if recent rainfall provided adequate moisture.
Conclusion
Dethatching represents a crucial but often overlooked aspect of lawn maintenance that dramatically impacts grass health and appearance. By understanding thatch formation, recognizing when intervention is needed, and following proper techniques, you can maintain the optimal balance that keeps your lawn thriving year after year.
Remember that successful dethatching extends beyond the mechanical removal process. Proper timing aligned with your grass type’s growth cycle, systematic execution using appropriate equipment, and comprehensive aftercare determine overall success. Early fall remains ideal for cool-season grasses, while warm-season varieties respond best to late spring treatment.
Most importantly, focus on prevention through balanced maintenance practices. Appropriate fertilization, proper mowing techniques, annual aeration, and soil health management significantly reduce thatch accumulation. These preventive measures prove far easier and less stressful to your lawn than corrective dethatching every few years. By integrating these practices into your regular lawn care routine, you’ll maintain a healthy, resilient lawn that resists thatch buildup while providing the lush, green appearance every homeowner desires.