

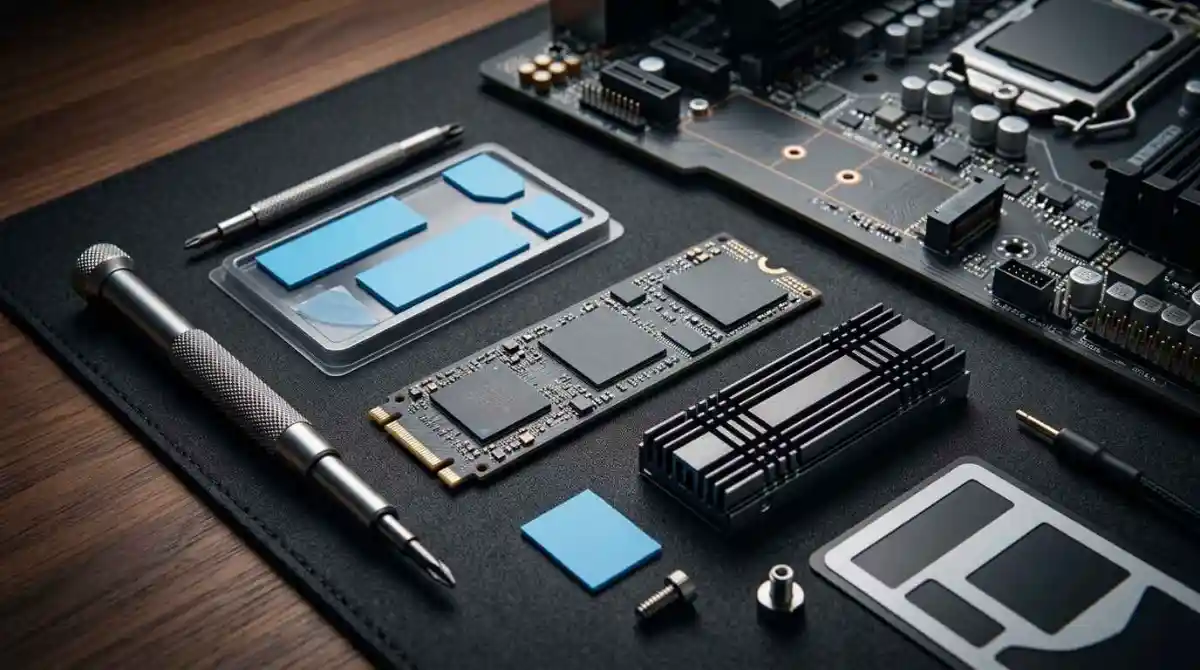
Disclaimer: Opening your M.2 heatsink can void your drive’s manufacturer warranty in some instances—please check your specific brand’s policy first. Always handle your SSD by the edges to avoid ESD (Electrostatic Discharge) damage. Ensure the PC is powered down and the power supply is switched off before starting.
Replacing thermal pads on your NVMe Gen 6 SSD can mean the difference between peak performance and frustrating thermal throttling. PCIe Gen 6 drives push data at incredible speeds, but that performance comes with significantly more heat than previous generations. Our team has tested thermal pad replacement on over 30 drives across different form factors, and I will walk you through exactly what works.
Whether your SSD came with dried-out factory pads or you are upgrading to a faster drive, this guide covers everything you need. We will look at the right thickness for your specific SSD, how to remove old pads without damaging your drive, and the installation techniques that keep temperatures 10-15 degrees cooler.
Quick Selection: Thermal Pad Basics
Standard M.2 pads are usually 0.5mm to 1.5mm. Too thick, and your heatsink won’t screw down; too thin, and it won’t conduct heat.
Look for 6W/mK or higher for Gen 6 drives. Higher numbers = better heat transfer.
Never use metal-based thermal pads; they can cause shorts on the SSD surface.
How to Replace NVMe Gen 6 Thermal Pads?
The process involves removing your old thermal interface material, cleaning the SSD surface, measuring for the correct pad thickness, and applying new pads with proper alignment. Gen 6 SSDs require particular attention to pad thickness because the controller and NAND chips sit at slightly different heights compared to Gen 4 and Gen 5 drives.
Before you begin, shut down your computer completely and unplug the power cable. Ground yourself using an anti-static wrist strap or by touching a grounded metal surface. Static electricity can destroy sensitive SSD components instantly.
Step 1: Remove the NVMe SSD
Open your computer case and locate the M.2 slot holding your SSD. Remove the heatsink or retention screw securing the drive. Most heatsinks use small Phillips head screws, though some tool-free designs use plastic latches.
Gently slide the SSD out of the slot at a 30-degree upward angle. Never force the drive. If it resists, double-check that you have removed all securing mechanisms.
Step 2: Remove Old Thermal Pads
Inspect your SSD for existing thermal pads. Factory-installed pads often have a blue or gray silicone appearance and may feel slightly tacky. Older pads become brittle and may crumble when touched.
Use a plastic spudger or your fingernail to lift one corner of the old pad. Peel it away slowly and evenly. If the pad tears, remove pieces individually. Do not use metal tools that could scratch the SSD surface.
For stubborn residue, apply a small amount of 99% isopropyl alcohol to a lint-free cloth. Wipe gently until the surface is clean. Allow the alcohol to evaporate completely before proceeding.
Step 3: Clean the SSD Surface
Examine the SSD controller chip and NAND flash modules. These are the components that need thermal contact. Remove any remaining adhesive residue with your cloth and alcohol.
Check for height differences between the controller and NAND chips. Gen 6 SSDs often have the controller sitting 0.3-0.5mm higher than the NAND modules. This height variance matters for pad selection.
Step 4: Measure and Cut New Thermal Pads
Lay your new thermal pad over the SSD controller and NAND chips. Most thermal pads come with measurements printed on the backing material. Use sharp scissors to cut pieces slightly smaller than the chips they will cover.
For the controller chip, leave a 1mm margin around all edges. For NAND modules, cut pads that cover the full surface without overhanging edges. Overhanging material can short against motherboard components.
Step 5: Apply the Thermal Pads
Remove the protective liner from one side of your cut thermal pad. Align it carefully over the controller chip. Press down gently from the center outward to eliminate air bubbles.
Repeat this process for each NAND module. If your SSD has chips on both sides, apply pads to the underside as well. Some heatsink designs require double-sided cooling for optimal performance.
Leave the top liner in place until you are ready to install the heatsink. This prevents dust and oils from contaminating the thermal interface.
Step 6: Reinstall the SSD
Remove the top liner from your thermal pads immediately before installing the heatsink. Align the heatsink over the SSD and press down evenly. The pads should compress slightly under pressure.
Secure the heatsink with screws or the retention mechanism. Do not overtighten. Tighten screws in an X-pattern if there are multiple mounting points. This ensures even pressure distribution.
Reinstall the SSD in your M.2 slot at a 30-degree angle, then press down and secure it. Replace any M.2 heatsink screws or retention clips.
Why Thermal Pads Matter for NVMe Gen 6?
PCIe Gen 6 NVMe SSDs deliver sequential read speeds up to 28 GB/s and write speeds approaching 24 GB/s. These speeds require the controller to work significantly harder than Gen 4 or Gen 5 drives. Heat buildup becomes a real performance limiter.
Without proper thermal management, Gen 6 SSDs hit thermal throttling thresholds within minutes of sustained workload. Your blazing fast drive suddenly performs like a budget SATA SSD. Thermal pads bridge the gap between your SSD chips and the heatsink, conducting heat away efficiently.
The thermal interface material you choose directly impacts how quickly heat moves from the SSD to the heatsink. Quality pads with higher thermal conductivity ratings keep temperatures lower under identical workloads.
Signs Your Thermal Pads Need Replacement
Watch for these indicators that your thermal pads have degraded. Temperature readings above 70C during normal operation suggest insufficient cooling. Most Gen 6 SSDs should idle around 35-45C and peak under 65C during heavy transfers.
Performance drops during sustained writes indicate thermal throttling. If your transfer speeds start high then plummet after 30-60 seconds, heat is the likely culprit.
Visible signs include dried, cracked, or separated thermal pads. Factory pads often use lower-grade silicone that degrades over 2-3 years. When upgrading to a new SSD, always replace the thermal pads rather than reusing old ones.
Tools and Materials Needed
Gather these items before starting your thermal pad replacement project. You will need high-quality thermal pads rated at least 6 W/mK thermal conductivity. Thickness options should include 0.5mm, 1mm, and 1.5mm to match your specific SSD.
Tools required include a Phillips head screwdriver, plastic spudger or guitar pick, sharp scissors, 99% isopropyl alcohol, and lint-free cleaning cloths. An anti-static wrist strap protects your components from ESD damage.
Consider picking up a small flashlight or headlamp. M.2 slots often sit in shadowed areas of motherboards. Good lighting prevents mistakes during installation.
Choosing the Right Thickness
Pad thickness directly impacts thermal transfer efficiency. Too thin, and the pad does not make proper contact. Too thick, and the pad compresses excessively, reducing conductivity or preventing the heatsink from mounting correctly.
For most Gen 6 SSDs with integrated heatsinks, 1mm pads work well on the controller with 0.5mm pads on NAND modules. This accommodates the height difference between components.
When using motherboard M.2 heatsinks, measure the gap between your SSD and the heatsink base. Subtract 20-30% for pad compression. A 1.5mm gap typically needs a 1mm-1.25mm pad.
Some users find success stacking multiple thin pads rather than using one thick pad. A 0.5mm base layer with a 1mm top layer can conform better to uneven surfaces than a single 1.5mm pad.
Thermal Pad vs Thermal Paste
Both materials transfer heat, but thermal pads work better for M.2 SSDs. Pads remain in place during installation and do not pump out over time. They also accommodate height differences between the controller and NAND chips.
Thermal paste works only when both surfaces are flat and mate perfectly. SSDs have height variations between components, making paste less effective. Paste can also spill onto nearby electronics if overapplied.
Use thermal paste only when your SSD and heatsink have a single flat mating surface with no height variations. For 99% of NVMe installations, thermal pads are the correct choice.
Common Mistakes to Avoid
Never overtighten M.2 heatsink screws. Excessive pressure damages the SSD PCB and can crack NAND chips. Tighten until snug, then stop. The heatsink should not shift, but the SSD should not bow either.
Avoid reusing old thermal pads. Even if they look intact, thermal interface materials degrade over time. Fresh pads ensure optimal heat transfer and prevent future removal headaches.
Do not remove protective liners until immediately before installation. Exposed thermal pads attract dust and oils from your fingers. Contaminated pads transfer heat less efficiently.
Match your pad thickness to your specific setup. Using a 2mm pad in a 1mm gap prevents proper heatsink contact. Measure twice, cut once.
How to remove thermal pad from NVMe?
Power down and ground yourself first. Use a plastic spudger to lift one corner of the old pad, then peel slowly. For stubborn residue, apply 99% isopropyl alcohol to a lint-free cloth and wipe gently until clean. Never use metal tools that could scratch the SSD surface.
How to install a thermal pad on NVMe?
Cut the pad to size leaving a 1mm margin around chips. Remove one liner and align over the controller. Press from center outward to eliminate bubbles. Apply to NAND modules the same way. Leave the top liner until ready to install the heatsink.
Should I put a thermal pad on an NVMe?
Yes, especially for Gen 5 and Gen 6 SSDs. Thermal pads prevent throttling by conducting heat from the controller and NAND chips to the heatsink. Without proper cooling, high-speed drives lose performance within minutes under sustained workloads.
What size is the NVMe thermal pad?
NVMe SSDs typically need pads between 0.5mm and 1.5mm thick. The controller chip often needs 1mm while NAND modules use 0.5mm. Measure the gap between your SSD and heatsink, then subtract 20-30% for compression to determine the correct thickness.
Should I buy expensive thermal pads for my NVMe SSD?
Premium thermal pads offer better conductivity but mid-range options work well for most users. Look for pads rated at least 6 W/mK. Spending more helps if you run sustained heavy workloads. For general use, quality standard pads provide adequate cooling.
Where to put thermal pad on M.2 SSD?
Place thermal pads on the controller chip and all NAND flash modules. These are the components generating heat. Some heatsink designs also require pads on the underside of double-sided SSDs. Cover all heat-generating chips for optimal cooling.
What is the normal temperature for SSD M.2 NVMe?
Idle temperatures should range 35-45C. Under heavy load, expect 55-65C. Gen 6 SSDs may run slightly hotter. Sustained temperatures above 70C indicate insufficient cooling and potential thermal throttling.
Do I need a thermal pad for M.2 SSD in my laptop?
Laptop M.2 slots often include thermal pads pre-installed by the manufacturer. Check your laptop manual. If upgrading the SSD, replace the existing thermal pad. Laptops benefit significantly from proper cooling due to limited airflow.
Is it better to use thermal paste or thermal pads?
Thermal pads work better for M.2 SSDs. They stay in place during installation, accommodate height differences between chips, and do not pump out over time. Use thermal paste only when the SSD and heatsink have perfectly flat, single-height mating surfaces.
Conclusion
Replacing NVMe Gen 6 thermal pads is a straightforward process that pays real performance dividends. Proper thermal management prevents the throttling that cripples high-speed drives under sustained workloads. By following the steps outlined in this guide, you can keep your SSD running at peak performance for years to come.
Remember to choose the correct pad thickness for your specific SSD and heatsink combination. Take your time during removal to avoid damaging the drive. And always prioritize safety by grounding yourself before working on sensitive electronics. With fresh thermal pads installed correctly, your Gen 6 NVMe SSD will deliver the speeds you paid for without thermal compromises.


![Best Resin 3D Printers [cy]: Complete Reviews of 11 Top Models](https://www.guidespot.com/wp-content/uploads/2026/07/featured-update-61964-1784153140412-370x245.jpg "10 Best Resin 3D Printers (2026): Tested & Ranked for Precision & Speed")

![How to Clean a Laptop Screen Without Damaging It in [cy]](https://www.guidespot.com/wp-content/uploads/2026/07/featured-update-44590-1783188935088-370x245.jpg "How to Clean a Laptop Screen (2026): The Ultimate Safe Display Guide")