If you’re getting serious about gardening, you’ve probably heard people mention tillers. But what exactly does a tiller do, and why do so many gardeners swear by them? I’ve spent years working with various garden tools, and I can tell you that understanding a tiller’s function can transform how you prepare and maintain your garden soil.
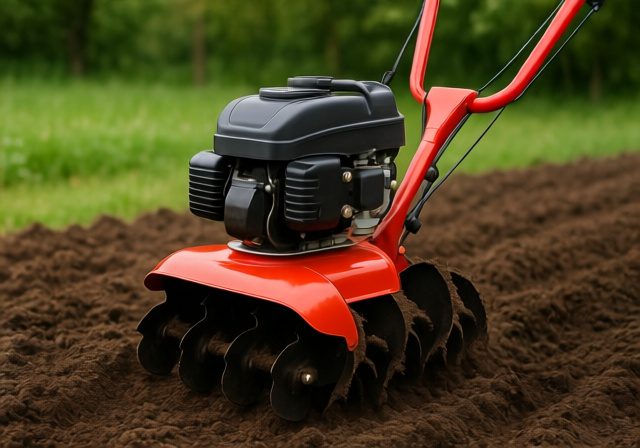
A garden tiller is a motorized tool that breaks up and churns soil using rotating metal tines or blades. Think of it as a powerful mechanical helper that does the backbreaking work of turning over soil, breaking up compacted earth, and mixing in amendments like compost or fertilizer. While you could technically do this work with a shovel and rake, a tiller accomplishes in minutes what might take you hours of manual labor.
The primary function of a tiller goes beyond simple soil breaking. When those rotating tines dig into the ground, they’re creating an ideal environment for plant roots to grow. They’re breaking up dense clay, incorporating organic matter deep into the soil profile, and creating the loose, crumbly texture that plants love. This process, called tillage, has been a fundamental part of agriculture for thousands of years – we’ve just mechanized it to save our backs and time.
Understanding How a Garden Tiller Works
The mechanics of a tiller are relatively straightforward, but the engineering behind them is quite clever. At the heart of every tiller is a set of curved metal blades called tines. These tines are attached to a rotating shaft that’s powered by either a gas engine or electric motor. As the shaft spins, the tines dig into the soil, break it apart, and throw it backward or forward depending on the tiller’s design.
The depth and aggressiveness of tilling depend on several factors. The tine speed, measured in rotations per minute (RPM), determines how finely the soil gets broken up. Most tillers operate between 150-350 RPM, with higher speeds creating finer soil texture. The tine design also matters – C-shaped tines are standard for most garden work, while bolo tines work better in deep, heavily compacted soil.
Power transmission in a tiller happens through either a direct drive system or a gear-driven mechanism. Direct drive tillers have the tines mounted directly on the engine crankshaft, making them lighter but less powerful. Gear-driven tillers use a transmission system that provides more torque to the tines, allowing them to power through tougher soil conditions. This is why commercial-grade tillers almost always use gear-driven systems.
The forward motion of a tiller can work in different ways. Some tillers are self-propelled, using either the tine rotation itself or separate drive wheels to move forward. Others require you to push or guide them through the soil. Counter-rotating tillers have tines that spin opposite to the direction of travel, providing better soil pulverization and preventing the machine from “walking” forward too quickly.
Primary Functions of a Garden Tiller
Breaking up compacted soil stands as the most fundamental function of any tiller. Over time, soil naturally compresses from foot traffic, rainfall, and its own weight. This compaction creates a dense layer that plant roots struggle to penetrate. When I run a tiller through compacted soil, those spinning tines shatter the hardpan layer, creating pathways for roots, water, and air to move freely through the soil profile.
Soil aeration is another critical function that often gets overlooked. Plant roots need oxygen just as much as they need water and nutrients. Compacted soil has minimal air pockets, which can suffocate roots and promote anaerobic conditions that foster plant diseases. A tiller introduces millions of tiny air channels throughout the tilled area, improving drainage and creating the oxygen-rich environment that beneficial soil microorganisms need to thrive.
Mixing amendments into soil becomes effortless with a tiller. Whether you’re adding compost, aged manure, peat moss, or lime to adjust pH, a tiller ensures these materials get distributed evenly throughout the root zone. I’ve found that hand-mixing amendments only incorporates them into the top few inches, but a tiller can blend them 6-8 inches deep where roots actually grow. This thorough mixing prevents the layering effect that can impede water movement and root growth.
Weed control represents an often underappreciated benefit of tilling. When you till soil before planting, you’re disrupting weed seeds and destroying existing weed root systems. Early spring tilling can eliminate overwintered weeds before they have a chance to produce seeds. However, this needs to be done carefully – excessive tilling can actually bring dormant weed seeds to the surface where they’ll germinate.
Creating new garden beds from lawn areas becomes a manageable task with a tiller. Instead of manually removing sod, digging out roots, and loosening soil, a powerful tiller can convert a grass area into plantable garden soil in a single afternoon. The tiller chops up the grass and roots, mixing them into the soil where they’ll decompose and add organic matter. This process typically requires multiple passes and may need to be repeated after a few weeks to ensure complete grass elimination.
Types of Tillers and Their Specific Functions
Front-tine tillers place the tines ahead of the wheels, making them ideal for maintaining previously tilled gardens and working in lighter soils. These tillers excel at cultivation tasks like weeding between rows and incorporating fertilizer into established beds. The front-mounted tines pull the machine forward, which can make them jumpy in hard soil but perfect for annual garden maintenance. They typically work soil to depths of 6-8 inches and handle gardens up to 5,000 square feet effectively.
Rear-tine tillers position the tines behind the wheels, providing better balance and control in difficult conditions. The wheels move independently of the tines, allowing you to control forward speed while the tines work at optimal RPM. This design excels at breaking new ground, working in clay soil, and handling large gardens over 5,000 square feet. Most rear-tine tillers can work soil 8-10 inches deep, with some commercial models reaching 12 inches.
Vertical-tine tillers, also called dual-rotating tillers, represent newer technology in the tilling world. The tines rotate on a vertical axis like an eggbeater, cutting forward through soil rather than churning it. This design leaves soil less fluffy and more suitable for immediate planting. They’re particularly effective in rocky soil where traditional tillers might throw stones, and they create less soil compaction below the tilled layer.
Mini-tillers or cultivators serve a different purpose than their larger cousins. These lightweight tools typically work soil only 2-4 inches deep, making them perfect for mixing compost into the top layer, maintaining paths between raised beds, and working in tight spaces where larger tillers can’t fit. While they won’t break new ground effectively, they’re invaluable for spot-tilling and maintaining small urban gardens under 1,000 square feet.
Electric tillers have gained popularity for small to medium gardens, offering instant starts, quieter operation, and zero emissions. Corded models provide consistent power for gardens within 100 feet of an outlet, while battery-powered versions offer complete mobility for areas up to 2,000 square feet per charge. They’re perfect for raised beds, greenhouse work, and noise-sensitive neighborhoods, though they lack the raw power needed for initial ground breaking in heavy clay.
Tiller vs. Cultivator: Understanding the Difference
The terms “tiller” and “cultivator” often get used interchangeably, but they’re actually different tools designed for different jobs. Understanding this distinction helps you choose the right tool and use it effectively. A tiller is a heavy-duty machine designed to break up hard, compacted soil and prepare new garden beds. A cultivator is a lighter tool meant for mixing soil amendments and weeding in existing gardens.
Power and depth represent the main technical differences. Tillers typically have engines ranging from 5-14 horsepower and can work soil 8-12 inches deep. Cultivators usually have 1-5 horsepower engines or electric motors and work only the top 2-6 inches of soil. This difference in power translates directly to capability – you need a tiller to break new ground, but a cultivator suffices for maintaining established beds.
Tine configuration differs significantly between the two tools. Tillers use heavy-duty C-shaped or bolo tines designed to bite into hard soil and flip it over. These tines are typically 12-18 inches in diameter. Cultivators use smaller, lighter tines or spring-steel prongs that scratch and mix the soil surface rather than digging deep. Some cultivators use star-shaped tines that are excellent for breaking up crusty soil surfaces.
The intended use cases clearly separate these tools. I use a tiller when starting a new garden, converting lawn to garden space, or dealing with severely compacted soil that hasn’t been worked in years. A cultivator comes out for weekly weeding, mixing fertilizer into planted beds, preparing seed beds in already-tilled soil, and maintaining pathways. Many gardeners find they need both tools, or they choose a mid-size tiller that can handle both heavy and light work.
Benefits of Using a Garden Tiller
Time savings alone justify a tiller for many gardeners. What takes 8-10 hours of manual digging, turning, and breaking up soil can be accomplished in 30-60 minutes with a tiller. This efficiency becomes even more important as garden size increases. For a 1,000 square foot garden, manual preparation might take a full weekend, while a tiller completes the job in an afternoon, leaving you energy for planting and other garden tasks.
Improved soil structure results from proper tilling technique. The mechanical action creates an ideal crumb structure – small soil aggregates with spaces between them for air and water movement. This structure supports robust root development, improves drainage in clay soils, and increases water retention in sandy soils. The consistent depth of tilling also creates a uniform growing environment across your entire garden.
Physical strain reduction cannot be overstated, especially for older gardeners or those with back problems. Manual digging and soil turning ranks among the most physically demanding garden tasks. A tiller eliminates the repetitive bending, lifting, and twisting that leads to sore muscles and potential injuries. You’re guiding a machine rather than providing all the power yourself, making gardening accessible to people who couldn’t otherwise manage the physical demands.
Nutrient distribution happens more effectively with mechanical tilling. When you add fertilizer, lime, or organic matter to your garden, tilling ensures these amendments reach the entire root zone rather than sitting on the surface. This thorough incorporation means plants can access nutrients immediately, and you’ll use less fertilizer overall because it’s placed where roots can reach it rather than washing away with surface runoff.
Pest and disease management improves with strategic tilling. Fall tilling exposes overwintering insects and disease organisms to freezing temperatures and predators. Grubs, cutworms, and other soil-dwelling pests get disrupted and destroyed. Disease spores that overwinter on plant debris get buried deep where they can’t infect new plants. This mechanical pest control reduces the need for chemical interventions.
When to Use a Tiller: Seasonal Timing and Soil Conditions
Spring tilling typically happens 2-3 weeks before your last frost date, when soil has dried enough to crumble in your hand but isn’t dust-dry. I test readiness by squeezing a handful of soil – if it forms a ball that breaks apart when poked, it’s ready. Tilling wet soil creates hard clumps that take months to break down, while tilling bone-dry soil creates excessive dust and destroys soil structure.
Fall tilling serves different purposes than spring work. After harvest, tilling helps incorporate crop residues, expose pest larvae to winter weather, and prepare beds for early spring planting. Fall is also ideal for working in soil amendments like lime that need time to react with soil. However, leaving some areas untilled provides winter habitat for beneficial insects and prevents erosion on slopes.
Soil temperature matters more than many gardeners realize. Cold soil (below 50°F) doesn’t benefit much from tilling because biological activity is minimal. Warm soil (60-70°F) responds best to tilling, with microorganisms quickly colonizing the freshly aerated soil. I use a soil thermometer to check temperature at 4-inch depth before deciding to till.
Clay soil requires special timing considerations. Clay should be tilled when slightly moist but not wet – usually a few days after rain when the surface has dried but moisture remains at depth. Sandy soil can be tilled across a wider moisture range but benefits from adding organic matter during tilling to improve water retention. Loamy soil, that perfect garden soil we all want, can be tilled whenever it passes the squeeze test.
Weather forecasts influence tilling decisions. I avoid tilling before heavy rain, which can cause freshly tilled soil to crust over or erode. Wind is another factor – tilling on windy days in dry conditions creates dust storms and strips away valuable topsoil. Ideal tilling weather is overcast with light humidity and minimal wind.
Proper Tilling Techniques for Best Results
Preparation before tilling makes the actual work much easier and more effective. I start by removing large rocks, sticks, and debris that could damage tines or get thrown by the tiller. String, wire, and plastic especially need removal as they wrap around tines and damage the transmission. Mark sprinkler lines, cables, and other buried utilities to avoid costly damage.
The first pass with a tiller should be shallow, especially in new ground. Set the tiller to work just 2-3 inches deep initially. This breaks the surface crust and starts the soil loosening process without overworking the machine. On subsequent passes, gradually increase depth until you reach your target, typically 6-8 inches for vegetable gardens.
Tilling patterns affect the final result. For new beds, I till lengthwise first, then make a perpendicular pass to ensure complete soil breakup. Overlapping passes by 2-3 inches prevents strips of untilled soil between rows. For established gardens, a single pass along planting rows usually suffices, followed by raking to smooth the surface.
Speed control separates experienced tillers from beginners. Rushing forces you to fight the machine and produces uneven results. Let the tiller work at its own pace – typically a slow walking speed. In tough soil, use short forward bursts, allowing tines to dig in before moving forward. Trying to force a tiller through hard soil damages equipment and exhausts the operator.
Adding amendments requires specific technique for even distribution. Spread compost, fertilizer, or lime evenly over the soil surface before tilling. For best results, add half the amendment, till it in with a shallow pass, add the remaining half, then till to full depth. This creates even distribution throughout the soil profile rather than concentrated pockets.
Common Mistakes to Avoid When Using a Tiller
Over-tilling ranks as the most common mistake I see gardeners make. Excessive tilling destroys soil structure, creates a hard pan below the tilled layer, and brings weed seeds to the surface. Once or twice per year is sufficient for most gardens. Some gardeners till weekly, thinking it helps, but this actually harms soil biology and structure.
Tilling wet soil creates long-lasting problems. Wet clay soil forms concrete-like clumps when tilled, taking months or even years to break down naturally. These clumps prevent root penetration and create drainage problems. If you can form a ribbon by squeezing soil between your fingers, it’s too wet to till.
Ignoring soil compaction below the tilled layer leads to drainage issues and restricted root growth. Tillers work the top 6-12 inches but can create compaction just below this depth, especially when used repeatedly at the same depth. Varying tilling depth and occasionally using a broadfork to break deeper compaction prevents this “tiller pan” formation.
Working soil too fine is another mistake that causes problems later. Garden soil doesn’t need to be powder-fine. Over-tilling breaks down soil aggregates, leading to crusting after rain and poor water infiltration. Aim for marble to golf ball-sized clumps that will break down naturally while maintaining good structure.
Neglecting safety leads to preventable injuries. Always wear closed-toe shoes, preferably steel-toed boots, when tilling. Safety glasses protect against thrown debris. Keep hands and feet away from tines, even when the engine is off – tines can still rotate. Never leave a running tiller unattended, and always disengage tines before backing up or turning.
Maintenance Tips for Your Garden Tiller
Regular maintenance extends tiller life and ensures reliable operation when you need it. After each use, I remove soil buildup from tines and housing using a putty knife or stiff brush. Dried soil becomes harder to remove and can cause rust. Check tines for damage – bent or broken tines cause vibration and uneven tilling.
Engine maintenance follows standard small-engine protocols. Change oil after the first 5 hours on a new tiller, then every 25-30 hours or annually. Clean or replace air filters more frequently in dusty conditions – a clogged filter reduces power and increases fuel consumption. Spark plugs need annual replacement for easy starting and smooth operation.
Tine inspection and replacement keep your tiller working effectively. Tines wear down over time, especially in rocky soil. Worn tines require more power to achieve the same depth and leave strips of untilled soil. Most tines last 3-5 years with moderate use. Replace them in complete sets to maintain balance and prevent vibration.
End-of-season storage preparation prevents spring disappointments. Run the engine dry or add fuel stabilizer to prevent carburetor gumming. Change the oil while the engine is warm – old oil contains acids that corrode internal parts. Clean the entire machine, oil exposed metal parts to prevent rust, and store in a dry location.
Sharpening tines isn’t usually necessary or recommended. Tines are designed to fracture soil through impact rather than cutting. Some slight rounding of edges is normal and doesn’t affect performance. However, badly bent or broken tines should be replaced promptly to prevent damage to other components.
Environmental Considerations and Alternatives
No-till gardening has gained popularity as an alternative to traditional tilling. This method maintains soil structure, preserves beneficial organisms, and reduces erosion. Instead of tilling, gardeners add layers of compost and mulch on top of existing soil. While no-till works well for established beds, initial bed preparation often still requires some form of soil loosening.
Reduced tillage represents a middle ground between conventional tilling and no-till methods. This approach involves tilling only when necessary – such as initial bed preparation or every few years to incorporate amendments. Between major tillings, surface cultivation or mulching maintains the garden. This preserves more soil biology while still allowing periodic deep soil work.
Cover crops provide natural tillage through root action. Deep-rooted covers like daikon radish penetrate compacted soil, creating channels for water and air. When these plants decompose, they leave organic matter throughout the soil profile. While slower than mechanical tilling, this biological tillage improves soil health long-term.
Carbon footprint considerations influence tool choices for environmentally conscious gardeners. Gas tillers produce emissions and require petroleum products. Electric tillers offer zero point-of-use emissions but still consume electricity. Manual tools like broadforks provide emission-free soil preparation but require significant physical effort. Choose based on your garden size, physical capability, and environmental priorities.
Soil biology preservation becomes easier when you understand tilling’s impact. Tilling disrupts fungal networks, exposes soil organisms to UV radiation, and accelerates organic matter decomposition. Minimizing tilling frequency and depth helps maintain the complex soil food web that naturally improves soil structure and fertility.
Frequently Asked Questions
How deep should I till my garden?
For most vegetable gardens, tilling 6-8 inches deep provides adequate root space and amendment incorporation. New gardens might benefit from initial tilling to 10-12 inches, especially in heavy clay. Raised beds typically need just 4-6 inches since they already have loose soil. Going deeper than necessary wastes fuel and can bring up poor subsoil or weed seeds.
Can I use a tiller to mix concrete or mortar?
Never use a garden tiller for concrete or mortar mixing. The abrasive materials quickly destroy tines and damage gear boxes not designed for such dense materials. Concrete also hardens on equipment, potentially ruining it permanently. Rent or buy a proper mortar mixer for masonry projects.
Should I remove grass before tilling?
For small areas, removing sod first prevents grass from regrowing. For larger areas, you can till grass directly into soil, but it requires multiple passes over several weeks to ensure complete kill. Till once, wait two weeks for regrowth, then till again. Adding a layer of cardboard after the final tilling prevents any remaining grass from sprouting.
What’s the difference between forward and reverse rotating tines?
Forward-rotating tines (standard rotation) turn in the direction of travel, pulling the tiller forward. They work well in previously tilled soil but can be jumpy in hard ground. Counter-rotating tines (reverse rotation) turn opposite to travel direction, providing more aggressive soil breakup and better control in difficult conditions, though they require more power.
How often should I till my garden?
Most gardens need tilling just once or twice yearly – spring preparation and fall cleanup. Over-tilling destroys soil structure and beneficial organisms. Established no-till gardens might go years without tilling. New gardens or those needing major amendment incorporation might require more frequent tilling initially, then less over time.
Can I till in fertilizer and lime at the same time?
While you can physically till both materials simultaneously, it’s not recommended for chemical reasons. Lime (calcium carbonate) can react with nitrogen fertilizers, causing nitrogen loss as ammonia gas. Apply lime in fall, let it react over winter, then add fertilizer during spring tilling for best results.
Why does my tiller bounce and jump?
Bouncing typically indicates soil that’s too hard, tilling too fast, or worn tines. Try making a shallow first pass, reducing forward speed, or waiting for better soil moisture. Check tine condition – worn or bent tines cause irregular digging. Front-tine tillers naturally bounce more than rear-tine models in hard soil.
Is it better to till or use a broadfork?
Both tools have their place. Tillers excel at initial bed preparation, working large areas, and incorporating amendments thoroughly. Broadforks preserve soil structure better, don’t require fuel, and work well for maintaining established beds. Many gardeners use tillers for initial preparation, then broadforks for annual maintenance.
Conclusion
Understanding what a tiller does and how to use it properly transforms garden preparation from backbreaking labor into manageable work. These powerful tools break compacted soil, incorporate amendments, control weeds, and create ideal growing conditions for plants. Whether you choose a small electric cultivator for raised beds or a powerful rear-tine tiller for breaking new ground, matching the tool to your needs ensures gardening success.
The key to effective tilling lies not in the frequency but in the timing and technique. Work soil at proper moisture levels, avoid over-tilling, and maintain your equipment for years of reliable service. Consider alternatives like reduced tillage or no-till methods as your garden matures and soil improves.
Remember that a tiller is just one tool in your gardening arsenal. Used wisely, it saves time and effort while improving soil conditions. Used excessively, it can damage soil structure and biology. Find the balance that works for your garden, climate, and physical capabilities. With proper understanding and technique, a tiller becomes an invaluable partner in creating productive, healthy gardens year after year.