If you’ve noticed lint on your freshly washed clothes or your washing machine isn’t draining properly, it’s time to tackle the lint buildup in your washer. I’ve cleaned dozens of washing machines over the years, and I can tell you that regular lint removal makes a massive difference in both cleaning performance and machine longevity.
Most people don’t realize their washing machine has a lint filter that needs regular cleaning. Unlike dryers with obvious lint traps, washing machine filters are often hidden and forgotten. This neglect leads to poor washing results, drainage issues, and even expensive repairs down the line.
In this comprehensive guide, I’ll walk you through exactly how to locate and clean your washing machine’s lint filter, regardless of your machine type. We’ll cover safety procedures, step-by-step cleaning instructions, and prevention strategies that will keep your washer running efficiently for years to come.
Understanding Lint Buildup in Washing Machines
Lint accumulation in washing machines is more than just an annoyance – it’s a genuine threat to your appliance’s performance and your clothes’ cleanliness. Every time you wash clothes, tiny fibers break loose from fabrics and need somewhere to go. Without proper filtration and removal, these fibers accumulate in various parts of your washing machine.
The lint problem varies significantly between different washing machine types. Top-loading machines typically handle lint differently than front-loaders, and newer high-efficiency models have their own unique challenges. Understanding your specific machine type is crucial for effective lint management.
Modern washing machines use several methods to capture lint. Some have dedicated lint filters, others use self-cleaning mechanisms, and many rely on the drain pump filter to catch debris. The key is knowing which system your machine uses and how to maintain it properly.
Why Lint Removal Matters?
Ignoring lint buildup in your washing machine creates multiple problems that compound over time. First and most obviously, excess lint redeposits on your clothes during the wash cycle, leaving them looking dingy and feeling rough. Dark clothes show this problem particularly clearly, with visible lint specks that are frustrating to remove.
Beyond aesthetic issues, lint buildup seriously impacts your washing machine’s efficiency. A clogged filter forces the pump to work harder, increasing energy consumption and wear on mechanical components. I’ve seen machines that struggled to complete cycles simply because their filters were packed with lint and debris.
Water drainage problems are another common consequence of lint accumulation. When filters clog, water can’t exit the machine properly, leading to standing water in the drum, extended cycle times, and potential overflow situations. In severe cases, this can trigger error codes and prevent the machine from operating entirely.
The financial impact of neglecting lint removal adds up quickly. Reduced efficiency means higher utility bills, while premature wear on components leads to costly repairs or early replacement. A simple monthly cleaning routine can prevent hundreds of dollars in unnecessary expenses.
Locating Your Washing Machine’s Lint Filter
Top-Loading Washing Machines
Traditional top-loading washing machines typically feature lint filters in one of several locations. The most common spot is along the agitator – that central post that moves clothes around during the wash cycle. Look for a small screen or mesh trap that can be pulled out or unscrewed from the top of the agitator.
Some top-loaders position the lint filter near the rim of the wash basket. Run your hand along the top edge of the drum, feeling for a small compartment or screen. These rim filters often slide out for easy cleaning but can be easy to miss if you don’t know where to look.
Older models might have lint filters attached to the end of the drainage hose. Check where the hose connects to the washer or the drainage pipe. These external filters typically unscrew for cleaning but require careful handling to avoid water spillage.
Front-Loading Washing Machines
Front-loading washing machines generally don’t have traditional lint filters. Instead, they rely on a drain pump filter that catches lint along with other debris. This filter is usually located behind a small door on the front lower panel of the machine, often on the right side.
To access the drain pump filter, look for a small rectangular or square panel near the bottom of your front-loader. This access door might be hidden behind a decorative panel that needs to be popped off first. Once opened, you’ll find the filter cap, which unscrews counterclockwise.
Some high-efficiency front-loaders have self-cleaning pump filters that don’t require regular maintenance. However, even these can benefit from occasional inspection, especially if you notice drainage issues or lint on clothes. Check your owner’s manual to determine your specific model’s requirements.
High-Efficiency Top-Loaders
Modern high-efficiency top-loading machines without agitators present unique challenges for lint management. Many of these models don’t have user-accessible lint filters at all, instead relying on the wash action and pump system to flush lint away with the wash water.
If your HE top-loader does have a filter, it’s often located under the agitator plate or wash plate at the bottom of the drum. This requires removing the plate entirely, which can be more complex than traditional filter cleaning. Some models have filters integrated into the pump system, similar to front-loaders.
Safety First: Pre-Cleaning Preparation
Before you start cleaning your washing machine’s lint filter, safety preparations are non-negotiable. Always begin by unplugging the washing machine from its power source. Even if you’re just cleaning a filter, water and electricity don’t mix, and safety should always be your top priority.
Turn off the water supply valves behind the washing machine. These are usually color-coded red for hot and blue for cold. Turning them clockwise will shut off the water flow, preventing any accidental flooding if you need to disconnect hoses or if a seal is compromised during cleaning.
Gather your cleaning supplies before starting: rubber gloves, a small brush (an old toothbrush works perfectly), a bucket or shallow pan to catch water, several towels, and a flashlight. Having everything ready prevents scrambling mid-cleaning and reduces the risk of water damage.
Place towels on the floor around the washing machine, especially if you’re cleaning a front-loader’s pump filter. These filters often release trapped water when opened, and proper preparation prevents water damage to your flooring.
Step-by-Step Lint Removal Guide
Cleaning Top-Loader Agitator Filters
Start by removing any clothes from the washing machine and ensuring the drum is completely empty. Locate the lint filter on your agitator – it’s usually at the top and may have a handle or tab for easy removal. Gently pull the filter straight up or twist it counterclockwise, depending on your model.
Once removed, you’ll likely see a accumulation of lint, hair, and fabric fibers. Hold the filter over a trash can and use your fingers to pull off the bulk of the debris. Don’t be surprised if you find a significant amount – these filters can hold more lint than you’d expect.
Rinse the filter under hot running water, using a soft brush to scrub away stubborn buildup. Pay special attention to the mesh or screen areas where lint tends to embed itself. If the buildup is severe, soak the filter in hot, soapy water for 10-15 minutes before scrubbing.
After cleaning, inspect the filter for damage. Look for tears in the mesh, cracks in the plastic frame, or any deformation that might prevent proper seating. A damaged filter won’t work effectively and should be replaced immediately.
Before reinstalling, clean the filter housing in the agitator. Use a damp cloth to wipe away any debris or soap scum that’s accumulated. This ensures the filter sits properly and maintains a good seal. Reinstall the filter by reversing the removal process, ensuring it clicks or locks into place securely.
Cleaning Front-Loader Pump Filters
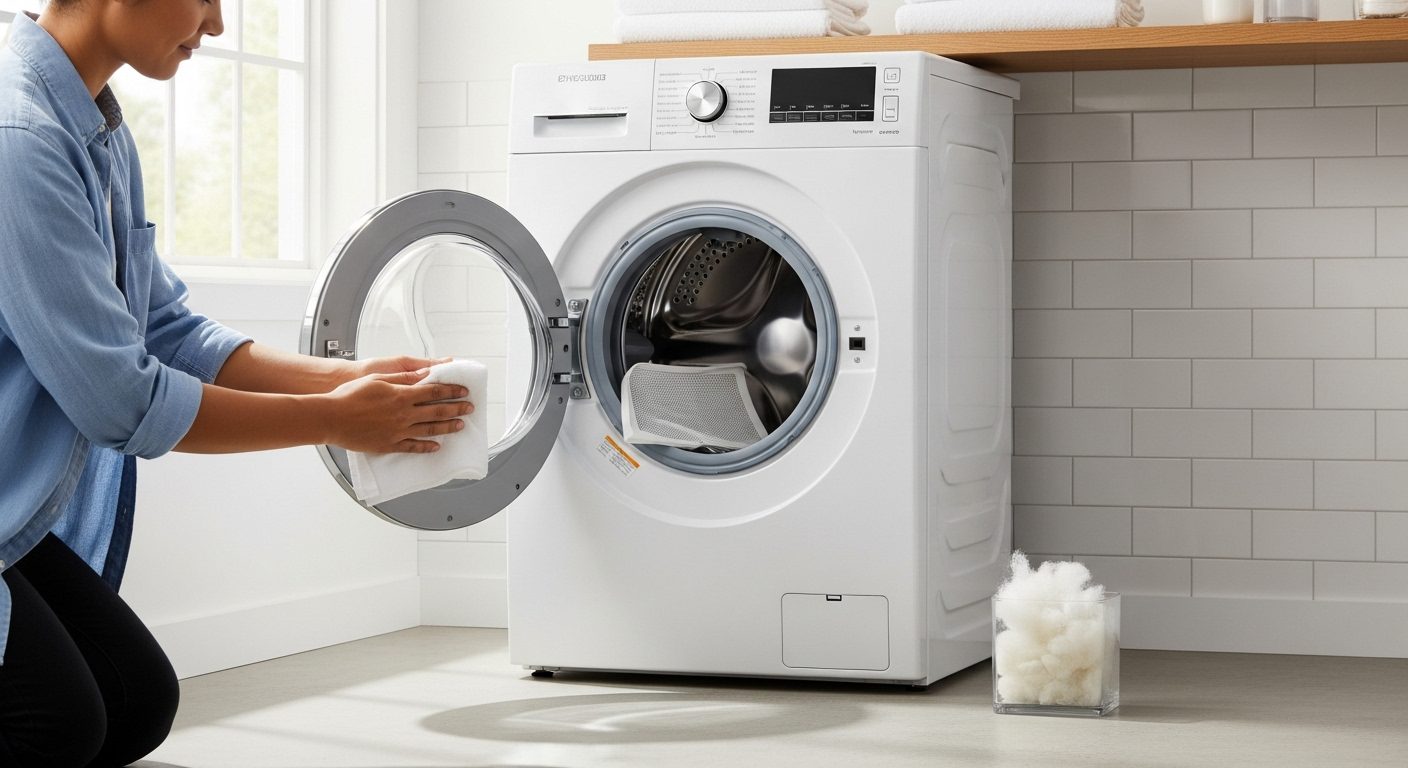
Cleaning a front-loader’s pump filter requires more preparation due to trapped water. Place a shallow pan or baking dish under the filter access door to catch water. Have several towels ready – you might need them.
Open the access panel and locate the emergency drain hose if your model has one. This small hose allows you to drain trapped water before removing the main filter. Pull out the drain hose, remove its cap, and let water flow into your container. This process might take several minutes depending on how much water is trapped.
Once drained, slowly unscrew the pump filter counterclockwise. Even after draining, expect some water to spill out. Remove the filter completely and inspect it. You’ll likely find lint, hair, small objects like coins or buttons, and possibly some unpleasant-smelling sludge.
Clean the filter thoroughly under hot running water, using a brush to remove all debris from the filter mesh and housing. Check the rubber seal on the filter for damage or buildup. A compromised seal can cause leaks, so clean it carefully and inspect for cracks or deformation.
Before reinstalling, shine a flashlight into the filter housing and remove any visible debris. Wipe the housing threads clean to ensure a proper seal. Reinstall the filter by screwing it clockwise until snug – don’t overtighten as this can damage the seal or make future removal difficult.
Special Considerations for HE Machines
High-efficiency machines without traditional filters require different maintenance approaches. Since these machines rely on wash action to manage lint, proper loading and detergent use become even more critical. Never overload the machine, as this reduces water circulation and lint removal effectiveness.
Run a monthly cleaning cycle using hot water and no clothes. Add two cups of white vinegar to help dissolve soap residue and mineral deposits that can trap lint. Follow this with a second hot water cycle using half a cup of baking soda to neutralize odors and provide additional cleaning power.
For HE machines with hidden or integrated filters, consult your owner’s manual for specific cleaning instructions. Some require professional service for filter access, while others have special cleaning modes that help flush the system.
Deep Cleaning Methods for Stubborn Buildup
When regular cleaning isn’t enough, deep cleaning methods can restore your washing machine’s performance. For severely clogged filters that won’t come clean with brushing alone, create a cleaning solution using equal parts white vinegar and hot water. Soak the filter for 30 minutes, then scrub with a brush.
Enzyme-based cleaners designed for washing machines can break down organic buildup that regular cleaning might miss. These products are particularly effective against the biofilm that can form from fabric softener and detergent residue mixed with lint.
For mineral deposits that trap lint, use a descaling solution or citric acid. Mix two tablespoons of citric acid powder with a cup of hot water, apply to the filter and housing, let sit for 15 minutes, then scrub and rinse thoroughly. This is especially important in hard water areas where mineral buildup is common.
Consider running an empty hot water cycle with two cups of white vinegar after deep cleaning the filter. This helps flush any loosened debris from the system and prevents it from redepositing on clothes during the next wash.
Preventing Future Lint Buildup
Prevention is always easier than removal when it comes to lint management. Start by sorting your laundry more carefully. Wash lint-producing items like towels and flannel separately from lint-attracting items like corduroy and synthetic fabrics. This simple step significantly reduces lint transfer between garments.
Shake out clothes before loading them into the washer. This removes loose lint and debris that would otherwise end up in your machine’s filter. It takes just seconds per item but makes a noticeable difference in filter cleanliness.
Use the appropriate amount of detergent for your water hardness and load size. Excess detergent doesn’t improve cleaning but does leave residue that combines with lint to form stubborn buildup. If you see suds during the rinse cycle, you’re using too much detergent.
Check pockets thoroughly before washing. Tissues, paper, and other materials disintegrate during washing and create massive amounts of debris that clogs filters quickly. One forgotten tissue can create more “lint” than several loads of normal laundry.
Consider using dryer balls or washing balls that help agitate clothes and loosen lint during the cycle. These simple tools improve washing action and help prevent lint from settling back onto clothes.
For households with pets, pre-treat pet bedding and heavily fur-covered items. Use a lint roller or damp rubber glove to remove excess pet hair before washing. This prevents overwhelming your filter with pet fur, which is particularly difficult to remove once wet.
Creating a Maintenance Schedule
Establishing a regular maintenance schedule ensures your washing machine continues performing optimally. For average households doing 5-7 loads per week, clean accessible lint filters monthly. Mark it on your calendar or set a phone reminder to make it routine.
Front-loader pump filters typically need cleaning every three months, though this varies based on usage. If you wash heavily soiled items, pet bedding, or lots of towels, increase frequency to every 6-8 weeks.
Perform a deep cleaning twice yearly, ideally during spring and fall cleaning. This includes not just the filter but also the door seals, detergent dispensers, and drum interior. These bi-annual deep cleans prevent long-term buildup that regular maintenance might miss.
Keep a maintenance log near your washing machine. Note when you clean filters, what you found, and any concerns. This history helps identify patterns and can be valuable if you need professional service.
After major washing projects like cleaning rugs, comforters, or especially dirty items, check and clean filters even if it’s not scheduled. These heavy-duty loads can clog filters quickly and impact subsequent wash cycles.
Troubleshooting Common Lint-Related Problems
Excessive Lint on Clothes After Washing
If you’re still seeing lint on clothes after cleaning the filter, several other factors might be responsible. First, check if you’re overloading the machine. Overcrowding prevents proper water circulation and lint removal. Reduce load sizes and see if the problem improves.
Examine your water temperature settings. Cold water doesn’t dissolve detergent as effectively, leading to residue that traps lint. Try using warm water for heavily soiled loads or those prone to lint production.
Your washer’s drum might need cleaning. Lint can stick to soap scum on the drum walls and redeposit on clothes. Run an empty hot water cycle with washing machine cleaner or two cups of white vinegar to clean the drum thoroughly.
Water Not Draining Properly
If water remains in the drum after a cycle, your pump filter is likely clogged beyond what normal cleaning addresses. Check the drain hose for kinks or clogs. Disconnect it carefully (have buckets ready) and inspect for blockages.
Sometimes lint bypasses the filter and clogs the pump itself. This requires professional service in most cases, but you might prevent it by ensuring the filter is properly seated and the seal is intact.
Error Codes Related to Drainage
Modern machines display error codes when drainage issues occur. Common codes like “F02,” “Sud,” or “5E” often indicate filter or drainage problems. After cleaning the filter, reset the machine by unplugging it for one minute before trying again.
If error codes persist after thorough filter cleaning, check your home’s drainage system. A partially clogged household drain can cause backpressure that triggers error codes even with clean filters.
When to Seek Professional Help?
While most lint-related maintenance is DIY-friendly, certain situations require professional assistance. If you can’t locate your machine’s filter after consulting the manual and searching thoroughly, a technician can help identify and access it.
Persistent drainage problems despite clean filters indicate deeper issues. Internal pump damage, control board problems, or major clogs in inaccessible areas need professional diagnosis and repair.
If you notice water leaking after filter cleaning, especially from front-loaders, stop using the machine immediately. A damaged seal or improperly reinstalled filter can cause significant water damage. Professional assessment prevents costly flooding.
Strange noises during the drain cycle, even after filter cleaning, suggest mechanical problems. Grinding, squealing, or loud humming sounds often indicate pump motor issues that require replacement.
For machines under warranty, always check coverage before attempting repairs beyond basic filter cleaning. Many warranties become void if you disassemble components beyond what’s outlined in the user manual.
Special Considerations for Different Brands
Each manufacturer has unique design philosophies that affect lint management. Samsung washing machines often feature debris filters accessible from the front panel, but some models hide them behind the kick plate. Their self-clean cycle is particularly effective when used monthly.
LG washers frequently use pump filters similar to other front-loaders, but their TurboWash models may have additional filtration systems. LG’s TubClean cycle should be run monthly along with regular filter maintenance. If you’re interested in LG’s advanced features, you might want to read our detailed washing machine review that covers their innovative TurboWash 360 technology.
Whirlpool and Maytag machines, often sharing design elements, may have filters in traditional locations for older models but self-cleaning systems in newer ones. Their Clean Washer cycle with affresh tablets helps maintain the entire system, not just the filter.
GE washing machines vary significantly between model lines. Their traditional top-loaders often have easily accessible agitator filters, while newer models might lack user-serviceable filters entirely. Check your specific model number for accurate information.
Bosch washing machines, being European designs, typically have excellent pump filters but require more frequent cleaning due to their water-efficient design. The filter access is usually straightforward, but the filters themselves might be more complex with multiple components.
Environmental Impact and Disposal
Proper lint disposal matters more than most people realize. Washing machine lint contains microplastics from synthetic fabrics that shouldn’t enter water systems. Never flush lint down toilets or drains – always dispose of it in regular trash.
Consider composting natural fiber lint from cotton, wool, and linen items. This lint breaks down naturally and adds carbon to compost bins. However, separate it from synthetic lint, which won’t decompose and can contaminate compost.
Installing a washing machine lint trap on your discharge hose provides extra filtration, preventing microfibers from entering wastewater. These aftermarket filters require regular cleaning but significantly reduce environmental impact.
When replacing filters, check if your old filter can be recycled. Many plastic components are recyclable, though you’ll need to clean them thoroughly first. Metal mesh filters might be accepted at scrap metal facilities.
Cost-Benefit Analysis of Regular Maintenance
Regular lint filter maintenance costs virtually nothing but provides substantial returns. The time investment – about 10 minutes monthly – prevents expensive repairs that can cost hundreds of dollars. A clogged pump replacement, for instance, typically runs $150-$350 including labor.
Energy savings from a clean, efficient machine add up over time. A washing machine working harder due to clogged filters uses 15-20% more energy per cycle. For a family doing 300 loads annually, this translates to noticeable utility bill increases.
Clothing longevity improves with proper lint management. Clothes stay newer-looking longer when they’re not constantly covered in lint or subjected to extended wash cycles from poor drainage. This delays replacement costs for your wardrobe.
Machine lifespan extends significantly with regular maintenance. A well-maintained washer lasts 10-13 years on average, while neglected machines might fail after 5-7 years. The difference represents thousands of dollars in delayed replacement costs.
Frequently Asked Questions
How often should I clean my washing machine’s lint filter?
For typical household use (5-7 loads per week), clean accessible lint filters monthly. Front-loader pump filters need cleaning every 2-3 months. Increase frequency if you wash pet items, heavily soiled clothes, or notice reduced performance.
My washing machine manual says it’s self-cleaning. Do I still need to clean anything?
Yes, even self-cleaning machines benefit from periodic maintenance. While they might not have traditional lint filters, they usually have pump filters that catch debris. Run monthly cleaning cycles and check accessible filters every few months.
Why is there still lint on my clothes after I’ve cleaned the filter?
Several factors cause persistent lint: overloading the machine, mixing lint-producing and lint-attracting fabrics, using too much detergent, or washing in cold water exclusively. The drum itself might need cleaning, or you might need to adjust your laundry habits.
Can I use chemical drain cleaners to clear lint from my washing machine?
Never use chemical drain cleaners in your washing machine. These harsh chemicals can damage rubber seals, pumps, and other components. Stick to washing machine-specific cleaners, vinegar, or enzyme-based products designed for appliances.
Is it normal for the pump filter to smell bad when I clean it?
Yes, some odor is normal, especially if the filter hasn’t been cleaned recently. The combination of lint, soap residue, and trapped water creates an environment for bacteria growth. Regular cleaning prevents severe odor buildup.
What’s the difference between lint and debris filters?
These terms are often used interchangeably. Both catch fibers from clothes, but debris filters (typically in front-loaders) also catch larger items like coins, buttons, and hair pins. The cleaning process is similar regardless of the name.
Should I clean the filter more often if I have pets?
Absolutely. Pet hair significantly increases filter clogging. If you regularly wash pet bedding or clothes covered in pet hair, double your cleaning frequency. Consider pre-treating heavily furred items before washing.
Can a clogged lint filter damage my washing machine?
Yes, severely clogged filters force pumps to work harder, potentially causing premature failure. They also cause poor drainage, which can trigger error codes, incomplete cycles, and even water backup that damages electronic components.
Conclusion
Regular lint removal from your washing machine is a simple task that pays enormous dividends in machine performance, clothing care, and long-term savings. By following the comprehensive steps outlined in this guide, you’ll keep your washer running efficiently while avoiding costly repairs and premature replacement.
Remember that every washing machine is different, so take time to understand your specific model’s requirements. Whether you have a traditional top-loader with an agitator filter or a modern front-loader with a pump filter, the principles remain the same: regular cleaning prevents problems.
Start implementing these maintenance practices today. Set up your cleaning schedule, gather your supplies, and make lint filter cleaning part of your regular home maintenance routine. Your washing machine will reward you with years of reliable service, and your clothes will come out cleaner and lint-free every time.
Taking care of your washing machine through proper lint management isn’t just about maintaining an appliance – it’s about ensuring your investment continues providing value for years to come. With the knowledge you’ve gained from this guide, you’re equipped to handle any lint-related challenge your washing machine might present.