We’ve all been there – a knocked-over candle, a fallen curling iron, or a stray ember from the fireplace, and suddenly you’re staring at an ugly burn mark on your carpet. I remember the sinking feeling when I accidentally dropped my soldering iron on my living room carpet last year. The good news? Most carpet burns can be repaired successfully with the right approach and a bit of patience.
Whether you’re dealing with a tiny cigarette burn or a more substantial damage from a hot iron, this guide will walk you through three proven repair methods that actually work. I’ve tested these techniques personally and consulted with professional carpet installers to bring you the most effective solutions. The key is matching the repair method to your specific damage type – and I’ll show you exactly how to do that.
What makes carpet burn repair surprisingly manageable is that you’re usually working with a small, localized area. Unlike stains that can spread or structural damage that affects large sections, burns are contained problems with clear boundaries. This means that with basic tools and about an hour of your time, you can make most burns virtually disappear.
In this guide, we’ll cover everything from assessing your damage to executing professional-quality repairs. You’ll learn when a simple trim job will suffice, when you need to patch, and when it’s time to call in the pros. Plus, I’ll share the cost breakdowns so you can make an informed decision about whether DIY repair makes sense for your situation.
Assessing Your Carpet Burn Damage
Before you grab any tools, you need to understand what you’re dealing with. Not all carpet burns are created equal, and the repair method that works for a surface singe won’t help with a hole burned through to the padding. I’ve found that taking five minutes to properly assess the damage saves hours of wasted effort on the wrong repair approach.
Start by examining the burn in good lighting. Run your fingers gently over the area – can you feel the carpet backing? Are the fibers completely gone, or just melted at the tips? The depth and size of the damage will determine your repair strategy. Surface burns where only the fiber tips are melted or discolored are the easiest to fix. You’re looking at a 15-minute repair job with just scissors and maybe some adhesive.
Medium burns that have damaged fibers down to the base but haven’t penetrated the backing require more work. These typically result from items like cigarettes or small embers that sat on the carpet briefly. You’ll need to remove the damaged fibers completely and either graft new ones or use a patching technique. Plan on 30-45 minutes for these repairs.
Deep burns that have gone through the backing and potentially into the padding underneath are the most challenging. These often come from hot irons, space heaters, or fireplace accidents. If you can see the floor or padding through the hole, you’re looking at a full patch job. While still doable as a DIY project, these repairs take more skill and about an hour to complete properly.
The type of carpet you have also matters significantly. Berber and loop carpets are notoriously difficult to repair invisibly because of their distinctive pattern. Cut pile carpets like Saxony or frieze are much more forgiving. If you have an expensive wool carpet or an antique rug, I’d strongly recommend consulting a professional – the risk of making things worse isn’t worth the money saved on DIY.
Tools and Materials You’ll Need
Having the right tools makes the difference between a professional-looking repair and an obvious patch job. I’ve repaired dozens of carpet burns over the years, and these are the tools that consistently deliver the best results. The good news is that most of these items cost less than $50 total, and you probably already have some of them.
For all repair methods, you’ll need sharp scissors (fabric scissors work best), a vacuum cleaner, and tweezers. These are your basic toolkit. The scissors must be sharp – dull scissors will fray the carpet fibers and make your repair obvious. I learned this the hard way on my first repair attempt. Tweezers help you work with individual fibers and remove debris from the burn site.
For Small Surface Burns
- Nail scissors or small fabric scissors
- Fine-grit sandpaper (220 grit)
- Carpet adhesive or clear-drying craft glue
- Toothpick for glue application
- Small brush or comb
For Patching Large Burns
- Utility knife with fresh blades
- Carpet tucker or broad putty knife
- Double-sided carpet tape or carpet adhesive
- Seaming iron (optional but helpful)
- Carpet remnant for patch material
- Measuring tape and marker
For Fiber Grafting
- All items from surface burn list
- Small amount of matching carpet (from closet or hidden area)
- Latex adhesive specifically for carpet
- Small paintbrush
- Wax paper
You can find most of these supplies at any hardware store. Carpet adhesive runs about $8-12 for a small bottle, which is enough for multiple repairs. Double-sided carpet tape costs around $10-15 per roll. If you need to buy everything from scratch, budget about $40-50. Compare that to professional repair costs of $150-300, and the DIY route becomes very attractive.
Method 1: Fixing Small Surface Burns
Small surface burns – typically from cigarettes, incense, or brief contact with hot objects – are the most common and fortunately the easiest to repair. I use this method for burns smaller than a dime where the damage is primarily to the fiber tips. The whole process takes about 15-20 minutes, and the results are usually invisible once the carpet is vacuumed.
First, vacuum the area thoroughly to remove any loose debris or charred material. This gives you a clean workspace and helps you see the actual extent of the damage. Using your small scissors, carefully trim away all the burned or melted fibers. Cut at an angle following the natural lay of the surrounding carpet. The goal is to remove damaged material while maintaining a natural-looking carpet height.
Here’s a trick I learned from a professional carpet installer: use fine-grit sandpaper to gently buff away any remaining discoloration on the fiber tips. Work in a circular motion with very light pressure. You’re not trying to sand down to the backing, just remove the topmost damaged layer. This step alone can sometimes completely eliminate the visual evidence of a burn.
If the burned area now appears noticeably lower than the surrounding carpet, you’ll need to add some fibers. Find an inconspicuous area of carpet – inside a closet, under furniture that never moves, or along a baseboard – and carefully cut a small amount of fibers. Use tweezers to harvest these donor fibers, cutting them at the base.
Apply a small amount of carpet adhesive to the burned area using a toothpick. You want just enough to hold the new fibers, not so much that it soaks through to the backing. Place the donor fibers into the adhesive, arranging them to match the surrounding carpet’s direction and density. Use tweezers to position them precisely – this attention to detail makes the repair invisible.
Let the adhesive dry according to the manufacturer’s instructions (usually 2-4 hours). Once dry, use scissors to trim the new fibers to match the exact height of the surrounding carpet. Give it a final vacuum, and you’re done. I’ve used this method on at least ten burns in my own home, and guests have never spotted the repairs.
Method 2: Patching Large Burn Holes
When you’re dealing with a burn larger than a quarter or one that’s gone completely through the carpet, patching is your best option. This method requires more precision but gives excellent results when done correctly. I recently used this technique on a friend’s carpet where a space heater had left a golf ball-sized burn, and even knowing where the patch was, it’s hard to spot.
The key to successful patching is getting a donor piece of carpet that matches perfectly. If you have leftover carpet from installation, you’re golden. Otherwise, take a piece from inside a closet, under a radiator, or another hidden spot. You’ll need a donor piece slightly larger than the damaged area.
Start by creating a template of the damaged area. Place a piece of paper over the burn and trace around it, adding about a quarter-inch margin. Cut out this template and test its fit – it should cover all the damage with a small border of good carpet. This template becomes your guide for both removing the damaged section and cutting the replacement patch.
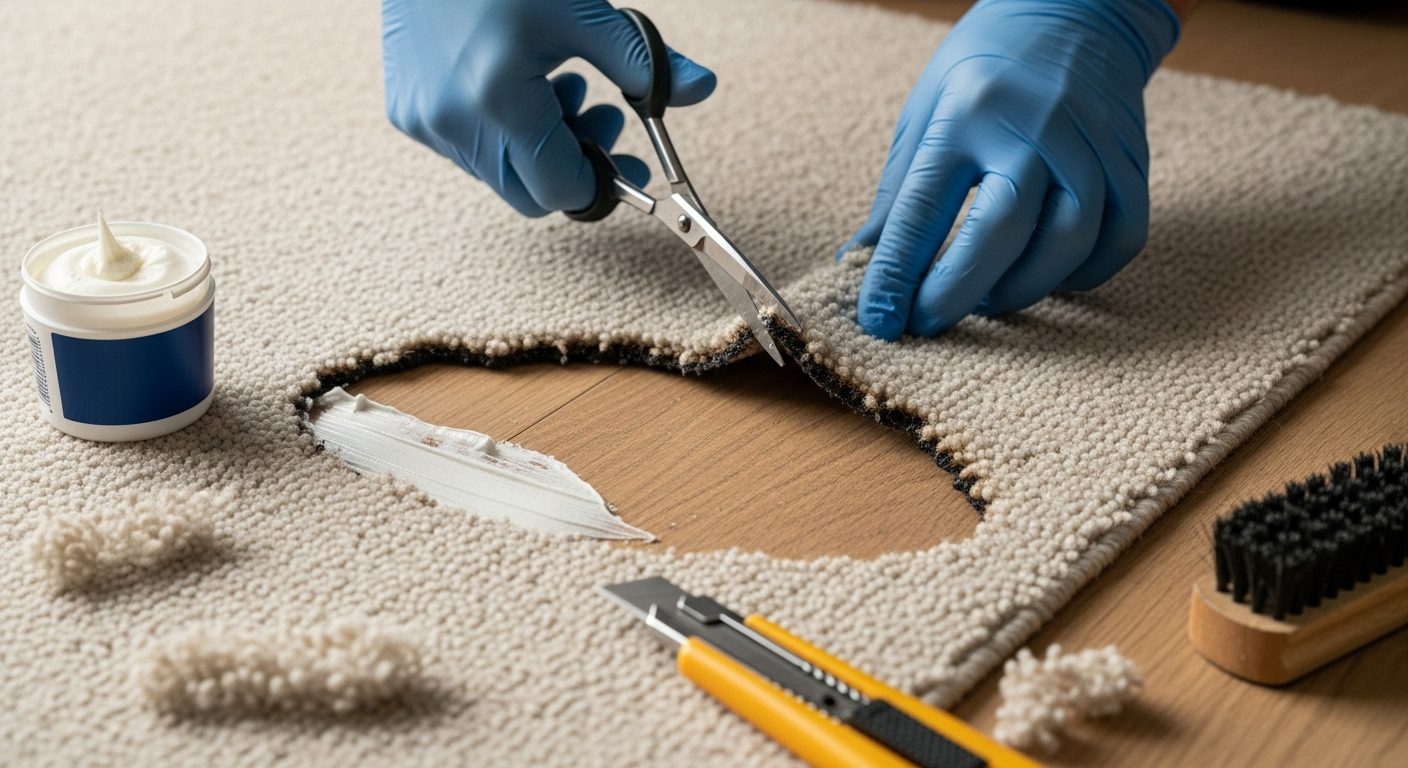
Using a sharp utility knife, cut through the carpet following your template. Make sure to cut only the carpet, not the padding underneath. Work slowly and use a straightedge if possible – clean, straight cuts are easier to hide. Remove the damaged piece and vacuum out any debris from the hole.
Now place your template on the donor carpet, paying careful attention to the pile direction. Carpet has a natural grain, and your patch must match this exactly or it will be obvious. Run your hand across the carpet – it feels smooth in one direction and rough in the other. Mark the smooth direction on both the patch and the area around the hole.
Cut your patch using the same careful technique. Test the fit before applying any adhesive – the patch should drop in easily without forcing but shouldn’t have gaps around the edges. If it’s too tight, carefully trim the edges. If it’s too loose, you might need to cut a new patch.
Apply double-sided carpet tape to the padding, extending slightly under the edges of the existing carpet. Alternatively, you can use carpet adhesive, but tape gives you more working time and is easier for beginners. Lower the patch into place, ensuring the pile direction matches. Press firmly around all edges, using a carpet tucker or broad putty knife to blend the seams.
The final step is crucial: blend the seams by teasing out fibers from both the patch and the surrounding carpet. Use a fork or comb to intermingle these fibers across the seam line. Vacuum in different directions to further blend the repair. With patience, the patch becomes virtually invisible.
Method 3: Fiber Grafting Technique
Fiber grafting sits between the simple trim method and full patching. It’s perfect for burns that have damaged a significant amount of fiber but haven’t created a hole through the backing. This technique takes more time and patience than the others, but it produces the most invisible repairs for medium-sized burns.
The process is similar to a hair transplant – you’re moving healthy fibers from a hidden area to replace the damaged ones. I’ve used this method on burns from hair straighteners and fallen candles where the damage was too extensive for simple trimming but didn’t warrant a full patch.
Begin by completely removing all damaged fibers from the burn site. Use scissors to cut them as close to the backing as possible without damaging the backing itself. You want to create a clean, bare spot ready to receive new fibers. Vacuum thoroughly to remove all loose material.
Select your donor site carefully. The back corner of a closet is ideal, or under a piece of furniture that never moves. You need an area about twice the size of the burn to harvest enough fibers. Using sharp scissors, cut fibers at their base, collecting them in a small container. Sort them by length – you’ll want to use similar lengths together for a more natural look.
Apply carpet adhesive to the burn site in small sections, working with about a square inch at a time. Using tweezers, insert the donor fibers into the adhesive, placing them at the same angle as the surrounding carpet. This is tedious work – expect to spend 20-30 minutes just on fiber placement for a silver dollar-sized burn.
Work from the outside edges toward the center, slightly overlapping your fiber placement with the existing carpet. This creates a gradual transition that’s much harder to detect than a sharp line. Pack the fibers fairly densely – you can always trim them down, but you can’t add more once the adhesive dries.
After the adhesive has fully dried (give it at least 4 hours), trim the grafted fibers to match the surrounding carpet height. Use scissors at an angle, following the natural carpet pattern. The beauty of this method is that the grafted fibers will blend perfectly since they’re from the same carpet.
When to Call a Professional?
While I’m a big advocate for DIY repairs, there are times when calling a professional is the smart choice. If the burn is larger than your hand, goes through multiple layers including the padding, or is in a highly visible area of an expensive carpet, professional repair might be worth the investment.
Professional carpet repair typically costs between $150 and $300 per burn, depending on size and location. They have specialized tools like carpet stretchers and seaming irons that create truly invisible repairs. They also carry insurance, which matters if you’re dealing with a rental property or a carpet under warranty.
Consider professional help if you’re dealing with pattern-matched carpets like Berber or any carpet with a distinct pattern. These require precise alignment that’s extremely difficult to achieve without experience. The same goes for carpets with unusual materials like silk or specialty synthetic blends.
To find a qualified professional, look for certified carpet repair specialists rather than general carpet cleaners. Check with local carpet retailers – they often maintain lists of trusted repair professionals. Get multiple quotes and ask to see before-and-after photos of similar repairs.
Preventing Future Carpet Burns
After going through the repair process once, you’ll want to prevent future burns. The most common causes in my experience are candles, cigarettes, fireplace embers, irons, and portable heaters. Simple preventive measures can save you hours of repair work.
For candles, always use stable holders with wide bases and place them on non-flammable surfaces. Never put candles directly on carpet, even in holders. Consider switching to LED candles in carpeted rooms – modern ones look surprisingly realistic.
If you use portable heaters, maintain at least three feet of clearance from carpets and use models with automatic tip-over shutoffs. For fireplaces, install a quality screen and keep a non-flammable hearth rug in front. These small investments prevent most carpet burn incidents.
Regular carpet maintenance also helps. Well-maintained carpet is more resistant to damage and easier to repair if burns do occur. Vacuum regularly, address spills immediately, and have carpets professionally cleaned annually to maintain their resilience.
Frequently Asked Questions
Can all carpet burns be repaired?
Most carpet burns can be repaired, but the visibility of the repair depends on the carpet type, burn size, and repair quality. Burns smaller than a golf ball usually repair invisibly. Larger burns or those in patterned carpets might show slight evidence of repair even when professionally done.
How much does professional carpet burn repair cost?
Professional repair typically costs $150-300 per burn, though prices vary by region and damage extent. Some companies charge a minimum service fee of around $200 regardless of burn size. DIY repairs cost $10-50 in materials.
Will the repair be visible?
When done correctly, small to medium repairs are usually invisible. The key factors are matching pile direction, fiber density, and color. Repairs in high-traffic areas might become more visible over time as the carpet wears differently.
How long does a carpet burn repair last?
A properly executed repair should last as long as the surrounding carpet. I have repairs from five years ago that still look perfect. The adhesive creates a permanent bond, and grafted or patched sections wear at the same rate as the original carpet.
Can I use carpet dye to fix burns?
Dye only works if the fibers are discolored but not destroyed. If the fibers are melted or missing, dye won’t help. For light scorch marks where fibers remain intact, carpet dye can be effective, but color matching is challenging.
What about carpet burns from friction?
Friction burns (like from furniture sliding) are different from heat burns. These usually just mat down fibers without destroying them. Try steam cleaning or using a carpet rake to restore the pile before attempting repairs.
Should I attempt repair on rental property carpet?
Check your lease first. Some landlords prefer professional repairs for insurance reasons. If you do attempt DIY repair, document the damage with photos first and keep receipts for materials in case questions arise later.
How do I match the carpet pile direction?
Run your hand across the carpet – it feels smooth in one direction and rougher in the other. The smooth direction is the pile direction. Always align patches and grafted fibers to match this direction or the repair will be obvious.
Final Thoughts
Carpet burn repair isn’t as daunting as it might seem. With the right approach and a bit of patience, you can make most burns virtually disappear. The key is choosing the appropriate method for your specific damage – simple trimming for surface burns, patching for larger holes, or fiber grafting for everything in between.
Remember that your first repair might not be perfect, and that’s okay. Even a slightly visible repair looks better than a burned hole, and your skills will improve with practice. I botched my first attempt at patching, but by my third repair, I was achieving near-professional results.
The $50 you invest in tools and materials will pay for itself with just one repair. Keep your carpet repair kit handy – once word gets out that you can fix carpet burns, friends and family will be calling for help. It’s a valuable skill that saves money and extends carpet life significantly.
Take your time, follow the steps carefully, and don’t hesitate to practice on a scrap piece of carpet first. With these techniques in your DIY arsenal, you’ll never have to live with unsightly carpet burns again.