I’ve been cleaning washing machines for over a decade, and I can tell you that a dirty top load washer is more than just an eyesore – it’s a breeding ground for bacteria, mold, and unpleasant odors that can transfer to your clothes. After helping countless homeowners tackle their grimy washers, I’ve developed a foolproof system that works every time.
What really opened my eyes was when I cleaned my neighbor’s 5-year-old washer that had never been properly maintained. The amount of soap scum, fabric softener residue, and mysterious gunk we removed was shocking. Her clothes started coming out fresher, and the musty smell that had plagued her laundry room completely disappeared. That’s when I realized how crucial regular washer maintenance really is.
In this comprehensive guide, I’ll walk you through everything you need to know about cleaning your top load washer, from quick monthly maintenance to deep cleaning sessions that restore your machine to like-new condition. We’ll cover both natural cleaning methods using items you already have at home and commercial options for tougher jobs.
Why You Need to Clean Your Top Load Washer Regularly?
Your washing machine might clean your clothes, but it doesn’t clean itself. Every load leaves behind microscopic debris, detergent residue, and moisture that create the perfect environment for problems to develop. According to research from the National Center for Biotechnology Information, household washing machines can harbor significant bacterial populations, particularly in the biofilms that form in damp areas.
The Hidden Dangers Lurking in Your Washer
Think about what goes into your washing machine: dirty clothes covered in sweat, food particles, pet hair, and outdoor contaminants. Add to that the constant moisture and warm temperatures, and you’ve created an ideal breeding ground for microorganisms. The University of Wisconsin Housing department emphasizes that leaving laundry sitting in the washer even briefly can accelerate mildew growth.
I once helped a family whose toddler developed persistent skin irritation. After ruling out detergent allergies, we discovered their washer was harboring mold colonies under the agitator. A thorough cleaning solved the problem within days. This experience taught me that washer cleanliness directly impacts family health.
Beyond health concerns, a dirty washer simply doesn’t perform well. Soap scum buildup reduces cleaning efficiency, meaning you’re using more detergent and energy to get clothes clean. The Department of Energy notes that proper maintenance, including regular cleaning, helps maintain your washer’s energy efficiency throughout its lifespan.
Signs Your Washer Needs Immediate Attention
Over the years, I’ve learned to spot the warning signs that a washer needs cleaning. The most obvious is odor – that musty, mildew smell that hits you when you open the lid. But there are subtler indicators too. If your clothes come out with mysterious spots or don’t smell fresh despite using fabric softener, your washer needs attention.
Visual inspection reveals a lot. Check under the lid’s rim for black or gray buildup. Look at the agitator’s base for soap scum rings. Examine the fabric softener dispenser for thick, gooey residue. These accumulations don’t just look bad; they’re actively contaminating every load you wash.
Performance issues also signal cleaning needs. If your washer takes longer to fill, doesn’t drain completely, or leaves clothes excessively wet after the spin cycle, mineral deposits and debris might be clogging internal components. Regular cleaning prevents these problems from escalating into expensive repairs.
Essential Cleaning Supplies: Natural vs. Commercial Options
Before we start scrubbing, let’s gather the right supplies. I always tell people they have two main paths: natural cleaning with household items or commercial products designed specifically for washers. Both work well, and I’ll help you choose what’s best for your situation.
Natural Cleaning Arsenal
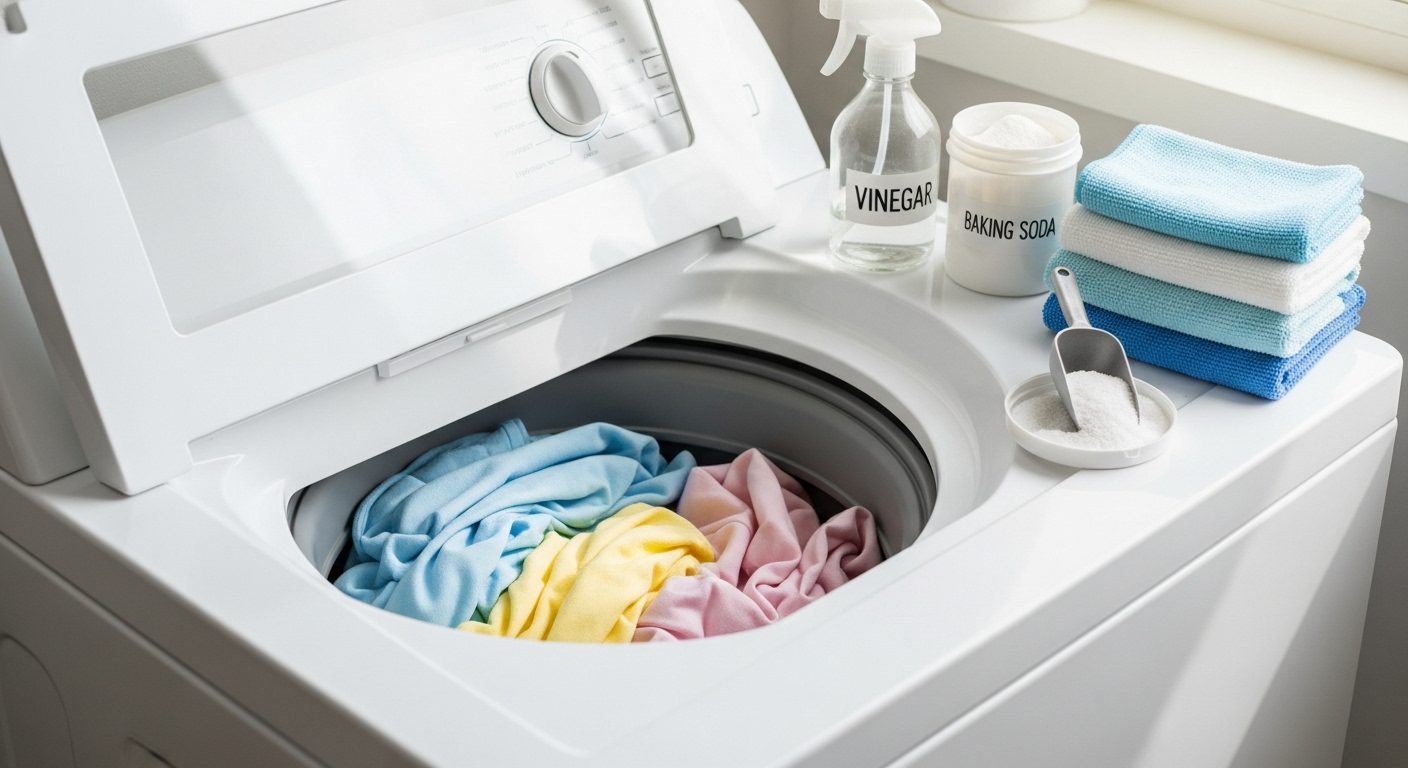
My go-to natural cleaning combination is white vinegar and baking soda. This dynamic duo costs pennies per cleaning and tackles 90% of washer grime effectively. White vinegar, with its acidic properties, dissolves mineral deposits, soap scum, and kills mold spores. I buy it by the gallon and use it throughout my home.
Baking soda brings different strengths to the table. Its mild abrasive action scrubs away stuck-on grime without scratching surfaces. It also neutralizes odors rather than just masking them. When combined with vinegar, the fizzing reaction helps lift debris from hard-to-reach areas.
For tougher situations, I occasionally use chlorine bleach. While not technically “natural,” it’s a household staple that effectively kills mold and sanitizes. However, never mix bleach with other cleaners – this creates dangerous fumes. I learned this lesson the hard way in my early cleaning days and ended up evacuating my laundry room.
Commercial Cleaning Products
Sometimes natural methods need backup. Commercial washer cleaners like Affresh tablets are formulated specifically for washing machine buildup. These products often contain stronger acids and surfactants that tackle stubborn residue more aggressively than natural alternatives.
The convenience factor is significant. Drop in a tablet, run a cycle, and you’re done. No measuring, no multiple steps. For busy households or those dealing with hard water issues, commercial cleaners offer consistent results with minimal effort.
However, commercial products come with trade-offs. They’re more expensive per cleaning, contain synthetic chemicals some people prefer to avoid, and generate plastic packaging waste. I recommend them for quarterly deep cleans rather than monthly maintenance.
Tools You’ll Need
Beyond cleaning agents, you’ll need some basic tools. An old toothbrush becomes invaluable for scrubbing crevices and around the agitator. Microfiber cloths are perfect for wiping down surfaces without leaving lint. A small bucket helps when you need to soak removable parts.
For safety, rubber gloves protect your hands from cleaning solutions and grimy buildup. If you’re sensitive to smells or using stronger chemicals, a face mask helps. Good ventilation is crucial – I always open windows or run a fan when cleaning.
Step-by-Step Guide: Monthly Maintenance Cleaning
Let me walk you through my monthly maintenance routine that keeps washers fresh and functioning optimally. This process takes about an hour of actual work time, though the cleaning cycles run longer. I usually start this on a Saturday morning when I’m doing other household tasks.
Step 1: Empty and Inspect
Start with an completely empty washer. Remove any clothes, including that sock hiding under the agitator (we all have one). Take out any removable parts like the fabric softener dispenser or lint trap. These components often harbor the worst buildup.
Now conduct a thorough inspection. Run your hand along the top rim where the lid closes – you’ll likely feel a slimy film. Check the agitator’s base for soap rings. Look inside the bleach and fabric softener dispensers for thick residue. This inspection tells you where to focus your efforts.
Step 2: Clean Removable Parts
Soak removable dispensers in hot water mixed with 2 cups of vinegar. Let them sit while you work on the main tub. For stubborn buildup, add a tablespoon of dish soap to the soaking solution. After 30 minutes, scrub with an old toothbrush, paying attention to small holes and crevices.
The agitator cap (if removable) deserves special attention. Twist it off according to your model’s instructions – some pull straight up, others twist counterclockwise. You’ll probably find a disgusting accumulation underneath. Soak it in the vinegar solution and scrub thoroughly before replacing.
Step 3: Run the Vinegar Cycle
Pour 4 cups of white vinegar directly into the wash tub. Set your washer to the hottest water setting and the longest cycle available. Let the washer fill and agitate for about a minute to mix the vinegar throughout the system.
Here’s the crucial part: stop the cycle and let the vinegar solution sit for an hour. This dwelling time allows the acid to break down mineral deposits and soap scum. I use this hour to clean other parts of my laundry room or tackle different chores.
After the hour, close the lid and let the cycle complete. The vinegar will have loosened debris throughout the system, and the rinse cycle flushes it away. You might see particles in the water – that’s exactly what we want to remove.
Step 4: The Baking Soda Scrub
Once the vinegar cycle completes, sprinkle 1 cup of baking soda around the wash tub. Using a damp microfiber cloth or soft brush, scrub the interior surfaces. Focus on water line marks and any visible stains. The mild abrasive action removes stubborn deposits the vinegar couldn’t dissolve.
Don’t forget often-missed areas. Scrub under the rim where the lid meets the tub. Clean around the agitator’s base where grime accumulates. Wipe down the lid’s underside, which often develops mold spots from condensation.
Step 5: Final Rinse Cycle
Run another complete cycle with hot water only – no cleaning agents. This final rinse removes any remaining vinegar, baking soda, and loosened debris. It’s tempting to skip this step, but it ensures no cleaning residue transfers to your next load of laundry.
While this cycle runs, replace all the parts you removed earlier. Make sure dispensers are completely dry before reinstalling to prevent immediate mold regrowth. Check that everything clicks securely into place.
Deep Cleaning for Neglected Washers
Sometimes monthly maintenance isn’t enough. If you’ve inherited a used washer, neglected cleaning for years, or face stubborn mold problems, you need the deep cleaning protocol. This intensive process takes most of a day but can resurrect even the grimiest machines.
When Deep Cleaning Becomes Necessary?
I recently helped a friend who bought a house with a 10-year-old washer that had never been cleaned. The smell hit us before we even opened the lid. Black mold covered the underside of the lid, thick soap scum coated every surface, and the agitator was practically glued in place with dried fabric softener. This washer needed serious intervention.
Deep cleaning is also necessary after specific incidents. If you’ve washed extremely dirty items like muddy sports uniforms or pet bedding, residual contamination might require extra attention. Flooding or sewer backups that affect your washer definitely warrant deep cleaning before use.
The Intensive Cleaning Process
Start by removing absolutely everything removable. This includes the agitator itself on many models – consult your manual for instructions. Some agitators have a bolt underneath the cap, others use a special tool. Taking it out reveals years of accumulated grime underneath.
Create a strong cleaning solution with 1 gallon of hot water, 2 cups of vinegar, and 1/2 cup of dish soap. Use this to soak all removed parts for at least 2 hours. For severe mold, add 1/4 cup of bleach to the solution, but ensure good ventilation and never mix bleach with other chemicals.
While parts soak, tackle the tub interior. Make a paste with baking soda and just enough water to create a spreadable consistency. Apply this paste to all surfaces, especially stained or moldy areas. Let it sit for 30 minutes before scrubbing with a stiff brush. The combination of baking soda’s abrasiveness and its odor-neutralizing properties works wonders.
For the area under where the agitator sits, you’ll likely find the worst accumulation. I use an old butter knife wrapped in cloth to scrape out packed-in gunk. Then apply the baking soda paste liberally and let it work while you clean other components.
Addressing Mold and Mildew
Mold requires special attention because simply cleaning visible growth doesn’t eliminate spores. After removing visible mold with the baking soda paste, spray affected areas with straight white vinegar and let it sit for an hour. The acidity kills mold at the root and prevents regrowth.
For persistent mold, carefully use a diluted bleach solution (1 part bleach to 10 parts water). Spray it on affected areas, let it sit for 10 minutes, then scrub and rinse thoroughly. Always ensure proper ventilation and never mix bleach with vinegar or other cleaners.
After scrubbing, run an empty hot water cycle with 2 cups of bleach to sanitize the entire system. Let the washer fill, agitate for a few minutes, then stop the cycle and let it sit for an hour before completing. This kills any remaining mold spores throughout the machine.
Cleaning the Outer Tub and Hidden Areas
The space between the wash basket and outer tub harbors significant grime. While you can’t access it directly, you can clean it using a special technique. Fill the washer with hot water to its highest level, add 4 cups of vinegar and 1 cup of baking soda, then run a complete cycle.
For washers with a self-clean cycle, use it after the manual cleaning for extra thoroughness. These cycles use higher water temperatures and special agitation patterns to clean areas you can’t reach manually. Run it with either commercial cleaner or 2 cups of vinegar.
Maintenance Schedule and Prevention Tips
After investing time in cleaning your washer, you want to keep it fresh. I’ve developed a maintenance schedule that prevents major buildup and extends the time between deep cleanings. Following this routine, my own washer stays fresh-smelling and spot-free with minimal effort.
Daily Habits That Make a Difference
Small daily actions prevent big problems. After your last load each day, leave the lid open for at least an hour. This allows moisture to evaporate, preventing mold growth. I prop mine open with a towel if I have curious pets or children who might investigate.
Remove wet laundry promptly – ideally within an hour of cycle completion. Leaving wet clothes sitting creates a humid environment perfect for mildew. Set a timer if you tend to forget. I’ve trained myself to respond immediately to the end-of-cycle buzzer.
Wipe down the lid’s underside and rim weekly with a vinegar-dampened cloth. This 30-second task prevents the black mold spots that commonly develop from condensation. Pay special attention to the lid’s seal where moisture accumulates.
Weekly and Monthly Tasks
Every week, run an empty hot water rinse cycle. This flushes out detergent residue and prevents buildup. Add 2 cups of vinegar monthly for extra cleaning power. Mark it on your calendar – I do mine the first Saturday of each month.
Check and clean the lint filter weekly if your model has one. Located near the agitator or on the tub’s side wall, these filters catch lint and debris. A clogged filter reduces efficiency and can cause drainage problems. Rinse it under hot water and scrub with an old toothbrush if needed.
Inspect and wipe dispensers weekly. Liquid fabric softener is particularly problematic, leaving thick residue that harbors bacteria. If you use liquid softener, dilute it with equal parts water before adding to the dispenser. This reduces buildup significantly.
Seasonal Deep Cleaning
Schedule deep cleanings quarterly or biannually depending on usage. Heavy-use households with children or athletes need quarterly cleaning. Average households can extend to every six months. Mark these dates at the beginning of each year.
Spring and fall are ideal deep cleaning times. Spring cleaning removes winter’s heavy-duty laundry residue from coats and blankets. Fall cleaning prepares for increased indoor time and holiday guests. I combine washer cleaning with other seasonal maintenance tasks.
Troubleshooting Common Washer Problems
Even with regular cleaning, washers sometimes develop specific issues. I’ve encountered nearly every problem imaginable, and most trace back to cleanliness and maintenance. Let me share solutions that have worked consistently over the years.
Eliminating Persistent Odors
That musty smell plaguing your laundry room usually comes from mold and mildew growing in hidden areas. Standard cleaning might not reach these colonies. Start with the intensive bleach treatment I described earlier, then follow with a vinegar cycle to neutralize any remaining odors.
Sometimes odors persist despite cleaning. Check your home’s water quality – sulfur or iron in well water creates distinct smells. Installing a whole-house filter or using washing soda in each load helps. Hard water also contributes to odor by leaving mineral deposits that trap bacteria.
Drainage issues cause serious odor problems. If water doesn’t drain completely, stagnant water breeds bacteria. Check that your drain hose isn’t kinked or clogged. Pour hot water mixed with vinegar down the drain pipe monthly to prevent buildup. A plumber might be needed for serious clogs.
Dealing with Visible Mold and Stains
Black or gray spots on the lid’s underside or tub walls indicate mold growth. After removing visible mold with bleach solution, prevent regrowth by improving ventilation. A small fan directed at the open washer accelerates drying. Some people install bathroom exhaust fans in laundry rooms for this purpose.
Rust stains require different treatment. These orange-brown marks come from metal components corroding or high iron content in water. Commercial rust removers work, but I prefer safer alternatives. Make a paste with cream of tartar and lemon juice, apply to stains, let sit for 30 minutes, then scrub and rinse.
Blue or green stains usually indicate copper pipe corrosion. While cleaning removes stains, addressing the underlying plumbing issue prevents recurrence. These stains also appear when using too much detergent with soft water – reduce detergent amounts if this applies.
Fixing Poor Cleaning Performance
When clothes come out dingy or still dirty, don’t immediately blame your detergent. Washer cleanliness directly impacts cleaning effectiveness. Soap scum and mineral deposits prevent proper water flow and agitation. A thorough cleaning often restores performance better than switching detergents.
Check water temperature too. Many modern washers default to cold water for energy efficiency, but hot water cleans better and helps dissolve detergent completely. Run occasional hot water loads, especially for heavily soiled items or when doing your monthly maintenance wash.
Overloading prevents proper cleaning regardless of washer condition. Clothes need room to move freely for effective washing. I follow the palm test – if I can’t fit my palm between clothes and the tub’s top, it’s overloaded. Better to run two properly loaded cycles than one stuffed load.
Safety Considerations and Important Warnings
Cleaning a washer seems straightforward, but certain safety issues deserve emphasis. I’ve seen accidents happen when people get careless with chemicals or skip basic precautions. Your safety matters more than a clean washer.
Chemical Safety Guidelines
Never, ever mix different cleaning chemicals. Bleach and vinegar create chlorine gas, which burns lungs and can be fatal in enclosed spaces. Bleach and ammonia produce chloramine vapor, equally dangerous. If you accidentally mix chemicals, evacuate immediately and ventilate thoroughly before returning.
Always read product labels completely. Some commercial washer cleaners shouldn’t be used with certain washer types or materials. Follow dilution instructions exactly – stronger isn’t always better and can damage components or create harmful fumes.
Protect yourself during cleaning. Wear rubber gloves to prevent skin irritation from cleaning solutions and gross buildup. Use eye protection when working with bleach or commercial cleaners. Ensure adequate ventilation by opening windows or running fans. If you feel dizzy or nauseous while cleaning, get fresh air immediately.
Electrical and Mechanical Safety
Never attempt to clean electrical components with water or cleaning solutions. The control panel should only be wiped with a slightly damp cloth. Water entering electronic controls causes malfunctions or electrical hazards.
When removing agitators or other mechanical parts, follow manufacturer instructions exactly. Forcing parts risks breaking plastic components or injuring yourself. Some agitators require special tools – don’t improvise with inappropriate implements that might slip and cause injury.
Be cautious with older washers. Models from the 1990s or earlier might contain components that shouldn’t contact certain chemicals. Rubber seals and hoses degrade over time, making them vulnerable to harsh cleaners. When in doubt, stick to mild solutions like vinegar and baking soda.
Specific Instructions for Popular Washer Brands
While general cleaning principles apply universally, each manufacturer has specific recommendations. I’ve worked with all major brands and learned their quirks. Understanding your brand’s particulars ensures effective cleaning without voiding warranties.
Whirlpool and Maytag
These sister brands share similar designs and cleaning requirements. Most models feature a Clean Washer cycle specifically for maintenance. Run this cycle monthly with either Affresh tablets or 2 cups of vinegar. The cycle uses higher water temperatures and extends soak time for thorough cleaning.
Whirlpool’s agitators often have a removable fabric softener dispenser on top. Twist counterclockwise to remove, then pull the agitator cap straight up. Clean underneath monthly where significant buildup accumulates. Some models have a removable agitator – check your manual for the specific removal procedure.
GE and Samsung
GE washers typically have lint filters requiring regular cleaning. Located on the rim or center agitator, these filters clog quickly with pet hair or lint-producing fabrics. Clean weekly for optimal performance. GE’s newer models include a Basket Clean setting that should be used monthly.
Samsung top loaders often feature advanced technology requiring gentler cleaning. Avoid harsh chemicals that might damage sensors or special coatings. Samsung recommends their specific cleaning products, but vinegar and baking soda work safely. Many Samsung models have self-clean cycles that run for 1-4 hours, thoroughly cleaning all surfaces.
LG and Other Brands
LG’s top loaders frequently include TubClean cycles designed for maintenance without chemicals. The cycle superhots water and uses special spinning patterns to clean the tub. Run it monthly, adding vinegar for extra cleaning power if needed. LG’s agitators usually don’t remove, so focus cleaning efforts on accessible areas.
Budget brands like Amana or Roper might lack self-clean cycles but respond well to standard cleaning methods. These workhorses often prove easier to clean due to simpler designs with fewer crevices. Focus on regular maintenance since these models might not withstand harsh chemicals as well as premium brands.
Frequently Asked Questions
How often should I clean my top load washer?
For average households doing 8-10 loads weekly, monthly cleaning maintains freshness and performance. Heavy-use households should clean every 2-3 weeks. If you notice odors, visible buildup, or decreased performance, clean immediately regardless of schedule. I tell clients that consistency matters more than frequency – regular monthly cleaning prevents major problems better than sporadic deep cleaning.
Can I use vinegar and baking soda together in the same cycle?
While mixing vinegar and baking soda creates an impressive fizzing reaction, they actually neutralize each other’s cleaning properties when combined directly. Use them separately for maximum effectiveness. Run a vinegar cycle first to dissolve mineral deposits and soap scum, then use baking soda as a scrubbing agent. This sequential approach leverages each ingredient’s strengths without reducing effectiveness.
Is bleach safe for my washer?
Bleach safely sanitizes most washers when used properly. Use regular chlorine bleach, not color-safe or splash-less varieties that contain additives. Never exceed recommended amounts – typically 2 cups for a cleaning cycle. Ensure good ventilation and run an extra rinse cycle afterward. Avoid bleach if you have a septic system, as it kills beneficial bacteria needed for waste breakdown.
Why does my washer smell worse after cleaning?
Sometimes cleaning dislodges hidden buildup that releases odors before being flushed away. This temporary worsening actually indicates the cleaning is working. Run an additional hot water rinse cycle to flush loosened debris. If odors persist after 2-3 rinse cycles, you might need professional service to address drainage issues or clean inaccessible areas.
Can I use dishwasher tablets to clean my washing machine?
While some people swear by this method, I don’t recommend it. Dishwasher tablets contain different surfactants and enzymes designed for dishes, not fabric residue. They might produce excessive suds that damage your washer or leave residue affecting future laundry loads. Stick to products designed for washers or proven natural alternatives like vinegar.
How do I know if my washer is really clean?
A clean washer has no visible residue, operates quietly without unusual noises, and leaves no odor with the lid open. Clothes come out fresh-smelling and truly clean. Run a white towel through a hot water cycle alone – if it comes out dingy or smelly, continue cleaning. The sniff test works too – a clean washer smells neutral or slightly fresh, never musty or sour.
Should I leave the lid open or closed between uses?
Leave it open whenever possible to promote air circulation and moisture evaporation. This simple habit prevents most mold and mildew problems. If you have safety concerns with children or pets, crack it open just an inch or two – enough for airflow but not enough for investigation. Only close it completely if necessary, and try to air it out daily.
What’s causing black flakes on my clean clothes?
Black flakes usually come from mold or deteriorating rubber components. First, run the deep cleaning protocol to eliminate mold. If flakes persist, inspect door seals, hoses, and gaskets for deterioration. Older washers might need component replacement. These flakes can also come from fabric softener buildup breaking loose – another reason to clean dispensers regularly.
Can hard water affect how often I need to clean?
Absolutely. Hard water leaves mineral deposits that accumulate faster than soft water residue. If you have hard water, increase cleaning frequency to every 2-3 weeks. Consider installing a water softener or using washing soda in loads to reduce mineral buildup. You might need stronger cleaning solutions or longer soak times to dissolve stubborn mineral deposits.
Is it worth calling a professional cleaner?
Professional cleaning makes sense for severely neglected washers or when DIY methods fail. Professionals have specialized tools and chemicals for reaching inaccessible areas. They can also identify mechanical issues affecting performance. However, regular maintenance prevents the need for professional intervention. Consider it if you’re buying a used washer or inheriting one in unknown condition.
Conclusion: Maintaining Your Investment
A clean washing machine isn’t just about aesthetics or eliminating odors – it’s about protecting your investment, ensuring your family’s health, and getting genuinely clean clothes. Through years of maintaining my own washers and helping others rescue neglected machines, I’ve seen the dramatic difference proper cleaning makes.
The techniques I’ve shared come from real experience dealing with every type of washer problem imaginable. From barely-used guest room washers to machines handling a sports team’s uniforms, the same principles apply: regular maintenance prevents major problems, natural cleaners work for most situations, and attention to detail makes the difference.
Start with monthly maintenance cleaning using the vinegar and baking soda method. It’s inexpensive, safe, and effective for 90% of situations. Save intensive deep cleaning for quarterly sessions or when specific problems arise. Most importantly, develop daily habits like leaving the lid open and removing wet clothes promptly.
Remember that every washer is different. What works perfectly for your neighbor’s machine might need adjustment for yours. Pay attention to how your washer responds to cleaning and adjust techniques accordingly. Water quality, usage patterns, and detergent choices all influence cleaning needs.
Don’t let washer cleaning become overwhelming. Breaking it into manageable monthly sessions makes it just another household task rather than a dreaded chore. Set reminders, gather supplies in advance, and combine it with other cleaning tasks for efficiency. Your future self will thank you when clothes consistently come out fresh and clean.
The small investment of time and effort in regular washer maintenance pays dividends through extended machine life, better cleaning performance, and healthier laundry. No more mysterious odors, no more dingy clothes, no more wondering if your washer is actually cleaning or just spreading germs around.
Take action today. Open your washer lid and take a good look inside. Run your finger along the rim. Check under the agitator cap. If you see or feel buildup, it’s time to clean. Start with the basic monthly maintenance routine, then establish a regular schedule. Your washer works hard for you – return the favor with proper care.