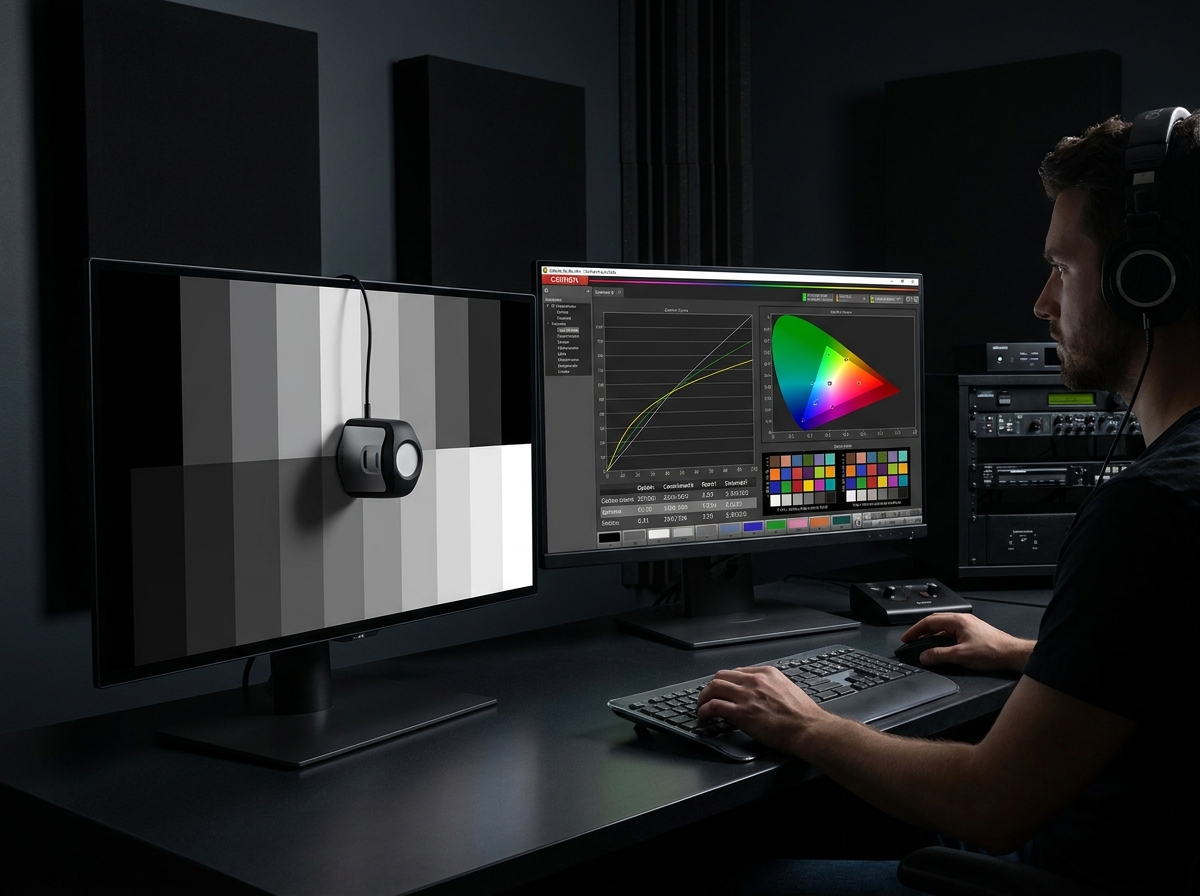
If you have invested in an OLED display, you already know the panel technology delivers deep blacks and vibrant colors. But out of the box, your TV or monitor is running factory settings designed to look good on a bright showroom floor, not in your actual viewing environment. That is where learning how to calibrate OLED gamma curves using Calman Studio Pro changes everything.
Gamma calibration adjusts how your display maps input signal levels to actual screen brightness. When the gamma curve is off, shadows crush into solid black, highlights lose texture, and skin tones drift toward unnatural hues. A proper calibration fixes all of that by bringing your display in line with industry color standards.
In this guide, I will walk you through the entire process from start to finish. We will cover what gamma curves are, which equipment you need, how to prepare your OLED display, and the complete SDR, HDR, and Dolby Vision calibration workflows inside Calman Studio Pro. I have spent hundreds of hours calibrating displays, and I want to share the techniques that consistently produce the best results.
Whether you are a home theater enthusiast chasing reference-grade image quality, a colorist who needs accurate monitors for client work, or a photographer proofing prints, this guide will give you everything you need to get professional calibration results at home.
What Is OLED Gamma Calibration?
Gamma calibration is the process of adjusting your display’s luminance response curve so that it accurately reproduces the brightness levels intended by content creators. Think of it as a translation layer between the video signal your TV receives and the actual light it puts out.
The gamma curve, technically called the Electro-Optical Transfer Function or EOTF, defines the mathematical relationship between input signal and output brightness. A gamma value tells you how much the display compresses or expands different parts of the brightness range. This affects everything from shadow detail in dark movie scenes to the smoothness of sky gradients.
OLED panels present unique calibration challenges and advantages compared to LCD displays. Because each pixel generates its own light, OLED displays can achieve true black at the pixel level. This means gamma calibration on OLED directly affects near-black performance, where every small adjustment is visible. Factory calibrations on OLED panels tend to be decent but not precise. The manufacturer optimizes for average viewing conditions, not your specific room.
Professional-grade calibration using Calman Studio Pro measures your specific panel’s actual output and applies corrections through 1D LUTs (Look-Up Tables) for grayscale and gamma, plus 3D LUTs for full color management. The result is a display that tracks the target gamma curve with precision that factory settings simply cannot match.
Understanding Gamma Curves: 2.2 vs 2.4 vs BT.1886
Choosing the right gamma target is one of the most important decisions in any calibration, and it is a topic that causes genuine confusion in every forum I visit. Let me break down each option clearly so you can make the right call for your setup.
Gamma 2.2: The General-Purpose Standard
Gamma 2.2 has been the default target for display calibration for decades. It was originally designed for CRT monitors in typical office lighting. At gamma 2.2, the brightness response is slightly flatter than power-law 2.4, which means shadow areas appear a bit brighter and the overall image looks slightly lifted.
I recommend gamma 2.2 for OLED displays viewed in rooms with moderate ambient light. If you have some lighting in your viewing space, maybe a bias light behind the TV or a dim lamp, gamma 2.2 prevents shadow detail from getting lost. It is also a solid choice if you watch a mix of content types including broadcast TV, streaming, and gaming in a living room environment.
Gamma 2.4: The Dark Room Choice
Gamma 2.4 applies a steeper curve that renders shadows darker and gives the image more perceived contrast and “pop.” For OLED displays in light-controlled rooms, this is typically the best choice. The true black capability of OLED combined with a 2.4 gamma curve produces images with exceptional depth and dimensionality.
Many home theater enthusiasts and professional calibrators prefer gamma 2.4 for movie watching on OLED. I have found it produces the most cinematic look in a dedicated theater room. However, be careful: if your room has any significant ambient light, gamma 2.4 can cause shadow details to disappear because your eyes adapt to the room brightness and lose sensitivity in the dark end.
BT.1886: The Reference Standard
BT.1886 is the International Telecommunication Union’s recommended gamma standard for broadcast content. Unlike a simple power curve, BT.1886 accounts for the actual black level of your display. It creates a gamma curve that starts from your measured black point and extends to peak white, maintaining consistent perceptual uniformity across the entire range.
For OLED panels, BT.1886 effectively behaves close to a pure power 2.4 curve because the black level is essentially zero. On an LCD with some light bleed, BT.1886 would produce a different shape. This is the most technically correct target for SDR content mastered to broadcast standards.
Which Gamma Should You Choose?
Here is my straightforward recommendation based on room conditions:
- Light-controlled room (dedicated theater): Use BT.1886 or gamma 2.4. Both produce nearly identical results on OLED. BT.1886 is technically more correct, and 2.4 is the practical equivalent.
- Moderate ambient light (living room with bias light): Use gamma 2.2. You will retain shadow detail while still getting good contrast performance from the OLED panel.
- Mixed usage (movies, gaming, daytime viewing): Calibrate two picture modes. One with BT.1886 for nighttime movie watching and another with gamma 2.2 for daytime use.
One thing I see people get wrong in forums is treating gamma selection as a one-size-fits-all decision. Your room environment is the primary factor, not personal preference. The gamma curve should compensate for your viewing conditions so that the image on screen matches the intent of the content creator.
Required Equipment for Calman Studio Pro Calibration
Before you open Calman Studio Pro, you need the right hardware. I have tested many combinations over the years, and here is what works reliably.
Colorimeter
A colorimeter measures the color and brightness output of your display. This is the essential measurement device for calibration.
The X-Rite i1Display Studio (formerly i1Display Pro) is the most popular colorimeter for Calman users. It offers fast measurement speed and solid accuracy. If you own a newer LG OLED, the Klein K-10A is faster and more precise, especially for near-black readings where OLED panels need the most attention. Portrait Displays also offers the C6-HDR2000, which is specifically designed for high-brightness HDR calibration.
Budget-conscious users sometimes start with the CalibRITE Display Pro HL, which provides good performance at a lower cost. However, for the most accurate OLED calibration, particularly in the near-black region, a higher-end colorimeter makes a measurable difference.
Pattern Generator
You need a way to send test patterns to your OLED display. Calman Studio Pro supports several approaches:
The built-in pattern generator in Calman sends patterns through your PC’s video output connected to the TV. This is the simplest method and works well for most users. For external pattern generation, the Murideo Six-G and AVFoundry VideoForge Pro are popular choices that connect directly to your display via HDMI, bypassing any PC video processing.
Some LG OLED models support pattern insertion directly through Calman via the TV’s service connection. This is the cleanest method because the patterns are generated internally by the display, eliminating any signal path variables.
Spectrophotometer (Optional but Recommended)
A spectrophotometer like the X-Rite i1Pro 3 or Konica Minolta CS-2000 provides more accurate color readings than a colorimeter. The standard workflow is to profile your colorimeter against a spectrophotometer first, creating a correction matrix. Then use the faster colorimeter for the actual calibration runs with improved accuracy.
If you do not have access to a spectrophotometer, Calman includes built-in correction profiles for many popular display types. Selecting the correct OLED correction profile in Calman significantly improves colorimeter accuracy even without a spectro.
Software and Cables
You need Calman Studio Pro (not Calman Home). The Studio Pro license unlocks AutoCal, advanced workflow customization, 3D LUT support, and full DDC control over compatible displays. A Windows PC or laptop running Windows 10 or later, a USB connection for your colorimeter, and optionally an Ethernet or serial connection for DDC control of your TV round out the requirements.
Make sure your PC connects to the same network as your display if you are using network-based control. For direct HDMI output from your PC to the display, use a high-speed HDMI cable capable of carrying the resolution and HDR signal you plan to calibrate.
Pre-Calibration Setup: Preparing Your OLED Display
This is the step most guides skip, and it is the reason many people get inconsistent results. Proper preparation takes 30 minutes and saves hours of frustration later.
Step 1: Warm Up the Display
Turn on your OLED TV or monitor and let it run for at least 60 minutes before taking any measurements. OLED panels stabilize as they reach operating temperature. Measuring a cold panel gives you readings that will drift significantly within the first hour. I usually turn the TV on, play a varied content loop, and set up the rest of my equipment while it warms up.
Step 2: Disable All Processing Features
Your OLED display comes with a host of image processing features that interfere with calibration measurements. Go through every setting and disable the following:
- Energy saving mode – reduces brightness and shifts color
- Auto-dimming / Automatic brightness limiter – the biggest source of measurement inconsistency on OLED
- Dynamic contrast – alters the gamma curve on the fly
- AI picture enhancement – modifies colors and sharpness dynamically
- Motion smoothing / TruMotion – can affect frame timing of test patterns
- Dynamic tone mapping – overrides your HDR calibration
- Gamma adjustment presets – set to default or 0 before calibration
On LG OLED models, you should also disable Real Cinema and set HDMI Deep Color to on for the input you are using. The goal is to give Calman a clean, unprocessed signal path to measure.
Step 3: Select the Correct Picture Mode
Choose the picture mode that Calman will calibrate. For most LG OLED models, ISF Expert (Dark Room) or Technicolor Expert modes provide the most accurate starting point. These modes unlock the full 10-point and 20-point grayscale and color management controls that Calman will adjust through DDC.
Set the backlight or OLED pixel brightness to your intended viewing level before starting. For SDR calibration, I typically set OLED pixel brightness between 35 and 50 depending on room light. Changing this value after calibration invalidates your results.
Step 4: Set Up Your Meter
Place your colorimeter flat against the center of the display. For contact meters, use the supplied counterweight or a meter stand to keep consistent pressure against the panel. The meter must be flush with no light leakage from the sides.
I always verify my meter placement by measuring a full white pattern first, then a full black pattern. If the white reading seems too low, the meter may not be seated properly. If the black reading is too high, ambient light may be leaking in around the sensor.
Step 5: Establish Baseline Measurements
Before making any adjustments, run Calman’s pre-calibration measurement on the uncalibrated display. This gives you a reference point so you can see exactly how much improvement the calibration provides. Save these readings. I have found that showing clients the before-and-after data is one of the most convincing ways to demonstrate the value of calibration.
How to Calibrate OLED Gamma Curves using Calman Studio Pro: SDR Workflow
This is the core of the guide. I will walk you through the complete SDR calibration workflow in Calman Studio Pro, with specific attention to gamma curve adjustment. Follow each step in order.
Step 1: Launch Calman and Select the SDR Workflow
Open Calman Studio Pro and create a new session. Select the SDR Calibration workflow from the template menu. Calman will guide you through the setup sequence, but knowing what to expect saves significant time.
In the session setup, select your display type as OLED and choose the specific brand and model if available. This loads the correct DDC communication profile. Connect your colorimeter through the Source Settings panel and select your pattern source.
Step 2: Set Your Target Gamma
In the Calman workflow, you will see a target gamma selection screen. Based on the guidance in the earlier section of this guide:
- For dark room calibration, select BT.1886
- For moderate light rooms, select Power Law 2.2
Calman displays the target gamma curve as a reference line on the gamma chart. Your goal during calibration is to make the measured gamma curve match this reference line as closely as possible across the entire brightness range.
Step 3: Calibrate the White Point (D65)
Before touching the gamma curve, set the correct white point. Calman will display a 100% white pattern and measure your display’s current white balance.
The target for SDR is D65, which corresponds to color temperature of approximately 6504K. In Calman’s grayscale chart, adjust the red and blue gain controls (2-point white balance) until the 100% white reading lands on the D65 target. The CIE chart should show the white point sitting directly on the D65 marker.
On LG OLED displays, these are the High (2-point) RGB gain controls. Adjust in small increments. Each adjustment affects the overall balance, so re-measure after each change. I typically get the white point within Delta E 0.5 before moving on.
Step 4: Grayscale Calibration (1D LUT)
With the white point set, move to the grayscale calibration. Calman measures a series of gray patterns from near-black to peak white and plots each point on the grayscale tracking chart.
Using Calman’s AutoCal feature, click AutoCal 1D Grayscale. Calman will automatically iterate through the grayscale points, adjusting the 10-point or 20-point white balance controls to bring each measurement point to the target. Watch the grayscale chart fill in as the green line (measured) converges with the white line (target).
For manual adjustment, use the 10-point white balance controls. Start at 100% and work down to 5%. At each point, adjust the red and blue offsets to minimize the Delta E. The goal is Delta E 2002 under 1.0 at every point, with under 0.5 being reference quality.
This is also where the gamma curve takes shape. The grayscale adjustments directly affect gamma tracking. After the grayscale calibration is complete, check the gamma chart. If you selected BT.1886, the measured gamma should track close to a 2.4 power curve with a smooth, consistent line from black to white.
Step 5: Color Management System Calibration
After grayscale and gamma are set, move to color accuracy. Calman measures the primary colors (red, green, blue) and secondary colors (cyan, magenta, yellow) against the Rec.709 color space target for SDR content.
Use the Color Management System (CMS) controls on your OLED display to adjust each color’s hue, saturation, and brightness. Calman shows each color as a point on the CIE chart. Drag each point toward its target triangle corner. AutoCal can handle this step as well if your display supports DDC color management.
On LG OLED models, the CMS controls are found in the advanced picture settings. Adjust red first, then green and blue, followed by the secondary colors. Each adjustment slightly affects the others, so plan to iterate through the colors at least twice.
Step 6: Verify the Complete SDR Calibration
Run a full verification pass through Calman. The software measures a comprehensive set of points and calculates your overall Delta E values. Look for these targets:
- Grayscale Delta E average: under 1.0
- Grayscale Delta E maximum: under 2.0
- Color Delta E average: under 1.5
- Gamma tracking: smooth curve within +/- 0.05 of target at all points
If any points exceed these targets, go back and fine-tune the specific areas that need attention. Often, one or two points at the extremes (5% and 10% stimulus) need a slight tweak to bring everything into line.
Save your calibration in Calman and also note the settings on your TV. Take screenshots of the Calman verification charts for your records. I keep a folder for each display I calibrate with dated screenshots, so I can track drift over time.
HDR Calibration Walkthrough with Calman Studio Pro
HDR calibration follows a different approach than SDR because HDR uses the ST.2084 PQ (Perceptual Quantizer) curve instead of a power-law gamma. The PQ curve is an absolute luminance standard, meaning each signal level maps to a specific brightness in nits. This makes HDR calibration fundamentally different from SDR gamma calibration.
Step 1: Select the HDR Workflow
In Calman Studio Pro, open a new session and select the HDR Calibration workflow. Configure your display for HDR mode. On LG OLED, select the HDR Cinema or HDR Technicolor picture mode.
Step 2: Set Peak Luminance
Calman will measure your OLED display’s peak luminance in HDR mode. OLED panels typically reach 600 to 800 nits peak on a 10% window, and this value becomes your calibration ceiling. Enter the measured peak luminance into Calman’s target settings.
Use a 10% window pattern for HDR measurements. This is a smaller pattern that only illuminates 10% of the screen area. OLED displays dim when large areas of the screen are bright due to Automatic Bright Limiting (ABL). The 10% window gives you the most accurate reading of actual peak capability.
Step 3: Measure the PQ Curve
Calman measures your display’s actual PQ curve against the ST.2084 reference. The PQ curve is much more complex than a simple power gamma because it maps absolute luminance values. A properly calibrated PQ curve means that a signal encoded for 100 nits actually produces 100 nits on your display.
Run Calman’s HDR grayscale measurement. The software plots your measured EOTF against the ST.2084 reference curve. Pay close attention to the shadow region (below 10% stimulus) and the highlight region (above 90% stimulus). OLED panels sometimes deviate in these areas.
Step 4: AutoCal HDR Grayscale
Use Calman’s AutoCal 1D Grayscale for the HDR workflow. Calman adjusts the HDR-specific white balance controls to bring the PQ curve into alignment. The process is similar to SDR but targets the ST.2084 EOTF instead of a power gamma.
If your display supports it, Calman can also create a 3D LUT for HDR. A 3D LUT corrects color accuracy across the entire brightness and color range simultaneously. This is more comprehensive than separate grayscale and CMS adjustments. AutoCal 3D LUT typically takes 30 to 60 minutes to complete.
Step 5: Verify Color Gamut
Check that your OLED panel correctly covers the DCI-P3 color gamut, which is the standard for HDR content. Most modern OLED displays cover 97% or more of DCI-P3. Calman plots the measured gamut against the target triangle on the CIE chart.
Do not worry if your display cannot hit the full BT.2020 gamut. No consumer OLED display covers the entire BT.2020 space. The important thing is that the colors within your display’s gamut are accurate. The display should correctly map input colors to the closest reproducible point within its actual gamut.
Dolby Vision Calibration with Calman Studio Pro
Dolby Vision is a dynamic HDR format that adjusts the image on a scene-by-scene or frame-by-frame basis using metadata embedded in the content. Calibrating Dolby Vision on OLED requires a slightly different approach because the TV’s built-in Dolby Vision processor handles most of the tone mapping.
Selecting the Right Dolby Vision Mode
On LG OLED displays, you will find multiple Dolby Vision picture modes. Select Dolby Vision Cinema or Dolby Vision Technicolor as your calibration target. These modes provide the most accurate starting point with the least aggressive processing.
Connect Calman and select the Dolby Vision workflow. You need a Dolby Vision-compatible pattern source, which means either an internal pattern generator via DDC or a compatible external pattern generator like the Murideo Six-G configured for Dolby Vision output.
Calibrating Dolby Vision Brightness and Tone Mapping
The key adjustments in Dolby Vision calibration are brightness, contrast, and tone mapping behavior. Calman measures the display’s response to Dolby Vision test patterns and shows how closely it tracks the Dolby Vision reference PQ curve.
Adjust the Dolby Vision Brightness control so that near-black detail is just visible without crushing. Then adjust the Dolby Vision Contrast to ensure highlights are not clipping. The Calman gamma chart for Dolby Vision should show a smooth curve that tracks the Dolby Vision target.
Dolby Vision calibration is inherently more limited than SDR or HDR10 because the TV’s Dolby Vision processor manages much of the image pipeline. Your calibration fine-tunes the parameters that the Dolby Vision engine uses, rather than directly controlling the full gamma curve.
Validation: How to Verify Your Calibration Results?
Calibration without verification is just guessing. After completing each calibration pass, you need to objectively confirm that your results meet reference standards.
Run a Full Verification Pass
Calman Studio Pro includes a dedicated verification mode. Select Verification from the workflow menu. Calman measures a larger set of test points than what was used during the calibration process. This reveals any areas where the calibration may look good on the specific points used during adjustment but deviate on intermediate values.
The verification report shows Delta E values for each measurement point, a summary of grayscale tracking accuracy, and an overall pass/fail assessment against your selected tolerance level.
Target Delta E Values
Here are the validation targets I use when calibrating OLED displays:
- Reference grade: Delta E 2002 under 1.0 for grayscale, under 2.0 for all colors
- Excellent: Delta E 2002 under 2.0 for grayscale, under 3.0 for all colors
- Good: Delta E 2002 under 3.0 for grayscale, under 4.0 for all colors
Most well-calibrated OLED displays using Calman Studio Pro achieve the “Excellent” tier. Getting to “Reference” grade requires patience, a good meter, and often multiple calibration passes to fine-tune the most stubborn measurement points.
Check Gamma Curve Smoothness
Look at the gamma tracking chart in Calman’s verification results. The measured curve should be smooth and continuous, not jagged or erratic. A bumpy gamma curve indicates that individual point adjustments are fighting each other. If you see spikes or dips in the curve, go back to the grayscale calibration and reduce the aggressiveness of your adjustments.
I always check the gamma chart at three scales: the full range from 0 to 100%, the shadow region from 0 to 30%, and the highlight region from 70 to 100%. Problems often hide in the shadow region on OLED displays because the absolute light levels are so low that measurement noise can cause apparent inconsistencies.
Compare Pre-Calibration vs Post-Calibration
This is where all your preparation pays off. Load the pre-calibration measurements you saved earlier alongside your current verification results. The visual difference on the Calman charts tells the whole story: a grayscale line that was crooked and off-target is now tracking straight and true, colors that missed their CIE targets now land precisely on the Rec.709 triangle, and the gamma curve hugs the reference line across the full brightness range.
The subjective difference on actual content is often dramatic. Movie scenes that looked crushed in the shadows now reveal hidden detail. Skin tones that had a green or blue cast look natural. Sky gradients that showed banding now transition smoothly.
Troubleshooting Common Calibration Issues
Even with careful preparation, things can go wrong. Here are the most common problems I encounter and how to fix them.
Inconsistent Results Between Calibration Runs
This is the number one complaint in calibration forums. You run the same calibration twice and get different results. The most common cause is auto-dimming still active on the OLED display. Go back through your TV settings and verify that every power-saving and auto-brightness feature is completely disabled.
Another cause is panel temperature variation. If you calibrate on a cold panel one day and a warm panel the next, readings will differ. Always warm up the display for at least 60 minutes. Room temperature changes can also affect results. Try to calibrate in consistent environmental conditions.
Meter Reading Errors
If your colorimeter shows inconsistent readings on the same test pattern, check the meter placement first. The sensor must be flat against the display with no gaps. Ambient light leaking in from the sides of the meter can cause elevated black readings and shifted color measurements.
Also verify that you have the correct correction profile selected in Calman. Using a correction profile designed for a different panel type will introduce systematic errors across all measurements. If you are unsure which profile to use, check Calman’s display database or consult the Portrait Displays documentation for your specific OLED model.
Calman Cannot Connect to the Display
DDC connection issues are common on first-time setups. Verify that your PC and display are on the same network if using IP control. For serial connections, check the COM port settings in Calman match your cable adapter. For LG OLED displays, ensure that LG Connect Apps is enabled in the TV’s network settings.
If Calman connects but cannot control specific adjustments, your display may not support DDC for that particular parameter. Check the Calman device support list to confirm which controls are available for your specific TV model.
Gamma Curve Not Responding to Adjustments
If you adjust the grayscale or gamma controls but the Calman readings do not change, the display may have a lock on the current settings. Some OLED displays lock the 20-point controls until the 2-point controls are set to specific default values. Try resetting the picture mode to factory defaults and starting the grayscale adjustment from scratch.
Another possibility is that you are in the wrong picture mode. Some modes, like Vivid or Standard, lock advanced calibration controls. Switch to ISF Expert or Cinema mode to unlock the full adjustment range.
Near-Black Banding After Calibration
OLED displays sometimes show banding in the darkest shades after calibration. This happens when the 10-point or 20-point grayscale adjustments are too aggressive in the low end. The fix is to reduce the size of your adjustments below 10% stimulus. Make smaller changes and re-measure after each one. Smoothness matters more than hitting the exact target at every point in the near-black region.
How to calibrate LG OLED with Calman?
To calibrate an LG OLED with Calman Studio Pro, first warm up your display for 60 minutes and disable all processing features including auto-dimming and energy saving. Launch Calman, select the SDR or HDR workflow, connect your colorimeter, and choose the LG OLED model from the display database. Set your gamma target to BT.1886 for dark rooms or 2.2 for moderate light. Use AutoCal to adjust the 1D grayscale, then calibrate the Color Management System for Rec.709 accuracy. Verify results with a full measurement pass targeting Delta E under 2.0 for grayscale.
How do you calibrate Display gamma?
Display gamma is calibrated by measuring the display’s luminance output at multiple stimulus levels using a colorimeter and calibration software like Calman Studio Pro. The software compares the measured luminance values against the target gamma curve (such as 2.2, 2.4, or BT.1886) and adjusts the display’s grayscale controls to bring the measured response into alignment. For OLED displays, this involves adjusting the 2-point and 10-point or 20-point white balance controls until the gamma tracking chart shows a smooth curve that matches the reference.
How to do Calman calibration?
A Calman calibration follows this sequence: (1) Connect your colorimeter and pattern source to Calman Studio Pro. (2) Select the appropriate workflow for your content type (SDR, HDR, or Dolby Vision). (3) Take pre-calibration measurements to establish a baseline. (4) Set the white point to D65 using 2-point white balance controls. (5) Run AutoCal 1D Grayscale to adjust gamma tracking across the full brightness range. (6) Calibrate the Color Management System for accurate primary and secondary colors. (7) Run a verification pass to confirm Delta E targets are met. (8) Save the calibration and record settings.
How much does it cost to get your TV professionally calibrated?
Professional TV calibration typically costs between $250 and $600 depending on your location, the calibrator’s experience, and the scope of work. A basic SDR calibration costs less than a full SDR plus HDR plus Dolby Vision calibration package. Purchasing Calman Studio Pro and a quality colorimeter requires a higher upfront investment but allows you to recalibrate as often as needed without recurring service fees.
Is Calman AutoCal worth it for OLED?
Yes, Calman AutoCal provides significant improvement over factory settings on OLED displays. AutoCal automates the tedious process of manually adjusting each grayscale point, which is especially valuable for the 20-point controls on modern LG OLED models. While a skilled manual calibration can achieve marginally better results at specific points, AutoCal delivers consistent, reference-quality results that most users cannot distinguish from a fully manual professional calibration.
What gamma setting should I use for OLED?
For OLED displays in a light-controlled room, use BT.1886 or gamma 2.4. These produce nearly identical results on OLED because the black level is essentially zero, and they deliver the most cinematic image quality. For rooms with moderate ambient light, use gamma 2.2 to preserve shadow detail. The correct gamma depends primarily on your room lighting conditions, not on the display itself.
Conclusion: Getting the Most from Your Calibrated OLED
Learning how to calibrate OLED gamma curves using Calman Studio Pro is one of the most impactful things you can do for your display’s image quality. A properly calibrated OLED panel reveals detail in shadows you never knew was there, renders skin tones with natural accuracy, and displays content exactly as the creator intended.
The process breaks down into clear stages: prepare your display, set the correct gamma target for your room, calibrate grayscale and color through the SDR workflow, then move to HDR and Dolby Vision. Validation after each step confirms your results meet reference standards.
Plan to recalibrate your OLED display every 12 to 18 months. OLED panels experience very gradual drift over time, and a fresh calibration keeps your display performing at its best. If you notice the image looking different after a firmware update, that is also a good time to run a verification pass and recalibrate if needed.
The combination of Calman Studio Pro’s automated tools and your understanding of gamma curves, meter placement, and display preparation puts professional-grade calibration within reach. Take your time on the first calibration, and each subsequent one will go faster as you develop familiarity with the workflow and your specific display.

![How to Clean a Laptop Screen Without Damaging It in [cy]](https://www.guidespot.com/wp-content/uploads/2026/07/featured-update-44590-1783188935088-370x245.jpg "How to Clean a Laptop Screen (2026): The Ultimate Safe Display Guide")