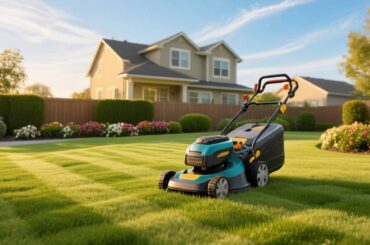
Nothing kills your Saturday lawn care plans faster than an electric lawn mower not starting when you pull it out of the garage. I’ve been there, standing in the driveway with a half-dead battery or a mysterious silence where the motor hum should be.
Electric lawn mowers have become the go-to choice for homeowners who want quieter operation, zero emissions, and lower maintenance than gas models. But when your electric lawn mower refuses to start, the troubleshooting process differs completely from traditional gas engines. No spark plugs to check, no fuel lines to clear, and no pull cords to yank until your shoulder hurts.
In this guide, you’ll learn exactly why your electric lawn mower won’t start and how to fix it yourself. We’ll cover battery-powered and corded models, walk through symptom-specific troubleshooting, and explain when you can handle the repair versus when it’s time for professional service or a replacement.
Common Reasons Your Electric Lawn Mower Won’t Start
Electric mowers fail to start for specific reasons tied to their electrical systems. Understanding these common culprits helps you diagnose the problem faster.
Dead or depleted battery is the most frequent cause of starting failures in cordless models. Battery voltage drops below the threshold needed to engage the motor controller, leaving you with either complete silence or a flashing indicator light.
Safety switch misalignment prevents the electrical circuit from completing. Modern electric mowers have multiple interlock systems that must all engage properly before the motor receives power.
Tripped thermal overload breaker stops the motor from receiving current after overheating conditions. This safety feature protects the motor from permanent damage but requires a manual reset.
Blown fuse interrupts the electrical path between battery and motor. Fuses protect the wiring and controller from damage but need replacement when they blow.
Power connection issues affect corded models specifically. Damaged extension cords, faulty outlets, or loose plug connections all prevent proper current flow.
Quick Diagnostic Checklist
Before diving into detailed troubleshooting, run through this 5-minute checklist:
- Check battery charge level or cord connection
- Verify safety bar is fully depressed
- Look for flashing indicator lights
- Inspect blade for obstruction
- Try a different outlet (corded models)
This simple process eliminates the most common causes without any tools or disassembly.
Corded vs Cordless: Different Starting Issues
Your troubleshooting approach depends entirely on whether you own a corded or battery-powered electric mower. Each type has unique failure modes that require different diagnostic steps.
Corded Electric Mower Starting Problems
Corded mowers draw power directly from your home’s electrical system. When they won’t start, the issue usually traces back to power delivery rather than internal components.
Extension cord problems rank as the top cause. Undersized cords create voltage drop that prevents motor engagement. Your mower needs a 12-gauge or heavier cord for runs over 50 feet.
GFCI outlet tripping occurs when moisture enters the electrical system. Wet conditions, damp grass clippings, or morning dew can trigger ground fault protection that cuts power.
Damaged power cord on the mower itself creates intermittent or complete power loss. Inspect the entire length for cuts, kinks, or exposed wire.
Circuit breaker overload happens when multiple high-draw devices share the same circuit. Electric mowers typically draw 12-15 amps, which can trip breakers if your garage also runs power tools or refrigerators on the same line.
Battery-Powered Mower Starting Problems
Battery mowers introduce additional complexity with their power storage and management systems. The battery, charger, and motor controller all play roles in starting failures.
Battery cell degradation reduces voltage output over time. After 3-5 years of regular use, lithium-ion batteries lose capacity and may not deliver enough current to start the motor.
Temperature effects significantly impact battery performance. Cold batteries below 40°F deliver reduced voltage. Hot batteries above 100°F trigger thermal protection that prevents starting.
Charger malfunction leads to partially charged batteries that seem full but lack starting power. Test with a multimeter or try a different charger if available.
Battery contact corrosion creates resistance that blocks current flow. The metal contacts between battery and mower can oxidize, especially after storage or damp conditions.
Troubleshooting by Symptom
Specific symptoms point to particular failure modes. Matching your mower’s behavior to these categories speeds up diagnosis and repair.
Makes No Sound at All
Complete silence when you press the start button or pull the bail handle indicates a power delivery problem upstream from the motor.
Step 1: Verify power source. For cordless models, remove and reseat the battery. Check indicator lights on both battery and charger. For corded models, test the outlet with a lamp or other device.
Step 2: Test safety switches. The handle bar must be fully engaged against the handle. The safety key must be inserted completely. Some models also require the grass bag to be properly attached.
Step 3: Check the fuse. Many electric mowers have an inline fuse near the battery compartment or motor housing. Remove and inspect for a broken filament.
Step 4: Inspect battery terminals. Clean any corrosion with a pencil eraser or fine sandpaper. Ensure the battery locks firmly into place with audible clicks.
Clicks or Hums But Won’t Start
Audible clicking or humming indicates the electrical system is partially working but the motor cannot engage. This symptom narrows the problem to specific components.
Blade obstruction is the most common cause. A jammed blade prevents the motor from turning, causing the controller to click or hum as it attempts engagement.
To clear a blade obstruction:
- Remove the safety key and battery (or unplug corded models)
- Tip the mower on its side with the air filter facing up
- Wear thick gloves and remove grass clippings or debris
- Try rotating the blade manually to ensure free movement
Thermal overload tripping causes a single click followed by silence. The breaker detects overheating and cuts power to protect the motor.
Low battery voltage produces a rapid clicking sound as the controller attempts to engage but cannot maintain power. This is common with partially charged batteries showing false “full” indicators.
Motor controller failure creates a humming sound without mechanical engagement. The controller receives power but cannot send proper current to the motor windings.
Starts Then Stops Immediately
Brief operation followed by shutdown suggests either overheating protection or voltage collapse under load.
Battery voltage sag occurs when old or damaged batteries cannot sustain current draw. The motor starts, voltage drops below threshold, and the controller shuts down.
Overheating protection activates when motor temperature rises too quickly. This can happen in thick grass, hot weather, or when air vents are clogged.
Safety interlock intermittent failure causes sudden stops when vibration or movement temporarily opens a switch contact. Check all safety switch connections for tightness.
Grass bag full sensor on some models stops operation when the collection bag reaches capacity. Empty the bag and restart.
Battery and Power System Checks
Battery-powered mowers require systematic testing of the entire power chain from charger to motor contacts.
Battery Voltage Testing
A multimeter provides definitive answers about battery condition. Set your multimeter to DC voltage and touch the probes to the battery contacts.
Reference voltages for common battery platforms:
- 20V/40V systems: Should read 20.0V+ at rest, 18.0V minimum under load
- 56V/60V systems: Should read 56.0V+ at rest, 52.0V minimum under load
- 80V systems: Should read 80.0V+ at rest, 75.0V minimum under load
Voltages significantly below these readings indicate battery replacement is needed.
Terminal Cleaning Procedure
Corroded terminals create resistance that blocks current flow. Clean them using this safe method:
Remove the battery and inspect both battery contacts and mower contacts. Look for green or white oxidation buildup.
Use a pencil eraser to gently rub the contact surfaces. The abrasive rubber removes oxidation without damaging the metal.
For heavy corrosion, apply a small amount of contact cleaner spray. Avoid sandpaper which can remove protective plating.
Reinstall the battery and test operation before proceeding to other diagnostics.
Charger Verification
Faulty chargers provide false confidence by showing “fully charged” indicators on depleted batteries.
Test your charger by timing a full charge cycle. Most lithium-ion batteries require 60-120 minutes for a complete charge from empty.
Check for charging indicator behavior. Healthy batteries show a progression from red (charging) to green (charged) or flashing to solid.
Feel the battery temperature during charging. Slight warming is normal. Excessive heat indicates battery or charger malfunction.
If available, test the battery in a different compatible charger to isolate the problem.
Battery Indicator Interpretation
Understanding your battery’s communication helps diagnose issues faster.
Flashing red typically indicates low charge, thermal protection, or battery fault. Solid red usually means charging in progress.
Flashing green often signals near-full charge or cell balancing in progress. Solid green indicates ready to use.
Rapid flashing patterns usually indicate a battery management system error that requires battery replacement or reset.
Safety Switch and Interlock System Inspection
Modern electric mowers incorporate multiple safety switches that must all engage before the motor receives power. These interlock systems prevent accidental starts but can frustrate troubleshooting when they malfunction.
Handle Bar Safety Switch
The bail handle or safety bar must be depressed against the main handle to complete the electrical circuit. This “dead man’s switch” stops the blade instantly if you release your grip.
Check the handle bar by pressing it firmly against the handle. You should hear or feel a slight click as the switch engages.
Inspect the cable that connects the handle to the switch mechanism. Look for fraying, kinks, or disconnections.
Test the switch with a multimeter set to continuity. With the bail handle depressed, the switch should show closed circuit (beep or 0 resistance).
Blade Engagement Lever
Some mowers require a separate lever or button to engage the blade after the motor starts. This two-step system prevents accidental blade activation.
Verify the engagement lever moves freely through its full range. Stiff or stuck levers may not activate the internal switch.
Check for debris or grass clippings interfering with lever movement. Clean the mechanism thoroughly.
Safety Key Verification
The safety key (also called a key switch or safety insert) breaks the electrical circuit when removed. This prevents children or unauthorized users from starting the mower.
Remove the key and inspect for damage, cracks, or bent contacts. Replace if any physical damage is visible.
Reinsert the key firmly until it clicks or seats completely. Partial insertion creates intermittent contact.
Try removing and reinserting the key 3-5 times to clean contact surfaces through friction.
Grass Bag and Deck Sensors
Some advanced models include sensors that detect proper grass bag installation or deck height position.
Verify the grass bag is fully seated on the mounting hooks. Listen for clicks indicating proper attachment.
Check that the deck height adjustment lever is in a valid cutting position. Some mowers refuse to start with the deck fully raised or lowered beyond normal range.
Thermal Overload and Electrical Component Fixes
When basic troubleshooting doesn’t solve the starting problem, deeper electrical diagnostics may be necessary.
Thermal Overload Reset Procedure
The thermal overload breaker protects the motor from overheating damage. When tripped, it cuts power completely until manually reset.
Step 1: Disconnect all power sources. Remove the battery from cordless models. Unplug corded mowers. Wait 10-15 minutes for components to cool.
Step 2: Locate the reset button. Most reset buttons are found on the motor housing, near the battery compartment, or under a protective cover. Look for a small button labeled “Reset,” “Thermal,” or showing a breaker symbol.
Step 3: Press the reset button firmly. You should feel a click as the breaker resets. Some models require a paperclip or small tool to reach recessed buttons.
Step 4: Reconnect power and test. Reinstall the battery or plug in the cord. Attempt to start the mower.
If the thermal breaker trips again immediately, the motor may have internal damage requiring professional service.
Fuse Location and Replacement
Fuses protect the wiring and motor controller from current spikes. When they blow, the electrical path is completely interrupted.
Locate the fuse: Check near the battery compartment, motor housing, or control panel. Look for a small cylindrical fuse holder or blade fuse socket.
Remove and inspect: Twist or pull the fuse from its holder. Hold it up to light and look for a broken metal filament inside the glass tube.
Select the correct replacement: Match the amperage rating exactly. Most electric mowers use 15-30 amp fuses. Using a higher-rated fuse risks fire or component damage.
Install and test: Push the new fuse firmly into the holder until seated. Test mower operation.
If the replacement fuse blows immediately, you have a short circuit requiring professional diagnosis.
Wiring Harness Inspection
Damaged wiring creates intermittent or complete power failures. Inspect the entire visible wiring for damage.
Look for cut or frayed insulation, especially where wires pass through the handle or near moving parts.
Check connection points for corrosion or looseness. Wiggle each connector while testing for intermittent operation.
Inspect wire routing to ensure no pinching or binding against sharp metal edges.
Motor Controller Basics
The motor controller (also called motor driver or control board) manages power delivery to the motor. Controller failures often present as clicking, humming, or complete silence with good power supply.
Controller diagnosis requires opening the motor housing, which may void warranties. Consider professional service for controller issues unless you’re experienced with electronics repair.
Signs of controller failure include burning smells, visible damage to circuit boards, or proper voltage at battery terminals but no voltage at motor leads.
Brand-Specific Troubleshooting Tips
Each manufacturer implements slightly different safety systems and common failure modes. These brand-specific tips address the most frequent issues reported by users.
Ryobi 40V Electric Mower Issues
Ryobi 40V mowers are popular for their battery compatibility with other Ryobi tools, but they have some unique quirks.
Lights on but no start: This is the most reported Ryobi issue. The battery LED indicators show full charge, but the motor won’t engage. Usually caused by a partially depressed safety bar or dirty battery contacts. Clean the battery terminals with a pencil eraser and ensure the bail handle is fully compressed.
Green then red flashing: Indicates either a fuse issue or pinched wiring. Check the inline fuse near the battery compartment first.
Intermittent starting: Often traces back to the battery release button not fully locking. Press firmly until you hear two distinct clicks.
EGO Power+ Mower Problems
EGO’s 56V ARC lithium system delivers excellent power but has specific diagnostic indicators.
Rapid flashing battery indicator: Typically indicates thermal protection. Move the battery to a shaded area and allow 30 minutes of cooling time.
Single click then nothing: Usually the handle bar switch not fully engaging. The EGO design requires firm pressure across the entire bail handle width.
Starts then dies: Check the Select Cut multi-blade system for binding. Remove the blade and ensure the spindle turns freely.
Greenworks Mower Troubleshooting
Greenworks offers both 40V and 60V platforms with different diagnostic behaviors.
No indicator lights: The 40V system uses a different battery mount than some competitors. Verify the battery is rotated fully into the locked position.
Motor hums but blade won’t turn: Common on 60V models with the SmartCut system. The electronic load sensor may be stuck. Power cycle by removing battery for 2 minutes.
Variable speed not working: Check the speed control dial for debris or damage. The contacts can corrode in damp storage conditions.
For more detailed model-specific guidance, check our Toro Flex Force 60V review which covers another popular electric mower platform.
When to Call a Professional Repair Service?
Some repairs exceed the scope of home troubleshooting and require professional service. Know when to stop and call for help.
Motor replacement needs: If the motor shows signs of burning, seized bearings, or winding damage, replacement often costs more than a new mower.
Controller board failure: Diagnosing and replacing motor controllers requires electronics expertise and often special-order parts.
Internal wiring shorts: Short circuits inside the motor housing or handle assembly can be difficult to locate and repair safely.
Repeated thermal overload trips: If the thermal breaker resets but trips again immediately, the motor may have internal shorts requiring replacement.
Cost vs replacement decision: If repair estimates exceed 50% of a new mower’s cost, replacement usually makes more sense. Electric mowers typically last 8-10 years with proper care.
When replacement makes more sense than repair, check our guide to the best electric lawn mowers for current recommendations.
Prevention and Maintenance Tips
Regular maintenance prevents most starting problems before they occur. A simple maintenance routine extends your mower’s life and ensures reliable starting.
Seasonal Storage Preparation
Proper storage between seasons prevents the most common starting failures.
Battery storage: Store lithium-ion batteries at 40-60% charge in a climate-controlled environment. Extreme temperatures and full discharge both reduce battery life.
Clean the deck thoroughly: Remove all grass clippings and debris from the cutting deck, blade, and discharge chute. Dried grass can harden and jam the blade.
Inspect and tighten: Check all visible screws, bolts, and fasteners. Vibration during operation loosens hardware over time.
Lubricate moving parts: Apply light oil to the height adjustment mechanism and wheel bearings.
Monthly Maintenance Schedule
During the mowing season, perform these quick checks monthly:
- Clean the battery contacts with a dry cloth
- Inspect the blade for nicks and proper balance
- Check that all safety switches engage properly
- Clear debris from motor cooling vents
- Test the thermal overload reset button operation
Pre-Use Checklist
Before each mowing session, run through this quick list:
Verify the battery is fully charged or the cord is in good condition.
Test all safety switches by attempting to start without the bail handle depressed. The mower should not start.
Check the blade can rotate freely by hand (with power disconnected).
Clear the area of sticks, stones, or debris that could damage the blade.
For automated lawn care options that eliminate starting issues entirely, consider exploring robot lawn mowers as a hands-free alternative.
Frequently Asked Questions
Why is my electric start lawn mower not starting?
Electric lawn mowers usually fail to start due to dead batteries, faulty safety switches, tripped thermal overload breakers, or blown fuses. Check your battery charge level first, then verify all safety switches are properly engaged. Look for a reset button if the mower previously overheated. Corded models may have power connection issues or GFCI trips.
Why has my electric lawn mower suddenly stopped working?
Sudden stops typically indicate thermal overload protection activation, battery voltage collapse under load, or a safety interlock opening due to vibration. Let the mower cool for 15-30 minutes and check for reset buttons. Inspect the battery voltage with a multimeter to confirm it can sustain load. Check that the grass bag is not overfull and all safety switches maintain contact during operation.
Do electric mowers have fuses?
Yes, most electric mowers have at least one fuse protecting the electrical system. The fuse is typically located near the battery compartment, motor housing, or control panel. Check your owner’s manual for the specific location. A blown fuse creates complete power failure and must be replaced with one of the exact same amperage rating. Never use a higher-rated fuse as this creates fire risk.
What’s the life expectancy of an electric lawn mower?
Electric lawn mowers typically last 8-10 years with proper maintenance. The battery usually requires replacement after 3-5 years of regular use. Motors and controllers often outlast the battery but can fail due to overheating or moisture damage. Regular cleaning, proper storage, and avoiding thermal overload conditions maximize lifespan. When repair costs exceed half the price of a new mower, replacement becomes the better choice.
How do I reset my electric lawn mower?
To reset an electric lawn mower, first disconnect all power by removing the battery or unplugging the cord. Wait 10-15 minutes for cooling. Locate the reset button, typically found on the motor housing or near the battery compartment. Press the button firmly until you feel or hear a click. Reconnect power and test operation. If the reset button trips again immediately, the motor may have internal damage requiring professional service.
Why does my electric mower click but won’t start?
Clicking without starting usually indicates a blade obstruction, low battery voltage, or thermal overload tripping. First disconnect power and manually rotate the blade to check for jamming from grass clippings or debris. Clean the blade area thoroughly. If the blade spins freely, test the battery voltage under load. Rapid clicking often signals insufficient voltage to maintain motor engagement.
Conclusion
Troubleshooting an electric lawn mower not starting requires a systematic approach that differs from gas engine diagnosis. By understanding whether you have a corded or battery-powered model, you can focus on the right components from the start.
The most common causes of starting failures are also the easiest to fix. Dead batteries, safety switches not fully engaged, and tripped thermal breakers account for the majority of issues. Your 5-minute diagnostic checklist can solve most problems without tools.
When your electric lawn mower won’t start, remember these key steps: verify power source, check all safety switches, inspect for blade obstructions, and look for reset buttons. Symptom-based troubleshooting helps you narrow down whether you’re dealing with a power delivery problem, safety system issue, or motor controller failure.
Regular maintenance prevents most starting problems. Clean your battery contacts monthly, store batteries properly between seasons, and clear debris from the deck after each use. These simple habits keep your electric mower starting reliably season after season.
If your mower still won’t start after following this guide, professional service may be needed. Motor and controller repairs can be cost-prohibitive on older mowers, making replacement a practical option when repairs exceed half the cost of a new machine.
With the right approach, most electric lawn mower starting problems are solved quickly and cheaply. Keep this guide handy for the next time your mower gives you the silent treatment.