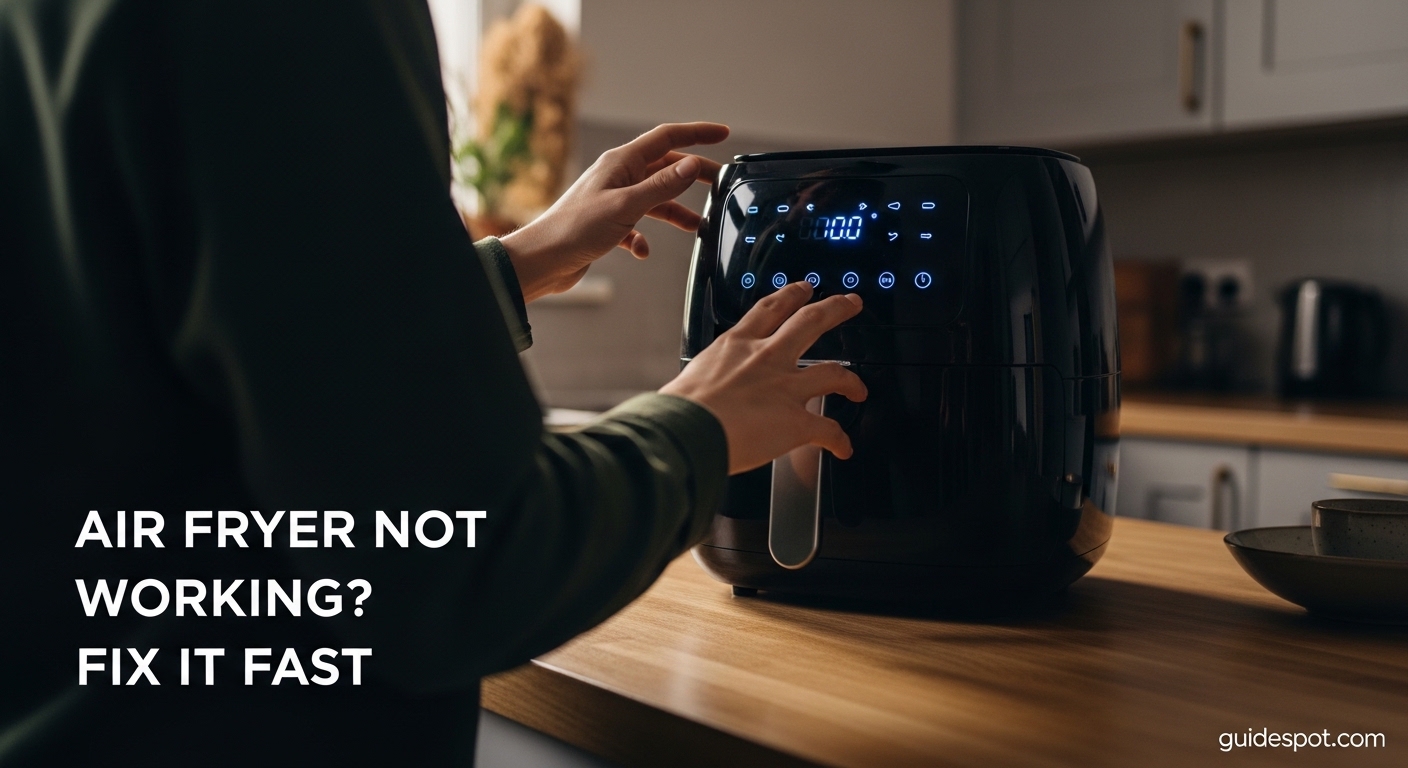
Nothing ruins dinner plans faster than an air fryer not working right when you need it. After troubleshooting dozens of these appliances, most problems are surprisingly simple to resolve. Before you start shopping for a replacement among the latest kitchen gadgets, try these diagnostic steps first.
Most air fryer failures fall into three categories: power issues, safety system triggers, or internal component problems. Understanding which category your problem belongs to saves hours of frustration. This guide walks you through each diagnosis with clear steps and realistic DIY difficulty ratings.
Whether your unit refuses to turn on, stops heating, or shuts down mid-cook, you will find solutions here. We cover everything from basic outlet checks to internal thermal fuse replacement. Let us get your appliance working again.
Quick Troubleshooting Guide: Air Fryer Not Working
Use this table to quickly identify your problem and the appropriate fix. These solutions cover about 80% of air fryer issues.
| Symptom | Likely Cause | Quick Fix | DIY Difficulty |
|---|---|---|---|
| Will not turn on at all | Power outlet or cord issue | Test outlet with another device; inspect cord for damage | Easy – No tools needed |
| Light on but not heating | Thermal fuse or heating element | Reset unit; check thermal fuse with multimeter | Moderate – Some disassembly |
| Stops during cooking | Overheating protection or basket switch | Clean air vents; check basket alignment | Easy – Basic tools |
| Touch screen unresponsive | Software glitch or moisture | Unplug for 30 minutes; dry control panel thoroughly | Easy – No tools needed |
| Fan making noise or not spinning | Debris or motor failure | Clean fan blades; check for obstructions | Easy – Basic tools |
| Error code displaying | Sensor or component failure | Reference error code table below | Varies by code |
Start with the easiest fixes first before moving to more complex repairs. Many air fryers start working again after a simple reset or cleaning. Save the internal component testing for last.
Power Supply Diagnostics
Power problems are the most common reason for an air fryer not working. These checks require no technical skill and solve about 40% of reported issues. Work through each step methodically.
Testing the Power Outlet
Your outlet is the first suspect when an air fryer shows no signs of life. These appliances draw significant power, often 1400-1800 watts. A weak outlet or overloaded circuit cannot deliver consistent electricity.
Plug a different high-wattage appliance into the same outlet. A hair dryer or microwave works well for this test. If the test device does not work, the problem is your outlet or breaker, not the air fryer.
Try a different outlet in another room, preferably one on a different circuit. Kitchen outlets often share circuits with multiple appliances. If the air fryer works in the new location, your original outlet needs an electrician’s attention.
Inspecting the Power Cord
Damaged power cords create intermittent or complete power failures. Examine the entire length for fraying, cuts, or pinching. Pay special attention where the cord enters the appliance body and the plug head.
Wiggle the cord gently while the unit is plugged in. If the power flickers, internal wires are likely broken. Never use an air fryer with a damaged cord. This creates fire and shock hazards.
Some models have detachable cords. Remove and reseat the connection firmly. Corrosion or loose connections here mimic total power failure. Clean any visible debris with a dry cloth before reconnecting.
Circuit Breaker and Fuse Checks
Air fryers can trip breakers when heating elements draw maximum power. Check your home’s electrical panel for flipped switches. Reset any tripped breakers and try the appliance again.
If the breaker trips repeatedly, the air fryer has an electrical fault. Do not continue resetting the breaker. This indicates a short circuit or ground fault requiring professional repair.
Some units have internal fuses accessible through the bottom panel. Consult your manual for fuse location and replacement specifications. DIY Difficulty Rating: Easy to Moderate depending on access.
Basket and Safety Switch Issues
Modern air fryers use multiple safety switches to prevent operation when the basket is removed. These micro switches can fail or become misaligned. Symptoms include units that power on but refuse to start cooking.
How the Safety Switch Works?
The basket safety switch, also called a micro switch, detects when the cooking basket is properly inserted. This prevents the heating element from activating without the food container in place. A small lever or button contacts the basket when fully seated.
When functioning correctly, you should hear a faint click when inserting the basket. This sound indicates the switch engaging. No click suggests misalignment or switch failure.
Multiple switches may exist on your model. Some units have drawer detection switches separate from basket switches. Check your manual for specific switch locations on your model.
Checking Basket Alignment
Remove the basket completely and inspect both the basket exterior and the fryer cavity. Look for food debris, grease buildup, or physical damage that prevents proper seating. Clean thoroughly with warm soapy water.
Reinsert the basket firmly until you feel resistance. Push with moderate pressure to ensure full engagement. The basket should sit flush with no gaps visible around the edges.
Try removing and reinserting the basket three times. Listen for the safety switch click each time. Inconsistent clicking indicates an alignment problem or switch wear.
Fixing a Dislodged Micro Switch
If cleaning does not restore the click sound, the switch itself may have shifted. Unplug the unit before attempting any internal access. Remove screws from the bottom or back panel per your manual’s instructions.
Locate the micro switch near where the basket makes contact. Check that mounting screws are tight and the switch body has not rotated. A switch twisted even 10 degrees may fail to engage.
DIY Difficulty Rating: Moderate. This repair requires screwdriver work and careful handling of small components. If you are uncomfortable opening appliances, consider professional service.
Reset Procedures
Resetting an air fryer clears software glitches and restores factory settings. This simple step solves many control panel and operational issues. Most resets take under two minutes to complete.
Standard Reset Procedure
Unplug the air fryer from the wall outlet completely. Do not simply turn it off with the power button. A full disconnect is required to clear the control board memory.
Wait at least 10 minutes before reconnecting. Some models require up to 30 minutes for full capacitor discharge. Use this time to clean the basket and inspect the cord.
Plug the unit back in and test all functions. Try each button on the control panel. Run a short test cycle without food to confirm heating and fan operation.
Finding the Reset Button
Some air fryers feature physical reset buttons for easier troubleshooting. Check these common locations: the bottom panel near the power cord entry, behind a small rubber plug on the back, or inside the basket compartment on the heating element housing.
The reset button is typically recessed and requires a paperclip or pin to press. Hold for 5-10 seconds while the unit is plugged in. You may hear a beep or see the display flash.
Not all models have reset buttons. Consult your user manual or search online for your specific model number plus “reset button location.” Our Ninja Speedi review includes reset information for that popular model.
When to Reset Your Air Fryer?
Reset when you experience unresponsive controls, error codes that persist after fixing the cause, or after power surges. A reset should also follow any internal cleaning where moisture might have contacted electronics.
Avoid resetting as a first troubleshooting step for heating problems. Resetting will not fix broken heating elements or blown thermal fuses. Use resets specifically for software and control issues.
If problems return after resetting, deeper issues exist. Multiple resets within a week suggest hardware failure requiring repair or replacement.
Heating Element and Thermal Fuse Problems
Heating failures leave air fryers powered but unable to cook food. These problems require more technical diagnosis but remain fixable for handy owners. Understanding these components helps you decide between DIY repair and replacement.
Signs of Heating Element Failure
A working air fryer should produce noticeable heat within two minutes of starting. Place your hand near the vent (safely) to feel warm air output. Cold air indicates heating element problems.
Visual inspection can reveal broken heating coils. Look through the basket into the heating chamber. The element should form continuous loops without gaps or dark burn marks. Broken coils glow brightly at the break point when powered.
Uneven cooking also suggests element issues. Food burned on one side and raw on the other indicates partial element failure. The unit may still heat partially but cannot reach set temperatures.
Thermal Fuse: What It Is and How to Check?
The thermal fuse protects against fire by cutting power when temperatures exceed safe limits. It is a single-use component that permanently opens when tripped. Once blown, the fuse must be replaced for the air fryer to work again.
Common causes of thermal fuse failure include blocked air vents, running the unit empty, or internal component degradation. The fuse sacrifices itself to prevent more expensive damage or safety hazards.
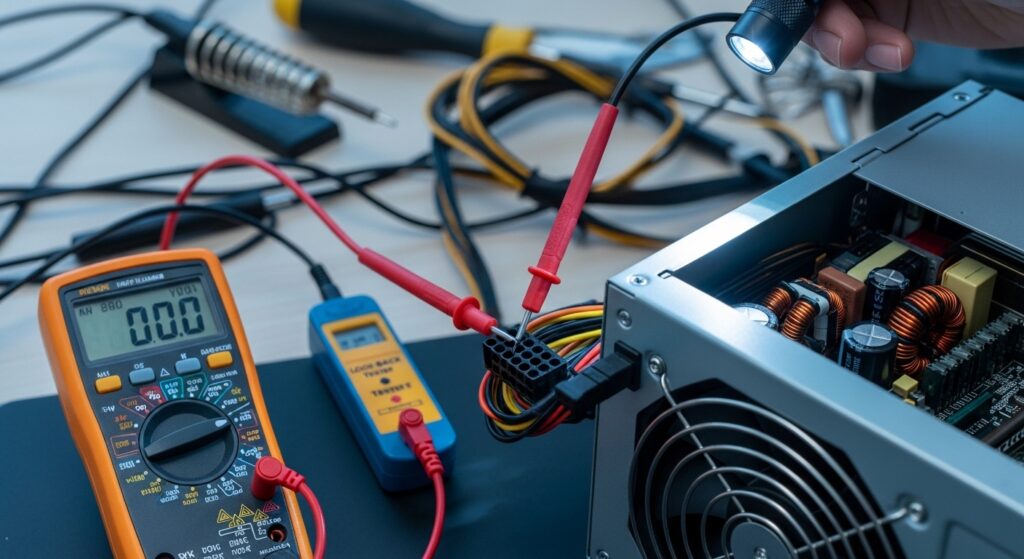
Access the thermal fuse by removing the bottom or back panel. It resembles a small metal cylinder with two wire leads. Test with a multimeter set to continuity mode. No beep means the fuse is blown and needs replacement.
Using a Multimeter for Testing
A multimeter is essential for diagnosing electrical problems beyond simple visual inspection. These inexpensive tools test continuity, resistance, and voltage. Basic models cost under $20 and suffice for air fryer repair.
To test the heating element, set your multimeter to resistance (ohms) mode. Touch probes to the element’s electrical terminals. A reading between 20-100 ohms indicates a good element. Infinite resistance means the element is broken internally.
DIY Difficulty Rating: Hard for multimeter testing. This requires opening the appliance and handling live electrical components. If you lack experience with electrical testing, consider professional diagnosis for heating and fuse issues.
Fan and Airflow Issues
The fan circulates hot air to create the “frying” effect. Fan failures reduce cooking performance or stop it entirely. Many units shut down automatically when fan rotation is not detected.
Identifying Fan Motor Problems
A working fan produces steady airflow from the exhaust vent. Hold a lightweight tissue near the vent during operation. The tissue should flutter consistently from the air stream. No movement indicates fan failure.
Unusual noises often precede complete fan failure. Grinding, squealing, or clicking sounds suggest bearing wear or blade obstruction. Address these sounds promptly to prevent motor burnout.
Some units have dual fans for intake and exhaust. Both must work for proper operation. Check both vent locations if your model has multiple fans.
Cleaning Air Vents and Intake
Blocked vents force the fan to work harder and can trigger overheating protection. Locate all vent openings on your unit. These are typically on the back, bottom, or sides of the housing.
Use a vacuum with brush attachment to remove dust and grease buildup. For stubborn deposits, a soft brush and degreasing cleaner work well. Ensure the unit is unplugged and completely dry before reconnecting power.
DIY Difficulty Rating: Easy. No disassembly required for external vent cleaning. This maintenance prevents many common failures and extends appliance life significantly.
Strange Noises and What They Mean
Rattling noises usually indicate loose screws or foreign objects in the fan housing. Remove the bottom panel to inspect. Small food particles can enter through vents and contact spinning blades.
High-pitched squealing suggests bearing failure in the fan motor. This requires motor replacement in most cases. Some motors have oil ports for lubrication, but most sealed units must be replaced entirely.
Buzzing without rotation indicates a stuck motor or electrical fault. Try manually rotating the fan blade (unplugged) to free it. If the blade spins freely by hand but not under power, the motor has failed electrically.
Control Panel and Display Problems
Modern air fryers rely heavily on digital controls. Touch screens and button panels can fail independently of cooking components. These issues range from simple moisture problems to complete control board failure.
Unresponsive Touch Screen Fixes
Touch screens stop responding when moisture enters the membrane or software glitches occur. Start with a complete reset as described earlier. This resolves about 60% of touch screen issues.
Clean the screen thoroughly with a slightly damp microfiber cloth. Dry completely with a fresh cloth. Residue from cooking oils can create an insulating layer preventing touch detection.
If the screen works partially, calibration may be needed. Some models offer calibration modes in settings menus. Check your manual for specific button combinations to enter calibration.
Button Malfunction Solutions
Physical buttons can stick from grease accumulation or wear out from use. Remove the button panel if possible for cleaning. Soak plastic components in warm soapy water, then dry thoroughly before reassembly.
Non-responsive individual buttons suggest contact failure beneath the button cap. This requires control board access to repair. Some buttons use rubber domes that collapse over time.
DIY Difficulty Rating: Moderate for button repairs. Touch screens generally cannot be repaired at home and require professional service or replacement when cleaning fails.
Display Error Troubleshooting
Dim or flickering displays often indicate power supply problems rather than display failure. Check your outlet and cord thoroughly before assuming the display needs replacement.
Complete display failure with other functions working suggests a separate display module issue. These are replaceable on some models. Search for parts using your exact model number.
Garbled characters or partial segments usually mean control board failure. This is one of the most expensive repairs. Consider replacement cost versus new unit pricing.
Air Fryer Error Code Reference
Error codes help diagnose specific component failures quickly. This table covers the most common codes across major brands. Always consult your specific manual first, as codes vary between manufacturers.
| Error Code | Meaning | Solution | DIY Difficulty |
|---|---|---|---|
| E1 | Temperature sensor failure | Check sensor connection; replace if damaged | Moderate – Some disassembly |
| E2 | Overheating protection triggered | Clean vents; allow cooling; check thermal fuse | Easy to Moderate |
| E3 | Heating element circuit fault | Test element with multimeter; replace if failed | Hard – Electrical testing |
| E4 | Fan motor or airflow problem | Clean vents; check fan rotation; replace motor if needed | Moderate to Hard |
| E5/E6 | Control board communication error | Reset unit; replace control board if persistent | Hard – Professional |
| 888/999 | Factory test mode or board failure | Unplug 30 minutes; contact manufacturer if persists | Easy to Professional |
Some brands use proprietary codes not listed here. Ninja units often display specific codes like “Err1” or “Err2.” Philips models may show flashing lights instead of numeric codes. Gourmia units typically use the standard E-series codes above.
When error codes persist after addressing the stated cause, underlying electrical issues exist. Multiple simultaneous error codes usually indicate control board failure requiring professional service.
Brand-Specific Troubleshooting
Certain brands have known issues or unique diagnostic procedures. Understanding these specifics saves time and prevents unnecessary repairs. These sections address the most commonly searched brands.
Ninja Air Fryer Issues and Fixes
Ninja air fryers, including the popular Ninja Speedi, have specific reset procedures. Most models require unplugging for at least 30 seconds, then holding the power button while reconnecting power.
Common Ninja problems include basket sensor errors and fan noise. The basket design uses multiple contact points that collect grease. Clean the basket rim and fryer cavity weekly to prevent sensor issues.
Ninja units are known for robust heating elements that rarely fail. If your Ninja is not heating, suspect the thermal fuse or control board first. These units typically last 3-5 years with proper maintenance.
Philips Air Fryer Common Problems
Philips models use a unique starfish design for air circulation. The bottom pan design can trap food particles that block airflow. Remove and clean the pan after every use to maintain performance.
Philips units often display error codes through flashing lights rather than a screen. Count the flashes and consult your manual for the specific meaning. One flash usually indicates a power issue; multiple flashes suggest component failure.
The drawer-style design of many Philips models makes safety switch access difficult. If your unit will not start with the drawer closed, professional repair is usually more cost-effective than DIY attempts on these compact units.
Gourmia Air Fryer Troubleshooting
Gourmia air fryers are budget-friendly units with straightforward troubleshooting. Most Gourmia models lack complex digital displays, reducing control panel failure rates. Power and heating issues are the primary concerns.
These units often use simple dial controls rather than touch screens. Dial timer failures are common after 12-18 months of use. Replacement timers are available online for under $15.
Gourmia heating elements are user-replaceable on many models. The element typically unplugs from sockets rather than requiring solder work. This makes element replacement a moderate DIY project for handy owners.
If you own a Hamilton Beach air fryer, similar principles apply. These mid-range units combine digital controls with accessible components for easier repair than premium compact designs.
Overheating and Auto Shut-Off
Air fryers shut down automatically when internal temperatures exceed safe limits. This protection prevents fires but frustrates users mid-cook. Understanding why overheating occurs helps prevent future interruptions.
Understanding Overheating Protection
Multiple sensors monitor temperature throughout the cooking chamber. When any sensor reports excessive heat, the control board cuts power to the heating element. The fan may continue running to cool components.
Overheating protection engages at different temperatures depending on the model and setting. High-temperature cooking (400°F+) triggers protection more easily than lower settings. This is normal and protects your investment.
Frequent overheating shutdowns indicate problems rather than normal operation. If your unit shuts down more than once per cooking session, investigate airflow, element condition, and sensor function.
Preventing Mid-Cook Shutdowns
Never overcrowd the basket. Dense food loads block airflow and trap heat. Cook in batches if necessary. Shake or turn food halfway through cooking to redistribute items and improve air circulation.
Preheating helps avoid overheating on some models. Starting with a hot chamber reduces the time the heating element runs at maximum output. Consult your manual for recommended preheat procedures.
Keep the unit on a heat-resistant surface with adequate clearance. Placing air fryers against walls or under cabinets restricts ventilation. Maintain at least 4 inches of space on all sides during operation.
When to Repair vs Replace Your Air Fryer?
Deciding between repair and replacement requires honest cost evaluation. Some fixes are simple and cheap; others exceed the value of a new unit. This framework helps you decide logically rather than emotionally.
Cost Comparison: Repair vs New Unit
Basic air fryers cost $40-80 new. If your repair estimate exceeds $30-40, replacement makes more financial sense. Mid-range units ($80-150) justify repairs up to $50-60. Premium models ($150+) are usually worth repairing unless multiple components have failed.
DIY repairs change the equation significantly. A $10 thermal fuse and an hour of your time beats buying new. Factor in your comfort level with appliance repair and tool availability when calculating costs.
If you decide replacement is the better option, check our guide to the best air fryers for tested recommendations. Budget-conscious buyers should also see our air fryer deals page for current sales.
Age and Warranty Considerations
Air fryers typically last 2-5 years depending on usage and brand quality. Units under two years old deserve repair attempts, especially if warranty coverage applies. Check your purchase date and warranty terms before disassembling anything.
Most manufacturers offer 1-year warranties on electrical components. Extended warranties through retailers may cover additional years. Keep receipts and warranty cards for claims. Unauthorized disassembly often voids remaining warranty.
Units over four years old that suffer major component failure should usually be replaced. Even successful repairs on aged units often lead to additional failures within months. Technology improvements also make newer units more efficient.
Finding Replacement Parts
Original manufacturer parts provide the best fit and reliability. Contact the brand’s customer service with your model number. Many manufacturers sell parts directly through their websites.
Amazon and eBay offer compatible parts for common brands like Ninja, Philips, and Gourmia. Search using your exact model number plus “replacement part.” Read reviews to verify compatibility before ordering.
Universal components like thermal fuses work across multiple brands. Note the temperature rating and physical size of your original fuse when ordering replacements. These cost $5-15 and solve many no-heat problems.
When to Call a Professional?
Some air fryer repairs require expertise and specialized tools. Knowing when to stop prevents injury and further damage. Electrical appliances carry shock and fire risks when improperly handled.
Electrical Safety Warnings
Never open an air fryer while plugged in. Capacitors inside can hold charge even after unplugging. Wait at least 10 minutes after disconnection before touching internal components.
Stop immediately if you smell burning plastic or see sparks. These indicate serious electrical faults beyond DIY repair. Unplug and discontinue use permanently if these symptoms occur.
If you are uncomfortable working with electrical components, do not attempt internal repairs. The cost of professional service is less than emergency room visits or house fires. Respect your skill limits.
Internal Component Repairs
Control board replacement requires soldering skills on most models. Unless you have experience with circuit board work, leave this to professionals. Botched soldering attempts often destroy boards completely.
Motor replacement involves precise mechanical alignment. Improperly seated fan motors create vibration and premature failure. Professional appliance technicians have the jigs and testing equipment for proper installation.
Professional service typically costs $50-100 plus parts. Many appliance repair shops offer free diagnosis with repair commitment. Compare this to replacement cost before deciding.
Preventive Maintenance Tips
Regular maintenance prevents most air fryer failures. These habits extend appliance life and maintain cooking performance. Prevention is always cheaper than repair.
Weekly Cleaning Routine
Clean the basket and pan after every use with warm soapy water. Dry completely before returning to the unit. Moisture causes switch corrosion and control panel damage over time.
Wipe the interior heating chamber weekly with a damp cloth. Remove grease buildup before it hardens. Never use abrasive scrubbers on non-stick surfaces.
Clean the exterior and control panel with a slightly damp cloth. Dry immediately. Grease on the control panel seeps inside and damages electronics.
Monthly Inspection Checklist
Once monthly, inspect the power cord for damage. Check that the plug fits securely in the outlet without wiggling. Test the outlet with another device to verify proper voltage.
Examine air vents for dust and grease accumulation. Vacuum or brush away debris. Blocked vents cause overheating and component failure.
Listen to the fan during operation. Note any changes in sound pitch or volume. Early noise detection allows repair before complete motor failure.
Extending Your Air Fryer’s Life
Avoid running the unit empty. This overheats components rapidly and triggers thermal fuse failure. Always have food or at least the basket in place during operation.
Do not exceed maximum capacity guidelines. Overloading strains the fan motor and heating element. It also produces poor cooking results that defeat the purpose of air frying.
Unplug during electrical storms or when away for extended periods. Power surges damage control boards. Surge protectors help but are not foolproof protection.
Frequently Asked Questions
Why has my air fryer suddenly stopped working?
The most common causes are power supply issues, tripped thermal fuses from overheating, or dislodged safety switches. Check your outlet with another device first, then inspect the power cord for damage. If the unit has power but will not start, the thermal fuse or basket safety switch likely needs attention.
How do I reset an air fryer?
Unplug the unit completely from the wall outlet. Wait at least 10 minutes for the internal capacitors to discharge. Plug back in and test all functions. Some models require holding the power button while reconnecting power. Check your manual for model-specific reset procedures.
Does an air fryer have a reset button?
Some models feature a physical reset button, while others rely on the unplugging procedure. Reset buttons are typically recessed and located on the bottom panel, back of the unit, or inside the basket compartment. Consult your user manual for your specific model’s reset method.
What is the common problem of an air fryer?
The most common problems are: power issues from faulty outlets or cords, heating element failures from blown thermal fuses, and safety switch problems from basket misalignment. Error codes indicating sensor or component failures are also frequent. Most issues are repairable with basic troubleshooting.
Is it worth repairing an air fryer?
Repairs under $30-40 are usually worth attempting on units less than 3 years old. Premium models over $150 justify higher repair costs. Budget units under $60 are often better replaced than repaired. Consider the unit’s age, warranty status, and your DIY comfort level when deciding.
Conclusion
An air fryer not working is frustrating but rarely means the end of your appliance. Most problems stem from simple causes like power issues, safety switch misalignment, or blown thermal fuses. Working through the diagnostic steps in this guide resolves the majority of failures without professional help.
Remember to prioritize safety when attempting any repair. Unplug the unit completely, wait for cooling, and respect your comfort level with electrical components. When repair costs approach replacement prices, consider upgrading to a newer model with updated features.
Regular maintenance prevents most problems before they start. Clean your unit weekly, inspect it monthly, and follow capacity guidelines. With proper care, your air fryer should provide years of reliable service. For more guides on kitchen appliances and troubleshooting advice, explore our other resources.