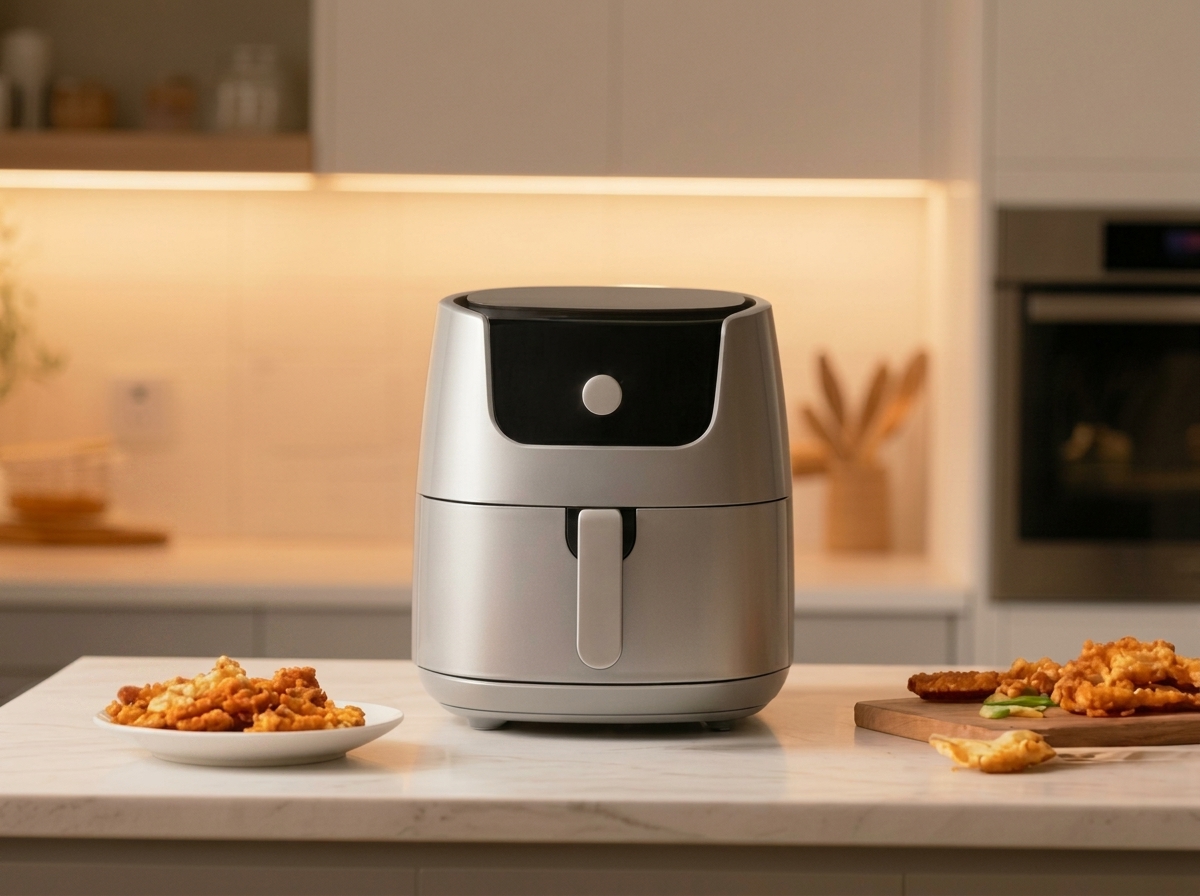
If you’ve recently unboxed a new countertop appliance and found yourself staring at a control panel covered in mysterious icons, you’re not alone. Learning how to use an air fryer for the first time can feel overwhelming, especially when every recipe seems to assume you already know the basics. Whether you’re working with a compact basket-style unit from Cosori, a multi-function model from Ninja, or an oven-style design from Instant Pot, the fundamental principles remain the same.
Recent kitchen appliance surveys show that over 40% of American households now own some form of air fryer, yet many owners admit to using theirs only for frozen foods and reheating leftovers. This guide changes that narrative by teaching you the techniques that transform this single-purpose gadget into a versatile cooking companion capable of everything from perfectly seared steaks to bakery-quality muffins.
I’ve spent years testing different models from brands like Philips, Cosori, and Instant Pot, making every beginner mistake so you don’t have to. The insights here draw from USDA safety guidelines, manufacturer documentation, and real-world troubleshooting from thousands of home cooks. By the end, you’ll understand not just which buttons to press, but why certain techniques produce consistently better results.
Quick Start: How to Use an Air Fryer at a Glance?
For those who want immediate answers before diving into detailed explanations, here’s the essential process for using any air fryer, whether you have a compact basket model or a larger oven-style unit:
- Remove all packaging materials and protective films before first use
- Run an empty “dry run” at 400°F for 15-20 minutes to eliminate manufacturing residues
- Position your air fryer on a heat-resistant, level surface with 5 inches of clearance on all sides
- Preheat for 3-5 minutes at your target cooking temperature
- Pat food dry and apply a light oil coating using a refillable oil mister
- Arrange food in a single layer on the perforated tray or basket, leaving space between pieces
- Set temperature 25°F lower than conventional oven recipes, reducing cooking time by approximately 20%
- Shake the basket or flip food halfway through cooking for even browning
- Verify internal temperature with an instant-read thermometer before serving
- Clean all removable parts after each use to prevent grease buildup and smoking
What Is an Air Fryer and How Does It Actually Work?
An air fryer functions as a compact, high-powered convection oven that generates crispy textures through rapid air technology. A heating element, typically positioned above the cooking chamber, warms air while an internal fan circulates it at speeds up to 70 mph. This hot air circulation surrounds food on all sides, triggering the Maillard reaction, the chemical process responsible for browning and creating that satisfying crunch we associate with traditionally fried foods.
The perforated basket or tray design is crucial to this process. Unlike a standard baking sheet, the holes in an air fryer’s cooking surface allow hot air to flow beneath the food, eliminating the need to flip items constantly while ensuring even cooking on all surfaces. This design principle explains why air fryers produce crispier results than conventional convection ovens, despite using similar heating technology.
Research published in PubMed Central demonstrates significant health advantages of this cooking method. Air frying reduces acrylamide formation by up to 90% compared to deep frying. Acrylamide, a potentially harmful compound that develops when starchy foods cook at high temperatures, forms less readily in air fryers due to shorter cooking times and reduced oil contact. The Cleveland Clinic confirms that this cooking method preserves more heat-sensitive nutrients while significantly cutting calorie content through minimal oil requirements.
Essential First-Time Setup and Safety Checks
Before cooking your first meal, proper preparation ensures both safety and optimal performance across all air fryer brands. Whether you’ve chosen a popular Ninja model with its distinctive basket design, a Cosori unit known for its square cooking surface, an Instant Pot appliance with air fryer lid functionality, or a premium Philips model with starfish-shaped air circulation, the initial setup steps remain consistent.
Begin by thoroughly inspecting your unit for packaging remnants. Manufacturers often include plastic ties, cardboard inserts, or protective films on the nonstick coating that must be removed before operation. The USDA Food Safety and Inspection Service recommends washing all removable components, including the perforated basket or tray, with warm soapy water before first use. Ensure these parts dry completely before reassembly to prevent electrical hazards.
Placement significantly impacts both safety and cooking performance. Position your air fryer on a heat-resistant, level surface with at least 5 inches of clearance on all sides. The exhaust vent, typically located at the back or top of the unit, releases hot steam during operation that can damage cabinets or walls. Consumer Reports specifically warns against placing air fryers under overhead cabinets during use, as exterior surfaces can exceed temperatures of 100°F.
The initial “seasoning” or dry run eliminates manufacturing residues. Run your empty air fryer at 400°F for 15-20 minutes. A slight plastic smell during this process is normal and dissipates quickly. This step is particularly important for basket-style models from Ninja and Cosori, as their compact cooking chambers concentrate any residual odors during first use.
Electrical safety demands attention to power requirements. Most air fryers draw between 1400 and 1700 watts, requiring a dedicated electrical outlet to prevent circuit overload. Never use extension cords or power strips, as these can overheat and create fire hazards. If your kitchen features older wiring, consider having an electrician verify that your outlets can safely handle the appliance’s power demands.
Step-by-Step Instructions for Using Your Air Fryer
Understanding the proper sequence of operations transforms inconsistent results into predictable success. While specific button layouts vary between Philips, Instant Pot, Cosori, and Ninja models, these fundamental steps apply universally to both basket-style and oven-style air fryers.
Step 1: Preheating Your Air Fryer
Preheating requires 3-5 minutes and establishes the immediate high heat necessary for proper crisping. Set your unit to the target cooking temperature and allow it to run empty. While some modern units from brands like Cosori feature indicator lights signaling readiness, older models or basic units may lack this convenience. I recommend preheating for all recipes except thick raw meats that benefit from gradual temperature increase.
A critical safety warning applies here: never place parchment paper or silicone liners in the basket during preheating. These lightweight materials can contact the heating element and create fire hazards. Always add liners only after preheating completes and food is ready to cook, using the food’s weight to hold these accessories in place.
Step 2: Preparing Your Food
Surface moisture is the enemy of crispiness. Pat all foods completely dry with paper towels before cooking. Wet surfaces create steam rather than browning, and excess moisture can cause oil to splatter against hot elements. For fresh vegetables, proteins, or homemade fries, apply a light coating of oil using a refillable oil mister rather than aerosol cooking sprays, which contain additives that damage nonstick coatings over time.
Uniform sizing ensures consistent results. Cut vegetables and proteins into similar-sized pieces so everything finishes cooking simultaneously. Smaller pieces require less time, so adjust accordingly. Season food before placing it in the basket, as the circulating air helps seasonings adhere more effectively than adding them after cooking begins.
Step 3: Loading the Basket Properly
Avoid overcrowding, which remains the most common error beginners make. Food must arrange in a single layer with visible space between pieces for proper hot air circulation. When cooking large quantities, work in multiple batches rather than stacking items. For foods like french fries, Brussels sprouts, or broccoli, filling the basket no more than halfway yields optimal crispiness.
For oven-style air fryers without baskets, rack placement matters significantly. Position the perforated tray or wire rack in the middle position for most foods, moving it higher for items needing more browning or lower for larger cuts requiring thorough cooking. Some Instant Pot multi-cookers with air fryer lids require specific accessories for optimal airflow.
Step 4: Setting Time and Temperature
Most air fryers operate effectively between 180°F and 400°F, with 400°F serving as the standard maximum for most home models. When adapting conventional oven recipes, apply the 20/20 rule: reduce the temperature by 20°F and the cooking time by 20%. For example, if a recipe calls for 400°F for 20 minutes in a conventional oven, start with 380°F for 16 minutes in your air fryer.
Begin checking food at the minimum recommended time. You can always extend cooking, but you cannot reverse overcooking. Digital models from Ninja and Cosori often include preset programs for common foods, but these serve as starting points rather than absolute rules, as actual requirements vary based on food quantity and specific model performance.
Step 5: Shaking or Flipping During Cooking
Intervention at the halfway point ensures even browning on all sides. For basket-style units, remove and shake the basket vigorously to redistribute contents. Most digital models pause automatically when you pull out the basket, while others continue counting down. For delicate items like fish fillets or foods that might fall apart, use silicone-tipped tongs to flip individual pieces rather than shaking.
Some foods benefit from more frequent attention. When cooking frozen french fries or small vegetables, shaking every 5 minutes produces superior results. For bacon or other foods prone to sticking, flipping halfway through prevents burning and ensures uniform crispiness.
Step 6: Checking for Doneness
Visual cues like golden-brown color indicate surface cooking but cannot confirm interior doneness. The USDA recommends using an instant-read thermometer to verify safe internal temperatures: 165°F for poultry, 145°F for whole cuts of beef, pork, or fish, and 160°F for ground meats. A quality meat thermometer represents one of the most valuable air fryer accessories you can purchase.
Comprehensive Temperature and Timing Guide
Mastering temperature and timing combinations eliminates guesswork from air fryer cooking. Based on extensive testing across multiple brands including Ninja, Cosori, Instant Pot, and Philips models, here are optimal settings for common foods:
Proteins: Chicken breasts cook beautifully at 375°F for 18-22 minutes depending on thickness. Chicken thighs require 380°F for 25-30 minutes. Salmon fillets need just 10-12 minutes at 400°F. Pork chops cook through in 12-15 minutes at 375°F. Hamburgers finish in 10-12 minutes at 370°F. Bacon crisps perfectly at 350°F for 8-10 minutes. Always verify internal temperature matches USDA safety guidelines using a food thermometer.
Vegetables: Brussels sprouts transform at 375°F for 12-15 minutes, while broccoli needs only 10-12 minutes at the same temperature. Asparagus cooks quickly at 400°F for 7-10 minutes. Bell peppers soften nicely at 370°F for 10-12 minutes. Zucchini reaches tender-crisp perfection at 375°F for 12-15 minutes. Mushrooms cook down in about 10 minutes at 375°F. Denser vegetables like carrots or potatoes require 5-10 additional minutes.
Frozen Foods: French fries crisp at 400°F for 15-20 minutes, shaking every 5 minutes. Chicken nuggets heat through in 10-12 minutes at 400°F. Fish sticks need 10-12 minutes at 400°F. Mozzarella sticks require careful attention at 370°F for just 6-8 minutes to prevent cheese blowouts. Egg rolls crisp in 12-15 minutes at 390°F. No thawing necessary, simply add 3-5 minutes to fresh food timing.
Baked Goods: Muffins bake well at 320°F for 12-15 minutes using small silicone molds. Cookies finish in 8-10 minutes at 300°F. Brownies need 15-18 minutes at 320°F. Biscuits rise and brown in 8-10 minutes at 330°F. Reduce standard recipe temperature by 25°F and check frequently, as baked goods can burn quickly in the concentrated heat environment.
Essential Air Fryer Accessories
While your air fryer functions effectively with just the included basket or tray, several accessories significantly expand its capabilities and ease of use. These additions, frequently recommended by experienced users in cooking forums, address common pain points and unlock new cooking techniques.
Instant-Read Thermometer: Perhaps the most important accessory for safe cooking, a quality meat thermometer eliminates guesswork about doneness. Look for models with quick read times under 3 seconds and temperature ranges covering at least 0°F to 500°F. This tool proves especially valuable when cooking thicker cuts of meat where exterior browning can mask undercooked centers.
Perforated Parchment Liners: These pre-cut rounds with holes allow easy cleanup without blocking essential airflow. Never use solid parchment paper that covers all holes, as this defeats the air circulation technology. Purchase liners specifically designed for air fryers, or create your own by folding regular parchment and cutting holes. Remember the critical safety rule: never add parchment during preheating, as lightweight liners can blow onto heating elements.
Silicone Mats and Liners: Reusable silicone liners offer an eco-friendly alternative to disposable parchment. These dishwasher-safe accessories prevent sticking while withstanding high temperatures. Square silicone mats work well in Cosori models, while round versions fit Ninja baskets perfectly.
Refillable Oil Mister: Skip aerosol cooking sprays, which contain propellants that degrade nonstick coatings over time. Instead, invest in a pump-action oil mister that allows you to fill with pure oil of your choice. This tool provides the light, even coating necessary for golden-brown results without damaged surfaces.
Silicone-Tipped Tongs: Long-handled tongs with silicone grips allow safe food manipulation without scratching nonstick surfaces. These prove essential for flipping delicate fish, rearranging vegetables, or removing finished items without damaging the basket coating.
Grill Pan Inserts: Many manufacturers offer grill pan accessories that add sear marks and expand cooking options. These perforated metal pans with raised ridges work wonderfully for steaks, chops, and vegetables that benefit from char lines.
Toothpicks and Skewers: Simple wooden toothpicks serve multiple purposes in air fryer cooking. Use them to secure bacon-wrapped items, hold stuffed foods closed, or test cake doneness. Soak wooden skewers in water before use to prevent burning.
Critical Safety Precautions and Guidelines
Consumer Reports documented over 200 burn injuries from air fryers between 2019 and 2026, primarily from touching hot surfaces or steam exposure. Understanding proper safety measures prevents accidents and ensures confident cooking.
Never touch the basket, tray, or interior surfaces during or immediately after cooking. These components can exceed 400°F during operation and remain dangerously hot for 30 minutes after shutdown. Always use the handle for basket removal, pulling straight out and away from your body to prevent hot oil drips from contacting skin or clothing.
The exhaust vent releases extremely hot steam that can cause serious burns. Position your face and hands away from this vent when opening the unit or removing food. This vent typically locates at the back of basket-style units like those from Ninja and Cosori, or at the top of oven-style models.
The FDA warns about potential chemical exposure from damaged nonstick coatings. Inspect your basket or tray regularly for chips, scratches, or peeling. Replace damaged components immediately, as exposed metal can cause uneven heating and potential chemical migration into food. Use only silicone, wood, or heat-resistant plastic utensils to preserve the coating integrity.
Electrical safety requires consistent attention. Unplug the unit when not in use and never immerse the main housing in water. If you notice unusual sounds, burning smells, or smoke unrelated to normal cooking, disconnect immediately and contact the manufacturer. Regular inspection of the power cord for damage prevents potential fire hazards.
Food safety follows standard USDA guidelines. Never leave cooked food in the air fryer for more than 2 hours, or 1 hour if ambient temperature exceeds 90°F. Prevent cross-contamination by cleaning the basket thoroughly between cooking raw proteins and other foods.
Common Mistakes to Avoid (And How I Learned From Them)
Years of experimentation across multiple air fryer brands have revealed recurring pitfalls that sabotage results. Learning from these errors saves time, money, and frustration while accelerating your path to consistent success.
Mistake 1: Using Too Much Oil – Excess oil pools at the bottom rather than creating crispiness, producing soggy results and triggering smoke alarms. One to two teaspoons suffices for most recipes. I learned this lesson after filling a basket with oil-soaked vegetables that created a kitchen full of white smoke within minutes.
Mistake 2: Not Preheating – Skipping preheating adds 3-5 minutes to actual cooking time and produces uneven results. Foods need immediate high heat for proper exterior crisping while maintaining interior moisture. Consider the difference between adding food to a cold skillet versus a properly preheated one.
Mistake 3: Overcrowding the Basket – Piling food blocks airflow, creating steamed rather than crisped results. Cook in batches for consistently crispy outcomes. Yes, this requires more time, but the quality difference justifies the extra effort.
Mistake 4: Forgetting to Shake or Flip – Without intervention, you get unevenly cooked food with burnt exterior and raw interior sections. Set a timer for halfway through cooking as a reminder. Some foods benefit from shaking every 5 minutes for optimal browning.
Mistake 5: Using Aerosol Cooking Sprays – These products contain additives and propellants that gradually degrade nonstick coatings. Use a refillable oil mister with pure oil instead. This mistake cost me a replacement basket after only six months of regular use.
Mistake 6: Preheating With Parchment Paper – Lightweight parchment or silicone liners can blow onto heating elements during preheating, creating fire hazards. Always add these accessories after preheating completes, using food weight to hold them in place.
Mistake 7: Not Cleaning Between Uses – Grease accumulation causes smoking and transfers unwanted flavors between foods. Clean after every use, even when the basket appears relatively clean. Accumulated residue becomes progressively harder to remove over time.
Proper Cleaning and Maintenance Techniques
Regular maintenance extends your air fryer’s lifespan while ensuring consistent cooking performance. According to manufacturer guidelines and safety organizations, proper cleaning prevents fire hazards from grease accumulation on heating elements.
After each use, allow the unit to cool completely, approximately 30 minutes. Remove the basket or tray and wash with warm, soapy water. While most removable parts are technically dishwasher-safe, hand washing preserves nonstick coatings significantly longer. For stubborn residue, soak components in warm water with dish soap for 10 minutes before gently scrubbing with a soft sponge.
Clean the interior with a damp cloth, checking carefully for food particles around the heating element. Never use abrasive cleaners, metal scrubbers, or scouring pads on any air fryer surface. A paste of baking soda and water removes stubborn stains without damaging finishes.
The exterior requires only wiping with a damp cloth. Pay special attention to the control panel, using a slightly dampened cloth to prevent moisture from entering electronic components. Rubber door seals on oven-style models should be cleaned weekly to prevent odor buildup.
Monthly deep cleaning involves the heating element. Unplug the unit and carefully invert basket-style models to access the element. Use a soft brush to remove debris from the heating coil. Built-up grease here causes smoking and reduces heating efficiency. Some models feature removable heating elements for easier cleaning, while others from brands like Instant Pot offer specialized cleaning modes.
Advanced Cooking Tips and Techniques
Once you’ve mastered fundamental operations, these advanced methods elevate your air fryer cooking to professional quality. Techniques developed through extensive testing across Ninja, Cosori, Philips, and Instant Pot models maximize this appliance’s versatility.
Layering Flavors: Marinate proteins for 2-24 hours before air frying. The concentrated heat intensifies flavors more dramatically than traditional cooking methods. Apply dry rubs 30 minutes before cooking for better adhesion and flavor penetration throughout the meat.
The Water Trick: Add 2-3 tablespoons of water to the drawer beneath the basket when cooking fatty foods like bacon or sausages. This prevents grease from burning and creating smoke. I discovered this technique after multiple smoke-filled kitchen incidents that had me troubleshooting unnecessarily.
Double Cooking Technique: For extra-crispy results on thick items, cook at a lower temperature first, 325°F for 10 minutes, then finish at high heat, 400°F for 3-5 minutes. This method works exceptionally well for thick-cut fries and chicken wings, ensuring interior doneness with exterior crunch.
Saving Drippings: The drawer beneath your air fryer basket collects valuable juices from cooked meats. Don’t discard these drippings. They make excellent bases for pan sauces and gravies, capturing concentrated flavor that would otherwise go to waste. This technique, emphasized by professional cooks, transforms a perceived inconvenience into a culinary asset.
Reheating Mastery: Air fryers excel at restoring crispiness to leftovers. Pizza, french fries, and fried chicken reheat beautifully at 350°F for 3-4 minutes, returning to nearly fresh quality. Add a light oil spray to revive items that have become dry during storage.
Reviving Stale Foods: Beyond reheating, air fryers can rescue slightly stale crackers, chips, and bread. A few minutes at 300°F removes excess moisture, restoring crunch to foods you might otherwise discard.
What You Can and Cannot Cook in an Air Fryer?
Understanding your air fryer’s capabilities and limitations prevents disappointment while expanding your culinary repertoire appropriately. Through extensive testing across multiple models, here’s what succeeds brilliantly and what to avoid.
Excellent Results: Frozen foods adapt perfectly, cooking directly from frozen without thawing. Chicken wings achieve restaurant quality with minimal effort. Roasted vegetables develop caramelized exteriors and tender interiors. Reheated pizza returns to crispy, melty perfection. Bacon cooks evenly without constant monitoring. Hard-boiled eggs peel easily when cooked at 270°F for 15 minutes. Small baked goods like muffins and cookies bake beautifully. Tofu achieves crispy exteriors while maintaining creamy centers. Fish fillets cook quickly without falling apart. Hamburgers, sausages, spring rolls, and anything traditionally deep-fried adapts wonderfully to this cooking method.
Proceed with Caution: Cheese melts and drips through basket holes unless contained in dishes or wrapped in other ingredients. Wet batter doesn’t set properly without oil immersion, use breaded coatings instead. Large roasts cook unevenly in compact chambers, cut into smaller portions for better results. Leafy greens like spinach can blow around the basket, weigh them down with other ingredients or cook briefly at lower temperatures.
Never Air Fry: Raw rice and grains require water absorption that air fryers cannot provide. Whole eggs in shells can explode from pressure buildup. Unbreaded wet items create messes without achieving desirable textures. Extremely delicate fish like sole falls apart under intense airflow. Popcorn kernels don’t pop properly without oil immersion and can damage heating elements. Fresh cheese without protective coatings melts directly through perforated baskets into the drawer below.
Troubleshooting Common Air Fryer Problems
When issues arise, systematic troubleshooting resolves most problems without professional service. Here are solutions to frequent challenges based on manufacturer guidance and community experiences across Ninja, Cosori, Instant Pot, and Philips user forums.
Food Not Getting Crispy: Excess moisture usually causes this disappointment. Pat foods completely dry before cooking, use minimal oil to prevent steaming, avoid overcrowding that blocks airflow, and ensure adequate preheating. If results remain disappointing, increase temperature by 25°F for the final 2-3 minutes of cooking.
White Smoke During Cooking: This indicates excess grease reaching the heating element. Add water to the drawer beneath the basket, reduce oil usage in recipes, and clean accumulated grease from previous cooking sessions. Ensure proper ventilation around the unit, and trim excess fat from meats before cooking.
Black Smoke and Burning Smell: Food particles burning on the heating element cause this serious issue. Stop cooking immediately, allow complete cooling, and clean the element thoroughly. This often occurs when cooking without proper cleaning from previous use.
Uneven Cooking: Overcrowding or incorrect food placement causes inconsistent results. Arrange food in true single layers, shake or flip regularly during cooking, and group similar-sized pieces together. Some models develop hot spots over time, rotate food positions if you notice consistent unevenness.
Food Drying Out: Excessive temperature or cooking duration removes too much moisture. Reduce both by 10-15% and check doneness earlier. Light oil coating helps retain natural moisture. Cover delicate items with foil if the exterior browns faster than the interior cooks through.
Basket Won’t Slide In Properly: Misalignment or overfilling prevents proper insertion. Check for food blocking the rails, ensure the basket sits correctly in its track, and never force insertion. Some models require specific angles for proper alignment.
Health Benefits and Nutritional Considerations
Scientific research confirms significant health advantages of air frying compared to traditional deep frying methods. The Cleveland Clinic reports that air frying reduces calorie content by 70-80% while maintaining comparable taste and texture profiles, making it an attractive option for health-conscious cooks.
Research published in Medical News Today demonstrates that air frying reduces acrylamide formation by up to 90% compared to deep frying. Acrylamide, classified as a potential carcinogen, forms when starchy foods cook at high temperatures. Lower cooking temperatures and reduced oil contact in air fryers minimize this compound’s development.
Nutrient retention improves significantly with air frying. Studies indicate better preservation of heat-sensitive vitamins like vitamin C and B vitamins compared to deep frying methods. Shorter cooking times and absence of oil immersion prevent the nutrient leaching common in traditional frying.
WebMD notes that air frying dramatically reduces trans fat consumption, as this cooking method avoids repeatedly heating oils to temperatures where trans fats form. This benefit directly impacts cardiovascular health, as trans fats increase harmful cholesterol while decreasing beneficial cholesterol levels.
However, maintaining realistic expectations remains important. Air frying doesn’t automatically make all foods healthy, french fries remain processed food regardless of preparation method. Focus on air frying whole foods like vegetables, lean proteins, and minimally processed items for maximum health benefits.
Frequently Asked Questions
Do I need to preheat my air fryer?
While not all models require preheating, I recommend it for consistent results across Ninja, Cosori, Instant Pot, and Philips models. Preheating takes 3-5 minutes and ensures food starts cooking immediately at the proper temperature for optimal crisping. Skip preheating only for foods that benefit from gradual temperature increase, like thick raw meats.
How much oil should I use in an air fryer?
Use 1-2 teaspoons of oil for most recipes, applied as a light coating using a refillable oil mister rather than aerosol cooking sprays. Some foods like frozen pre-fried items need no additional oil. Fresh vegetables and lean proteins benefit from light oil application for proper browning and flavor development.
What is the 20/20 rule for air fryers?
The 20/20 rule is a simple conversion formula for adapting conventional oven recipes to air fryer cooking. Reduce the oven temperature by 20 degrees Fahrenheit and decrease the cooking time by 20 percent. For example, if a recipe calls for 400°F for 20 minutes in a regular oven, start with 380°F for 16 minutes in your air fryer. Adjust based on your specific model and desired results.
Can I use aluminum foil in my air fryer?
Yes, but ensure it doesn’t block essential airflow. Use foil to line the basket for easy cleanup or cover foods that brown too quickly. Never let foil touch the heating element, and always weigh it down with food to prevent it from blowing around during cooking. Perforated parchment paper often works better for maintaining proper air circulation.
Why is my air fryer smoking?
White smoke indicates excess oil or grease reaching the heating element. Add 2-3 tablespoons of water to the drawer beneath the basket to prevent this. Black smoke means food debris is burning on the heating element. Stop cooking immediately, allow complete cooling, and clean thoroughly. Ensure proper ventilation and never exceed recommended oil amounts.
How do I prevent food from sticking to the basket?
Light oil application prevents sticking better than cooking spray. Perforated parchment liners or silicone mats provide non-stick surfaces without blocking airflow. Ensure your basket’s nonstick coating remains intact. Replace damaged baskets immediately, as exposed metal causes severe sticking and potential safety hazards.
What’s the difference between an air fryer and a convection oven?
Air fryers are essentially compact, high-powered convection ovens with more powerful internal fans creating faster air circulation. This concentrated airflow and smaller cooking chamber produce crispier results in less time than standard convection ovens. Think of an air fryer as a convection oven optimized specifically for creating crispy textures quickly.
Can I cook multiple different foods simultaneously?
Yes, if they require similar temperatures and cooking times. Use foil dividers or accessories to separate foods physically. Remember that strong flavors can transfer between foods through shared air circulation, so avoid mixing aromatic foods like fish with desserts. Arrange items with longer cooking times closer to the heating element in oven-style models.
How long do air fryers typically last?
With proper maintenance and regular cleaning, quality air fryers from established brands like Ninja, Cosori, Instant Pot, and Philips typically last 3-5 years of regular use. The heating element and internal fan motor represent the most common failure points. Avoid overloading beyond manufacturer recommendations to extend lifespan significantly.
Can you cook frozen foods directly in an air fryer?
Absolutely. One of the air fryer’s greatest strengths is cooking frozen foods without thawing. Simply add 3-5 minutes to the recommended cooking time for fresh items. French fries, chicken nuggets, fish sticks, and mozzarella sticks all cook beautifully from frozen at 370°F to 400°F depending on the specific food.
Conclusion
Learning how to use an air fryer effectively transforms this appliance from an occasional convenience into an essential kitchen tool. Through understanding the science behind rapid air circulation, following proper safety protocols, and applying the techniques covered throughout this guide, you’ll consistently achieve restaurant-quality results regardless of whether you own a compact basket model from Ninja, a versatile multi-cooker from Instant Pot, a feature-rich unit from Cosori, or a premium design from Philips.
The key to air fryer success lies in recognizing that this cooking method offers more than a simple replacement for deep frying. It represents a fundamentally different approach to quick, healthy meal preparation that rewards attention to detail. From perfectly caramelized vegetables to succulent proteins with crispy exteriors, the foundation established here enables endless culinary exploration.
Remember that every air fryer model, whether basket-style or oven-style, possesses slight performance variations. Treat the guidelines in this guide as starting points and adjust based on your specific appliance and personal preferences. Keep notes on successful time and temperature combinations for your favorite foods, gradually building a personalized reference guide tailored to your kitchen.
With consistent practice and willingness to experiment, you’ll discover capabilities far beyond frozen foods and reheating leftovers. Your air fryer becomes a tool for creativity, health-conscious cooking, and efficient meal preparation that integrates naturally into modern lifestyles. The investment in learning proper technique pays dividends through better meals, reduced cleanup, and expanded cooking confidence for years to come.
Ready to upgrade your kitchen? Check out the best air fryers available right now:

![How to Clean a Laptop Screen Without Damaging It in [cy]](https://www.guidespot.com/wp-content/uploads/2026/07/featured-update-44590-1783188935088-370x245.jpg "How to Clean a Laptop Screen (2026): The Ultimate Safe Display Guide")