After spending years working with different hardwood floors, I’ve learned that proper cleaning isn’t just about making them shine—it’s about protecting your investment. The National Wood Flooring Association (NWFA) estimates that proper maintenance can extend your floor’s lifespan by 15-20 years, potentially saving thousands in refinishing costs.
In this guide, I’ll share the professional techniques that actually work, based on NWFA guidelines and EPA safety standards. Whether you have sealed, unsealed, or engineered hardwood, you’ll learn exactly how to maintain them without causing damage.
The biggest mistake I see homeowners make? Using too much water. According to Brett Miller, VP of Technical Standards at NWFA, “Excessive moisture is the number one cause of hardwood floor damage.” We’ll cover the right way to clean, what products actually work, and which popular methods could void your warranty.
Understanding Your Hardwood Floor Type
Before grabbing any cleaning product, you need to identify your floor type. This critical first step determines everything from which cleaners to use to how much moisture is safe.
Sealed (Surface-Finished) Hardwood Floors
Most modern hardwood floors have a protective polyurethane, polyacrylic, or urethane finish. Here’s how to test if yours is sealed: drop a small amount of water on an inconspicuous area. If the water beads up and doesn’t absorb within 30 seconds, you have sealed floors.
Sealed floors are the most forgiving when it comes to cleaning. They can handle pH-balanced commercial cleaners and slightly damp mopping. The finish acts as a barrier, protecting the wood from moisture and stains. However, this doesn’t mean you can use excessive water—the seams between boards remain vulnerable.
Unsealed (Penetrating Seal or Wax-Treated) Floors
These floors have oil or wax finishes that penetrate the wood rather than sitting on top. The water test will show absorption rather than beading. Unsealed floors require gentler care and absolutely minimal moisture.
If you have unsealed floors, avoid any water-based cleaning methods. Instead, use solvent-based cleaners specifically designed for wax or oil finishes. These floors need regular waxing or oil treatment to maintain their protective layer.
Engineered Hardwood Floors
Engineered hardwood consists of a real wood veneer over plywood or composite base. While the top layer is genuine hardwood, the construction makes these floors more sensitive to moisture than solid hardwood.
The cleaning approach for engineered floors mirrors that of sealed hardwood, but with extra caution around moisture. The layers can separate if water seeps into the seams, causing irreversible damage.
Essential Cleaning Tools and Products
Having the right tools makes the difference between efficient cleaning and potential floor damage. Here’s what professionals recommend:
Must-Have Tools
Microfiber Mop System: The NWFA strongly recommends microfiber over traditional string mops. Microfiber traps dirt particles instead of pushing them around, and it requires less moisture to clean effectively.
Soft-Bristled Broom or Dust Mop: For daily maintenance, choose a broom with fine, soft bristles that won’t scratch the finish. Dust mops with microfiber pads work even better for trapping fine particles.
Vacuum with Hard Floor Setting: Look for a vacuum with a hard floor setting that disables the beater bar. The rotating brush can scratch your finish. Ensure the wheels are clean and won’t leave marks.
Spray Bottle: For spot cleaning, a spray bottle lets you control moisture application precisely. Never pour cleaner directly onto the floor.
EPA Safer Choice Certified Products
The Environmental Protection Agency’s Safer Choice program identifies products that are safer for both human health and the environment. When selecting hardwood floor cleaners, look for this certification to ensure you’re using products with reduced VOC emissions and safer chemical profiles.
pH-balanced cleaners specifically formulated for hardwood floors are essential. The Good Housekeeping Institute’s testing shows that cleaners with a pH between 6 and 8 clean effectively without damaging the finish or leaving residue.
Products to Avoid
Never use these common household cleaners on hardwood floors:
Vinegar and Water: Despite its popularity as a natural cleaner, vinegar’s acidity (pH 2-3) can dull and damage floor finishes over time. The NWFA explicitly warns against vinegar use.
Steam Mops: The combination of heat and moisture can cause boards to cup, crown, or buckle. Steam can also cloud or damage the finish.
Oil Soaps: While marketed for wood, oil soaps can leave a residue that attracts dirt and makes future refinishing difficult.
Ammonia-Based Cleaners: These strip the finish and can discolor the wood underneath.
Abrasive Cleaners or Tools: Steel wool, scrub brushes, and powdered cleaners will scratch and dull your finish.
Daily Maintenance Routine
Establishing a daily routine prevents dirt accumulation that can scratch your floors. I spend just 5-10 minutes each day on maintenance, which saves hours of deep cleaning later.
Morning Quick Sweep
Start each day by sweeping high-traffic areas. Focus on entryways, kitchen areas, and hallways where dirt accumulates fastest. Use a microfiber dust mop for best results—it attracts and holds particles rather than dispersing them into the air.
Pay special attention to areas under furniture edges where dust bunnies form. These seemingly harmless accumulations can scratch floors when they’re eventually disturbed.
Immediate Spill Response
Address spills within minutes to prevent moisture damage and staining. Keep microfiber cloths in strategic locations for quick cleanup. Blot—don’t rub—spills to avoid spreading liquid into floor seams.
For sticky spills, spray a small amount of hardwood floor cleaner on a cloth (never directly on the floor) and wipe clean. Follow with a dry microfiber cloth to remove any moisture.
Evening Spot Check
Before settling in for the evening, do a quick visual inspection. Look for any spots that need attention, particularly in dining areas or near pet food bowls. A two-minute spot clean prevents stains from setting overnight.
Weekly Deep Cleaning Method
Weekly deep cleaning removes the grime that daily maintenance misses. This routine takes 30-45 minutes for an average home but extends the time between professional cleanings.
Step 1: Complete Dry Cleaning
Start by removing all dust and debris. Vacuum or sweep the entire floor, including under furniture and in corners. Use vacuum attachments to clean along baseboards where dust accumulates.
Don’t skip this step—wet mopping over dirt creates muddy streaks and can grind particles into the finish.
Step 2: Prepare Your Cleaning Solution
Mix your hardwood floor cleaner according to manufacturer instructions. If using a concentrate, measure precisely—too much cleaner leaves residue, while too little won’t clean effectively.
Fill your spray bottle or mop bucket with the solution. For spray mopping, you’ll use about 1/2 cup of solution per 100 square feet.
Step 3: The Proper Mopping Technique
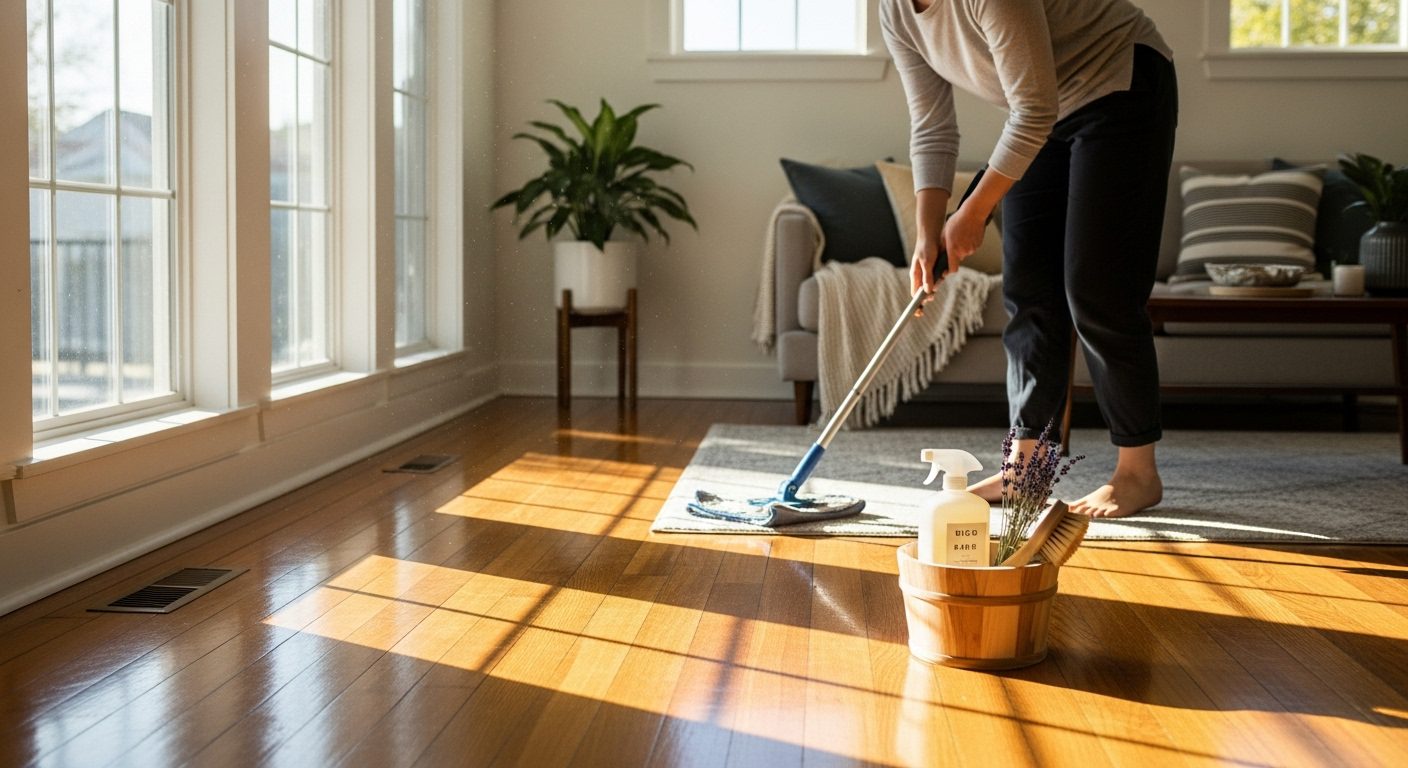
Work in 4×4 foot sections, starting from the farthest corner and working toward the exit. Spray the cleaner directly onto your microfiber mop pad or lightly mist the floor section—never saturate.
Mop with the grain of the wood using smooth, overlapping strokes. This technique prevents streaking and ensures even coverage. Rinse or change your mop pad when it becomes dirty to avoid redistributing soil.
Step 4: Drying and Inspection
Although proper damp mopping shouldn’t leave standing water, use a dry microfiber cloth to buff any areas that appear wet. This final step also removes any potential streaks and brings out the floor’s natural shine.
Open windows or use fans to accelerate drying. The floor should be completely dry within 10 minutes. If it takes longer, you’re using too much moisture.
Tackling Common Stains and Marks
Different stains require different approaches. Here’s how to handle the most common floor challenges without damaging the finish:
Scuff Marks and Heel Marks
For fresh scuff marks, a clean tennis ball works wonders. Rub gently in a circular motion—the felt material lifts marks without scratching. For stubborn scuffs, dampen a microfiber cloth with hardwood floor cleaner and rub gently with the grain.
Avoid the temptation to use erasers or abrasive pads, which can dull the finish in that spot.
Water Marks and Rings
Fresh water marks often disappear with gentle buffing using a dry microfiber cloth. For older marks on sealed floors, apply a small amount of floor cleaner to a cloth and rub gently. On wax-finished floors, you may need to apply fresh wax to the affected area.
White marks typically indicate surface damage, while dark marks suggest water has penetrated the finish. Dark marks may require professional refinishing.
Pet Stains and Odors
Act immediately with pet accidents. Blot up liquid, then clean with a hardwood-specific enzyme cleaner that breaks down organic matter. Never use ammonia-based products, as they can actually attract pets back to the same spot.
For set-in stains, you may need to sand and refinish the affected area. Prevent future accidents by keeping pet nails trimmed and placing water bowls on waterproof mats.
Sticky Residue
For gum, wax, or adhesive residue, harden the substance with ice in a plastic bag, then gently scrape with a plastic scraper. Clean any remaining residue with a cloth barely dampened with hardwood floor cleaner.
Never use solvents like nail polish remover or paint thinner, which can damage the finish and discolor the wood.
Seasonal Maintenance Schedule
Your hardwood floors face different challenges throughout the year. Adapting your maintenance routine seasonally protects them from weather-related damage.
Spring Deep Clean
Spring brings increased humidity and foot traffic. Start the season with a thorough deep clean to remove winter’s accumulated salt and grime. Check for any winter damage like gaps between boards or finish wear in high-traffic areas.
This is also the ideal time to rearrange furniture and clean thoroughly underneath. Place felt pads on all furniture legs to prevent scratching as items are moved back.
Summer Humidity Control
High humidity causes wood to expand, potentially leading to cupping or buckling. Maintain indoor humidity between 30-50% using air conditioning or dehumidifiers. The NWFA notes that controlling humidity is just as important as cleaning for floor longevity.
Increase cleaning frequency during summer to manage the dirt tracked in from increased outdoor activity. Place quality doormats at all entrances and encourage family members to remove shoes.
Fall Preparation
Prepare for winter by checking and replacing worn furniture pads, inspecting entrance mats, and ensuring your cleaning supplies are stocked. Consider applying a fresh coat of finish to high-traffic areas before the harsh winter months.
Clean heating vents and returns to prevent dry, dusty air from circulating onto your floors when the heating season begins.
Winter Protection
Winter presents the dual challenge of salt/sand tracked indoors and low humidity from heating. Place heavy-duty mats at all entrances and establish a shoes-off policy. Keep a towel near entrances for wiping up melted snow immediately.
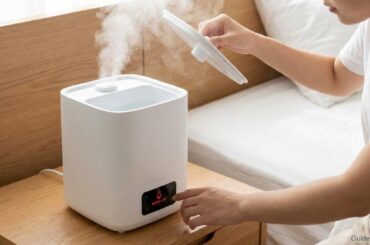
Combat low humidity with humidifiers to prevent boards from shrinking and creating gaps. Monitor humidity levels with a hygrometer, maintaining that crucial 30-50% range.
Professional Cleaning vs. DIY
Understanding when to call professionals versus handling maintenance yourself saves money while protecting your investment.
When DIY Works Best?
Regular maintenance and cleaning are perfect DIY tasks. With proper tools and techniques, you can maintain beautiful floors for years. DIY cleaning allows you to address spills immediately and maintain consistent care routines.
Most minor scratches and surface wear can also be addressed with DIY touch-up kits designed for your specific finish type.
When to Call Professionals?
Consider professional service every 3-5 years for deep cleaning and finish renewal. Professionals have specialized equipment that removes embedded dirt and applies fresh finish evenly.
Call professionals immediately for water damage, deep scratches penetrating to bare wood, or when refinishing is needed. Attempting these repairs yourself often causes more damage and increases repair costs.
Professional assessment is also valuable when buying a home or if you’re unsure about your floor type or condition.
Common Mistakes That Damage Hardwood Floors
Learning from others’ mistakes protects your floors from preventable damage. Here are the most costly errors I’ve encountered:
Over-Wetting During Cleaning
Excessive moisture is the leading cause of hardwood floor damage. Water seeps between boards, causing warping, cupping, and finish separation. Even “slightly too damp” mopping accumulates damage over time.
The solution: wring mops until barely damp and never leave standing water. Your mop should feel almost dry to the touch.
Using Wrong Cleaning Products
Generic all-purpose cleaners often contain ingredients that damage wood finishes. Even “natural” solutions like vinegar cause cumulative damage that becomes visible months later.
Stick to pH-balanced, hardwood-specific cleaners. The small extra cost prevents thousands in refinishing expenses.
Neglecting Preventive Measures
Skipping doormats, allowing shoes indoors, and forgetting furniture pads creates unnecessary wear. Prevention is exponentially cheaper than restoration.
Invest in quality mats, maintain a shoes-off policy, and check furniture pads monthly. These simple steps add years to your floor’s life.
Delayed Spill Cleanup
Procrastinating on spill cleanup allows liquids to penetrate the finish and stain the wood. Even “harmless” water becomes damaging when left standing.
Keep cleaning supplies accessible and address spills within minutes. Train family members to handle spills immediately.
Advanced Care Tips for Long-Term Floor Health
These professional strategies maximize your floor’s lifespan and maintain its beauty for decades:
Traffic Pattern Management
Rotate area rugs and runners periodically to distribute wear evenly. In hallways, shift runners a few inches every few months to prevent defined wear patterns.
Rearrange furniture annually when possible. This prevents permanent indentations and allows previously covered areas to age consistently with exposed flooring.
Finish Maintenance Strategy
Apply a maintenance coat every 3-5 years in high-traffic areas before wear reaches the wood. This preventive approach costs far less than full refinishing and can extend the time between major refinishing projects by decades.
Document your maintenance schedule, including products used and application dates. This information proves valuable for warranty claims and helps professionals provide appropriate care.
Climate Control Investment
Installing a whole-house humidification system maintains optimal moisture levels year-round. While the upfront cost seems significant, it prevents gaps, cracks, and warping that require expensive repairs.
Smart thermostats that monitor humidity help maintain the ideal 30-50% range automatically, protecting your floors even when you’re away.
Troubleshooting Guide
When problems arise, quick identification and response minimize damage:
Cloudy or Hazy Appearance
This usually indicates product buildup from using too much cleaner or the wrong type. Strip the buildup using a hardwood floor cleaner specifically designed for residue removal. Going forward, use less product and ensure thorough drying.
Squeaking Boards
Seasonal squeaking often resolves when humidity levels stabilize. Persistent squeaks may indicate subfloor issues requiring professional assessment. Temporary relief comes from sprinkling talcum powder into squeaking seams, though this is merely a short-term solution.
Gaps Between Boards
Small seasonal gaps are normal as wood contracts in dry conditions. Maintain proper humidity to minimize gapping. Large or persistent gaps may require professional intervention to address underlying moisture or installation issues.
Discoloration or Fading
UV exposure causes most fading. Rotate rugs and furniture to ensure even exposure. Use window treatments to filter harsh sunlight during peak hours. Some discoloration from pet accidents or water damage requires refinishing.
Environmental and Health Considerations
Choosing eco-friendly cleaning methods protects both your family’s health and the environment:
EPA Safer Choice Products
The EPA’s Safer Choice program identifies cleaners that perform well while using safer chemical ingredients. These products reduce VOC emissions in your home and minimize environmental impact.
Look for the Safer Choice label when selecting hardwood floor cleaners. These products undergo rigorous testing to ensure they meet strict safety criteria without sacrificing cleaning power.
Natural Cleaning Alternatives
While many natural solutions can damage floors, some safe alternatives exist. A barely damp microfiber mop with just water works for light cleaning between deeper cleans. For slightly more cleaning power, add a few drops of castile soap to water, ensuring thorough rinsing.
Essential oils like tea tree or lavender can add pleasant scents to approved hardwood cleaners, but never use them directly on floors as they can damage finishes.
Indoor Air Quality
Regular cleaning improves indoor air quality by removing allergens and dust. However, ensure adequate ventilation when using any cleaning products. Open windows and use fans to circulate fresh air during and after cleaning.
HEPA-filtered vacuums prevent redistributing fine particles into the air, particularly important for allergy sufferers.
Frequently Asked Questions
How often should I clean my hardwood floors?
Daily dust mopping or sweeping prevents scratches from dirt and debris. Perform weekly damp mopping with appropriate cleaner, and schedule professional deep cleaning every 3-5 years. Adjust frequency based on traffic levels and household conditions.
Can I use a steam mop on sealed hardwood floors?
No, never use steam mops on any hardwood floor. The combination of heat and moisture can penetrate even sealed floors, causing warping, cupping, and finish damage. The NWFA strongly advises against steam cleaning for all wood floors.
Is vinegar really that bad for hardwood floors?
Yes, vinegar’s acidity (pH 2-3) gradually breaks down floor finishes, causing dulling and eventual damage. While damage isn’t immediately visible, continued use leads to expensive refinishing needs. Use pH-balanced cleaners specifically designed for hardwood.
What’s the best way to remove pet hair from hardwood floors?
Microfiber dust mops excel at trapping pet hair. For stubborn hair, use a vacuum with a hard floor setting. Rubber brooms also work well, as the rubber creates static that attracts hair. Avoid brooms with stiff bristles that can scratch.
How do I know when my floors need refinishing?
Signs include worn areas where the wood shows through, deep scratches, discoloration that won’t clean, or when water no longer beads on the surface. Most floors need refinishing every 7-10 years with proper maintenance, though high-traffic areas may need attention sooner.
Can I use Murphy Oil Soap on hardwood floors?
While Murphy Oil Soap is popular, most flooring professionals recommend against it. Oil soaps leave residue that attracts dirt and can make future refinishing difficult. Stick to residue-free, pH-balanced cleaners designed specifically for finished hardwood.
Should I wax my hardwood floors?
Only wax floors that have wax finishes. Modern polyurethane-finished floors should never be waxed—it creates a slippery surface and prevents future finish applications from adhering. If unsure about your finish type, consult a flooring professional.
How do I prevent furniture from scratching my floors?
Attach felt pads to all furniture legs and replace them every 3-6 months as they wear or accumulate dirt. For heavy furniture, use furniture sliders when moving pieces. Never drag furniture across floors, even with protective pads.
What’s the ideal humidity level for hardwood floors?
Maintain relative humidity between 30-50% year-round. Below 30% causes shrinking and gaps, while above 50% leads to expansion and potential buckling. Use humidifiers in winter and dehumidifiers or air conditioning in summer to maintain optimal levels.
Can I use a regular vacuum on hardwood floors?
Yes, but only with the beater bar/rotating brush turned off. Many vacuums have a hard floor setting that lifts the brush. Ensure wheels and bottom surfaces are clean to prevent scratching. Canister vacuums with floor brush attachments work particularly well.
Conclusion
Proper hardwood floor care doesn’t require expensive equipment or hours of work—just the right knowledge and consistent maintenance. By following these NWFA-approved methods and EPA safety guidelines, you’ll protect your investment while maintaining beautiful, healthy floors.
Remember that prevention is your best strategy. Control moisture, use appropriate cleaners, and address issues promptly. Your floors represent a significant investment that, with proper care, will last generations.
Start implementing these professional techniques today. Begin with identifying your floor type, gathering the right tools, and establishing a simple daily routine. Within weeks, you’ll notice improved appearance and have confidence you’re providing the best possible care.
The time you invest in proper maintenance pays dividends in floor longevity, home value, and daily enjoyment of beautiful, well-maintained hardwood floors. Your future self will thank you for the care you provide today.