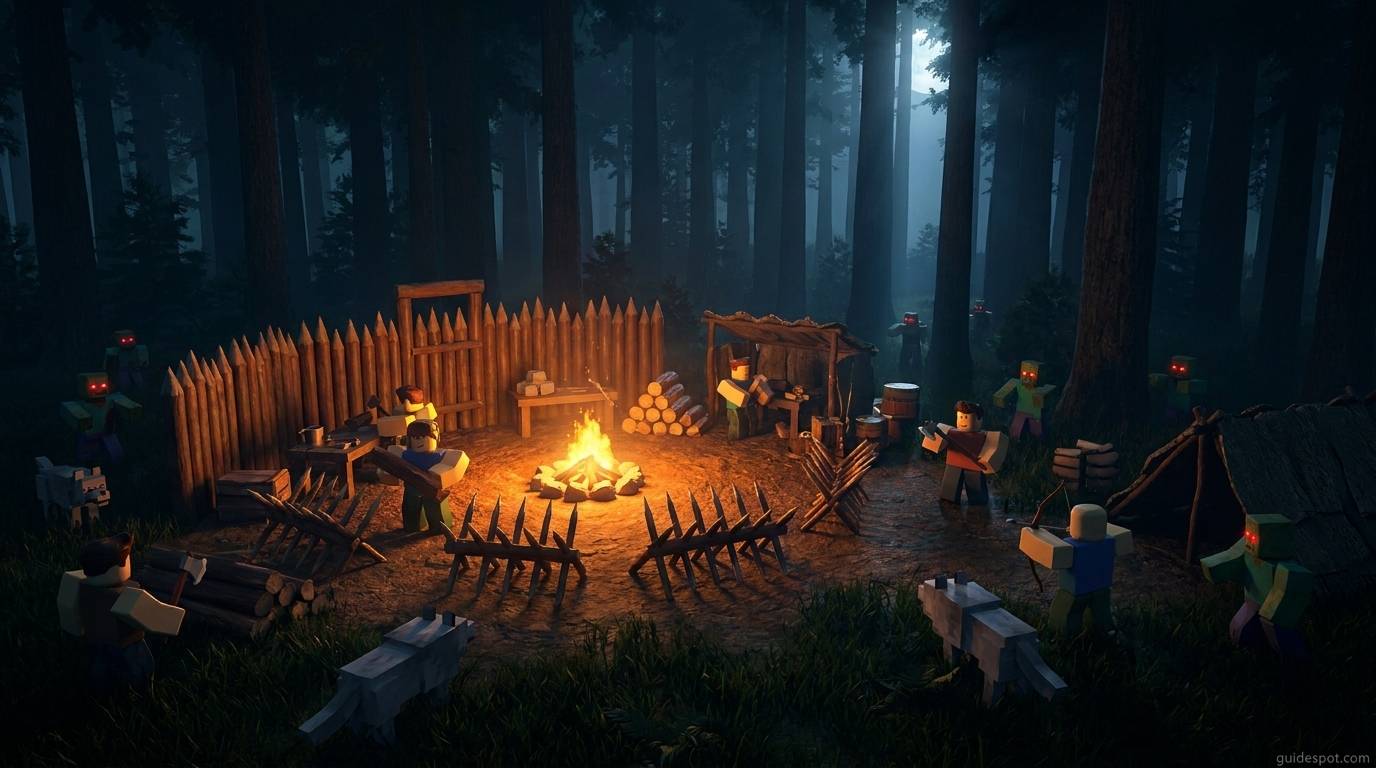
99 Nights in the Forest is one of the most intense multiplayer survival games on Roblox, challenging players to keep a campfire burning through 99 consecutive nights while fighting off increasingly dangerous monsters, rescuing missing children, and managing complex resource chains. Our team spent over 200 hours playing with veteran groups and studying community strategies to bring you this comprehensive guide. Whether you are just starting out and wondering what to do first or looking to push past day 100 in a solo run, this guide covers everything you need to survive all 99 nights in the forest.
The game operates on a day-night cycle where each night brings new threats. The fog creeps closer to your campfire with every passing hour, and monsters become more aggressive as the nights progress. Understanding this core loop is essential to developing effective survival strategies. Players who master the rhythm of gathering during the day and defending at night consistently reach higher night counts than those who try to rush through content.
Getting Started: Your First Nights
The first thing you should do in 99 Nights in the Forest is immediately focus on upgrading your campfire to level 4 before exploring the map. Your campfire is your lifeline, pushing back the deadly fog, enabling health regeneration for your entire team, and unlocking access to critical NPCs like the Pelt Trader. Experienced players we spoke with emphasized that rushing campfire level 4 first is the single most important early game decision you can make.
We recommend playing with friends if possible since the game scales difficulty based on player count. When someone leaves mid-session, the remaining players often face overwhelming odds against the Deer and other monsters. Reddit community members report that solo runs of 1000+ days are possible with proper setup, but require significantly more skill and preparation than multiplayer runs. The multiplayer scaling system means that more players make early game substantially easier while late game remains challenging regardless of team size.
Set up a small shelter near your campfire with a sleeping bag and storage chest on night one. This gives you a safe spawn point and keeps essential items protected from the chaos of subsequent nights. Position your storage chest away from the fire to prevent accidental fuel depletion from nearby players. Building your first structure should happen before your first night ends, and we cannot stress this enough based on community feedback.
Your initial crafting priorities should be a Spear for combat and a Flashlight for utility. The flashlight serves dual purposes as a light source and a stun mechanism against the Deer boss. Craft these items before spending resources on anything else. Many new players make the mistake of building decorative structures first, only to lose them to monster attacks on night two or three.
Campfire Management and Upgrades
The campfire in 99 Nights in the Forest operates on a straightforward but absolutely critical fuel system. Your fire consumes fuel over time, and when it runs out, the fog creeps in and damages everyone nearby. Players report that running out of fuel on night 5 or later typically means game over since the resulting damage accumulation will overwhelm your healing capacity. The fog damage scales with the number of nights survived, making fuel management increasingly important as you progress.
Upgrade your campfire in this specific priority order to maximize early game efficiency. Level 2 unlocks basic crafting including bandages and simple tools. Level 3 opens the Pelt Trader access, which is essential for trading wolf pelts for valuable items. Level 4 allows you to explore the full map safely and enables the biofuel processor. Rush to Level 4 before looting any structures according to experienced players we spoke with during our research.
Understanding fire levels is crucial for planning your upgrade sequence. Each level requires specific resources and provides distinct benefits. Level 1 fire provides basic warmth and limited fog protection. Level 2 fire enables crafting of essential survival items. Level 3 fire introduces the Pelt Trader NPC and expands your trading options. Level 4 fire provides maximum fog protection and unlocks advanced structures like the Workshop Anvil and Biofuel Processor.
Keep at least 50 pieces of fuel in your storage at all times as a minimum safety buffer. Build a Biofuel Processor once you reach mid-game to create fuel from excess food and materials. The processor converts organic matter into usable fuel, reducing your reliance on manual fuel gathering. Players who neglect biofuel production spend significant time manually collecting fuel instead of advancing their base.
Early Game Resource Gathering
Gather wood first since it serves as your primary building material and fuel source. You need roughly 200 wood by day 3 to support basic base expansion and fire maintenance. Wood is the most versatile resource in the game, used for building structures, crafting tools, and keeping your fire burning. Prioritize wood above all other resources in your first three days of gameplay.
Scrap metal becomes critical around day 5 when you start crafting weapons and tools. Prioritize breaking down old machines and looting abandoned structures for scrap. The IGN guide recommends finding and unlocking the Workshop as soon as possible since it enables weapon repair and advanced crafting. Scrap is used in virtually every mid-game and late-game crafting recipe, making it a perpetually valuable resource.
Do not ignore fiber and herbs early on. These materials craft bandages, which are essential for surviving the Deer boss encounter and cultist raids. Bandages provide immediate health restoration and are consumable items that can mean the difference between life and death during boss fights. Keep at least 10 bandages in your inventory at all times once you reach night 5.
The Pelt Trader becomes available after reaching campfire level 3. Trading wolf pelts for essential items is a core gameplay loop that experienced players exploit fully. The Bunny Foot item is highly valued for early trading according to community members, providing significant value when traded to the Pelt Trader. Collect wolf pelts from the wolves that spawn near your base and trade them strategically to maximize your resource gains.
Combat Basics and Enemy Strategies
Target locking is essential for accurate combat in 99 Nights in the Forest. Hold the lock-on button and use your movement to circle enemies while maintaining distance. The Rock Paper Shotgun guide emphasizes that target lock enables you to track enemies during circular movement patterns, which is critical for avoiding damage while dealing damage. Practice target locking in low-stress situations before attempting difficult encounters.
The flashlight stun mechanic is a game-changer against the Deer boss. Shining your flashlight at the Deer causes it to pause briefly, giving you time to attack or reposition. This mechanic is documented across multiple strategy sources and represents one of the most important combat techniques in the game. Time your flashlight stuns to create openings for your team during boss fights.
Master the spear trick for early game combat efficiency. Throw spears at enemies from range, then retrieve them after the engagement. This approach conserves health and ammunition while providing reliable damage output. Spears are craftable early and repairable at the Workshop Anvil, making them sustainable weapons for extended gameplay sessions.
Kite enemies by running in circles while attacking. Most enemies in 99 Nights in the Forest cannot catch you if you maintain circular movement patterns around structures or trees. The Deer boss is particularly susceptible to kiting, though its charge attack requires you to dodge sideways at the last moment. Practice your kiting technique on lesser enemies before attempting boss encounters.
Bear traps placed around your base perimeter deal significant damage to cultists and other melee enemies. Replace damaged traps regularly since they degrade after each use. Traps are particularly effective against cultist raids, which begin around night 10 and increase in intensity. Position traps at chokepoints where enemies must pass to reach your structures.
Crafting Bench Progression Guide
The Crafting Bench is your most important structure in 99 Nights in the Forest. Upgrade it as soon as you have the resources because higher tiers unlock better weapons and tools. The Rock Paper Shotgun guide specifically recommends souping up your Crafting Bench early, noting that advanced bench levels enable crafting of game-changing items. Your bench level directly determines what you can craft, making it the bottleneck for progression.
Level 1 bench gives you basic tools and weapons including the starting Spear and Flashlight. Level 2 unlocks the Revolver and Bear Traps, providing ranged combat options and defensive structures. Level 3 opens advanced defenses and the Workshop Anvil for weapon repair, enabling sustainable long-term gameplay. Plan your resource allocation around reaching Level 3 bench by day 10.
Always craft a Spear and Flashlight in your first session. These two items carry you through the early nights when resources are scarce. The Spear provides reliable melee damage while the Flashlight serves both illumination and combat utility functions. According to community feedback, new players who neglect these essential items struggle significantly more than those who prioritize them.
The Workshop Anvil becomes available at Crafting Bench Level 3 and enables weapon repair. Maintaining your weapons in good condition is essential for late game survival since damaged weapons deal reduced damage. Repair your weapons regularly using the Anvil rather than crafting new ones, as this approach is more resource-efficient. Players who ignore weapon durability find themselves defenseless during critical moments.
Missing Children Rescue Mechanics
Finding and rescuing the Missing Children is one of the most important objectives in 99 Nights in the Forest. Each child you save increases your day multiplier, which extends how long each in-game day lasts. Extended days mean more time for gathering, crafting, and base building per cycle, creating a compounding benefit that accelerates your progression. The Rock Paper Shotgun guide specifically notes that saving the missing kids is crucial for long-term success.
Children are scattered across the map in specific locations that become accessible as your campfire level increases. Mark locations on your map as you explore so you can return to rescue them during safer daytime hours. Creating a mental or physical map of child locations is a valuable skill that improves with experience. Some children are hidden in structures while others are found in open areas.
Build beds near your base to assign rescued children. Children assigned to beds contribute to your overall survival efficiency and provide passive benefits to your camp. The IGN guide emphasizes that rescuing children and building beds should be a priority starting around day 7 when you have basic infrastructure established. Children also provide narrative context for the game’s survival scenario, adding emotional weight to your mission.
The day multiplier mechanic rewards players who complete the child rescue objective. Higher multipliers mean longer days, which translates to more productive gameplay sessions. Players pursuing high night counts should prioritize child rescues above optional objectives like exploration or decoration. The multiplier benefit compounds over time, making early rescues increasingly valuable as you progress.
Base Building and Defense Strategies
Position your base with the campfire at the center and structures arranged in a defensive perimeter. Leave clear firing lanes so you can attack enemies without obstruction. The Fandom wiki recommends specific base building archetypes depending on your playstyle, with centralized designs providing the best defense coverage. Experiment with different layouts to find what works best for your team composition.
Bear traps placed around your base perimeter deal significant damage to cultists and other melee enemies. Replace damaged traps regularly since they degrade after each use. Traps are particularly effective against cultist raids, which begin around night 10 and increase in intensity. Position traps at chokepoints where enemies must pass to reach your structures.
Cultist raids begin around night 10 and increase in intensity. Have at least two players dedicated to base defense while others gather resources during daytime hours. Cultists are aggressive enemies that attack structures directly, making defense preparation essential for survival. The Rock Paper Shotgun guide notes that keeping hold of Cultist Gems is important for crafting powerful items.
Reinforce critical structures with additional walls and support beams. The Ram boss charges in straight lines and destroys structures on contact, so building reinforced walls helps your base survive late-game boss encounters. Position structures strategically to minimize damage from charge attacks. Use corners and obstacles to break up straight-line attack paths.
Boss Strategies: Deer, Owl, and Ram
The Deer is your first major threat and appears on night 5. This boss charges at players and deals significant damage on contact. Use the flashlight to stun it when it charges, then attack from behind while it recovers. Maintain circular movement to avoid its charge attacks. Having bandages ready is essential since the Deer deals significant damage with each hit.
The Deer has a specific attack pattern that experienced players learn to exploit. The charge attack involves a brief wind-up animation followed by a rapid forward dash. Dodging sideways at the wind-up moment allows you to avoid the charge while positioning yourself for a counter-attack. The flashlight stun interrupts the charge animation, giving you free damage opportunities.
The Owl boss flies and attacks from elevated positions. When the Owl appears, find cover and wait for it to land before engaging. Ranged weapons work best against flying bosses since you cannot reach them in the air. The Owl attacks with aerial dive bombs that deal area damage, so maintaining distance from other players prevents clustered damage.
The Ram charges in straight lines and destroys structures. Dodge sideways when you see the wind-up animation, which involves the Ram lowering its head and pawing the ground. Build your base with reinforced walls to withstand charges. The Ram is particularly dangerous to base integrity, making structural reinforcement essential for late-game survival.
All three bosses drop valuable items when defeated, making boss fights worth the risk despite the danger. Plan your boss encounters during daytime hours when possible, and always maintain adequate healing supplies before engaging. Boss fights are team events in multiplayer, requiring coordination and communication for successful completion.
Class Tier List and Recommendations
The Scout class ranks highest for solo players because of its mobility and resource gathering bonuses. You can explore the map faster and identify threats before they reach your base. The Scout’s enhanced movement speed enables quicker resource gathering and superior positioning during combat encounters. Solo players consistently report that Scout provides the best balance of mobility and combat capability.
The Medic class provides essential healing support in multiplayer groups. If you are playing with friends, at least one player should run Medic to handle healing during boss fights and cultist raids. The Medic’s healing output significantly reduces team mortality during difficult encounters. Multiplayer groups without a Medic struggle significantly more than those with dedicated healing support.
The Fighter class works well for aggressive players who want to clear enemies quickly. High damage output makes this class ideal for cultist raid defense and boss damage. The Fighter excels at single-target damage, making it the preferred choice for players who want to quickly eliminate high-priority threats. However, the Fighter’s limited utility in resource gathering makes it less ideal for solo play.
The Gatherer class excels at resource collection but struggles in direct combat. Use this class if your group needs material support and can compensate for limited combat capability. The Gatherer’s resource gathering bonuses make it valuable for late-game expansion when resource requirements increase significantly. This class works best in coordinated groups where other players cover combat responsibilities.
Late Game Management Tips
After day 100, resource management becomes your primary challenge. Set up automated farms and biofuel processors to maintain your base without constant manual attention. The Fandom wiki notes that late game management tips are scarce, making personal experimentation increasingly important as you progress. Players who establish automated systems early have much easier late-game experiences.
AFK strategies work in 99 Nights in the Forest if you prepare properly. Stock your base with 500+ fuel, assign companions to guard positions, and ensure your campfire is at maximum level. Companions can be tamed using the Taming Flute, which is obtained from the Fairy NPC. The Rock Paper Shotgun guide specifically mentions getting a formidable companion for AFK protection.
Rotate between exploration, base maintenance, and resource gathering each in-game day. Do not spend entire days on one activity since difficulty scales with time. Establishing a routine helps ensure you maintain all aspects of your base simultaneously. Players who neglect any single aspect of their base typically encounter problems within a few in-game days.
Weather system effects become more pronounced in late game, with storms and other events adding environmental challenges to existing threats. The Rock Paper Shotgun guide recommends keeping an eye on the forecast, noting that weather events can significantly impact resource gathering efficiency. Plan your activities around weather predictions to maximize productivity.
Point of Interest exploration should follow a specific order to maximize efficiency. Prioritize locations that unlock critical NPCs like the Pelt Trader and Fairy before exploring for resources. The Fairy NPC provides seeds for farming, which becomes essential for long-term food sustainability. Establish farming operations early to avoid late-game food shortages.
What is the best strategy for 99 Nights in the Forest?
The best strategy is to rush your campfire to level 4 before exploring, gather resources efficiently, and always maintain 50+ fuel in storage. Play with a team when possible and prioritize rescuing Missing Children to increase your day multiplier.
What is the first thing to do in 99 Nights in the Forest?
The first thing you should do is upgrade your campfire to level 4 as quickly as possible. This unlocks the full map for exploration, enables better crafting options, and provides access to the Pelt Trader for essential trades.
What is the best class in 99 Nights in the Forest?
The Scout class is generally considered the best for solo play due to its mobility and gathering bonuses. For multiplayer groups, the Medic class provides essential healing support during boss fights and cultist raids.
How many hours does it take to complete 99 Nights in the Forest?
Reaching 99 nights typically takes 20-40 hours of gameplay depending on your group size and experience level. Solo players report needing 40+ hours while coordinated groups of 4+ can reach night 99 in about 20 hours.
How do I defeat the Deer boss in 99 Nights in the Forest?
Use your flashlight to stun the Deer when it charges, then attack from behind while it recovers. Maintain circular movement to avoid its charge attacks. Having bandages ready is essential since the Deer deals significant damage.
Can you AFK in 99 Nights in the Forest?
Yes, you can AFK if you prepare properly. Stock your base with 500+ fuel, set up automated biofuel production, assign companions to guard positions, and ensure your campfire is at maximum level before stepping away.
Conclusion
This 99 nights in the forest guide covers everything you need to survive your first run and push toward day 99. Focus on campfire upgrades first, master the combat basics, and always keep fuel stocked. Rescue the Missing Children as soon as you find them to maximize your day multiplier and accelerate your progression.
Our team found that playing with friends dramatically improves your chances of reaching night 99. Coordinate roles, share resources, and support each other during boss fights and cultist raids. The game is designed for multiplayer cooperation, and solo runs require significantly more skill and preparation.
Start with this guide, practice the core mechanics, and gradually incorporate advanced strategies as you gain experience. Good luck surviving all 99 nights in the forest.

![Best Kick a Lucky Block Scripts [cy]: Top Performance Guide](https://www.guidespot.com/wp-content/uploads/2026/07/featured-update-96473-1783106813765-370x245.jpg "Best Kick a Lucky Block Scripts (July 2026): Top Hub Guide")
![15 Best DBD Survivor Builds ([nmf] [cy]): Meta Loadouts Tested](https://www.guidespot.com/wp-content/uploads/2026/07/featured-update-56943-1783027639317-370x245.jpg "15 Best DBD Survivor Builds (July 2026): Meta Loadouts Tested")